


Highlights
- Interactive Terminal UI: K9s provides a rich, dashboard-like interface directly in your terminal, making it easier to visualize cluster state than standard CLI output.
- Context-Aware Shortcuts: Keyboard commands dynamically adapt based on the resource you are viewing (e.g., Pods vs. Deployments), streamlining operations.
- Real-Time Monitoring: View live metrics for Pods and Nodes, provided you have the metrics server enabled.
- Efficient Navigation: Use simple keystrokes to switch namespaces, view logs, port-forward, or shell into containers without typing long commands.
- Cross-Platform: The tool is available and consistent across macOS, Windows, and Linux environments.
Have you ever felt overwhelmed by the complexity of managing Kubernetes clusters using kubectl? If so, you're not alone. While kubectl is a powerful and versatile command-line tool, it often requires memorizing lots of commands and syntax, which can be daunting, especially for newcomers or even for seasoned developers.
But what if there was a more streamlined, efficient way to interact with your Kubernetes clusters? Enter K9s, a terminal-based k9s kubernetes CLI tool that provides an interactive user interface for observing and managing resources inside your Kubernetes clusters.
In this blog post, we’ll start out by exploring what K9s is. Next, I’ll guide you through the K9s user interface and highlight some of the most frequently used keyboard shortcuts and modes. After that, I'll dive into practical demonstrations, showcasing how to perform some common operations on Kubernetes Pods using K9s. By the end of this blog post, you will have gained familiarity with the core features of the K9s CLI and will be able to confidently navigate your way around the terminal UI. Let’s get started!
Prerequisites
To follow along with the examples in this blog post, you will need the following:
- A running Kubernetes cluster: If you don’t already have access to one, a tool like minikube can help you set up a local cluster easily.
- The kubectl command-line tool: We’ll use kubectl primarily for deploying resources to our Kubernetes cluster.
- Minikube metrics server add-on enabled: Activating the metrics server add-on is crucial for making resource metrics available to K9s. K9s relies on these metrics to display real-time data about the resource usage of Pods and Nodes in the Kubernetes cluster. To enable this add-on, first ensure that minikube is running. Then, execute the command
minikube addons enable metrics-server. - K9s Kubernetes CLI: Ensure K9s is installed on your machine. For installation instructions, refer to the official installation guide suited to your operating system.
Try the Kubernetes Deployments Lab for free
Note that the examples and commands in this blog post have been specifically tested on MacOS and Windows.
What is K9s Kubernetes CLI?
K9s is a terminal-based UI to interact with your Kubernetes clusters. This means that it provides an interactive and somewhat graphical user interface within the terminal. You can use this interface to navigate, view, and manage Kubernetes resources more intuitively than purely command-line tools.
With K9s, you use keyboard shortcuts and key bindings to navigate and manage your Kubernetes clusters. What’s more, K9s intelligently adapts its keyboard shortcuts to your current context. The actions you can perform while focused on a Pod differ from those when dealing with Services.
Don't worry if this sounds a bit abstract now! In the following sections, we'll dive into practical demonstrations that will illustrate these concepts clearly.
Essential Navigation and Command Operations in K9s CLI
In this hands-on section, we'll become familiar with the K9s user interface and learn some key commands and modes frequently used for efficient navigation.
Step 1: Ensure your local minikube cluster is up and running.
Step 2: Open a new terminal tab and enter the following command:
kubectl create deployment mynginx --image=nginx
This command creates a Deployment named mynginx using the nginx image.
Step 3: Next, open another terminal tab and run:
k9s
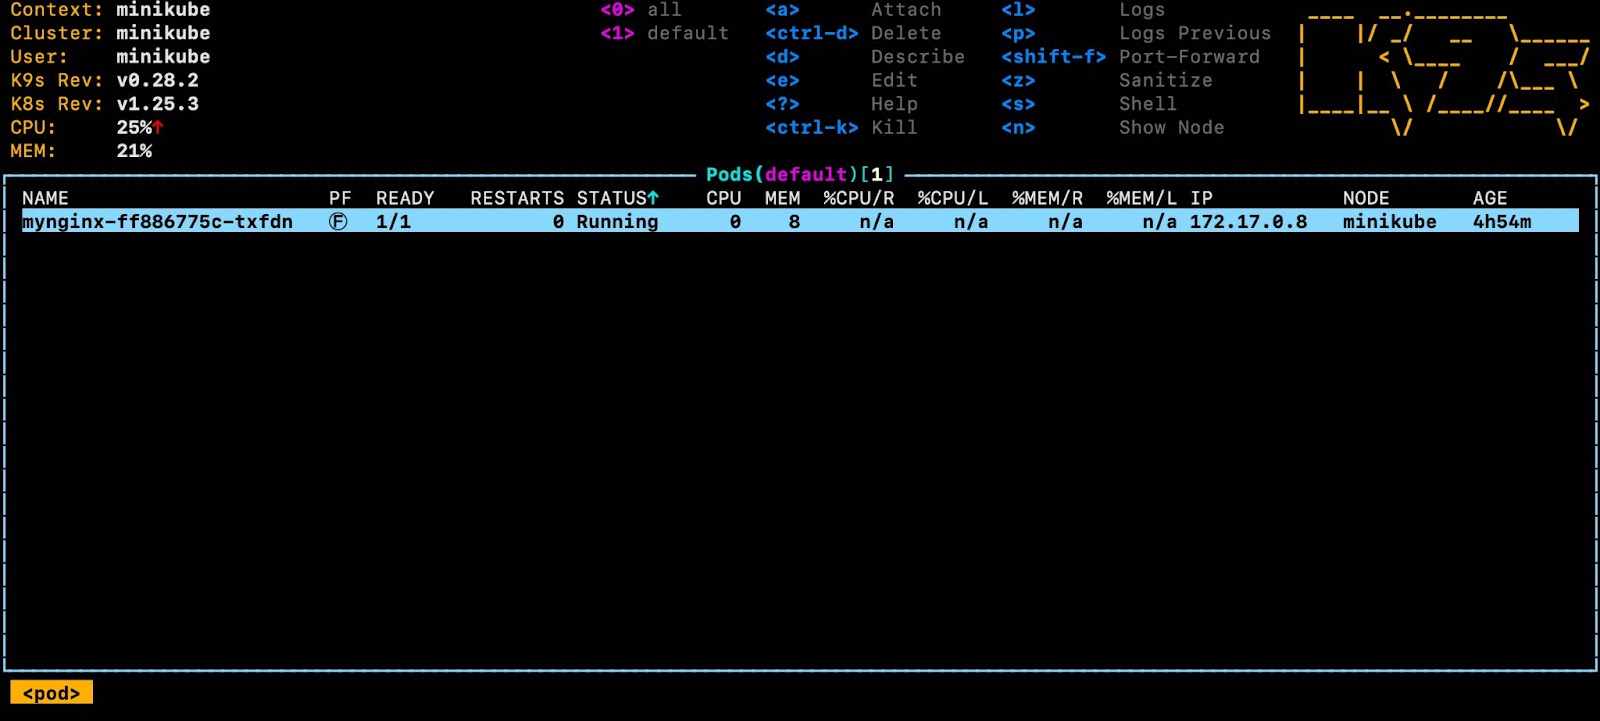
Executing k9s will start the K9s interface, and you’ll see the Pods in the default namespace, as shown below:
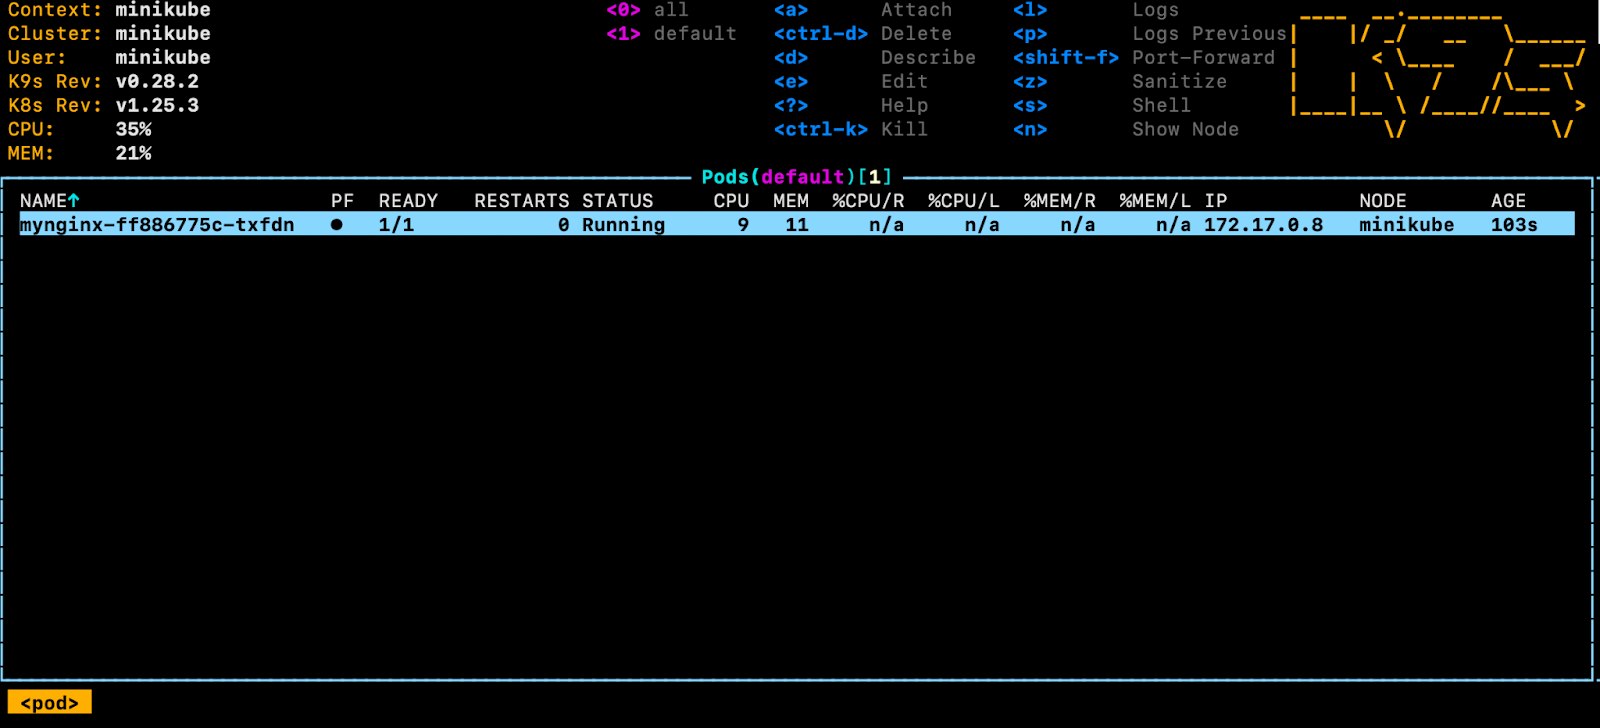
As you can see, the Pod, prefixed with the Deployment name mynginx, is up and running.
Resource-specific keyboard shortcuts
In K9s, a 'resource view' refers to the specific screen or interface where details and operations of a particular Kubernetes resource type, such as Pods, Deployments, or Services, are displayed and managed.
When you're on any resource view page, you’ll notice a set of keyboard shortcuts displayed in the top right corner, as highlighted below:

These shortcuts are tailored to the actions relevant to the currently selected resource, which is Pod in our case. For example, pressing the d key will describe the Pods, while the e key allows you to edit the Pod configurations, and so on. (we will see a few practical demonstrations in the next section.)
The beauty of the k9s cli is its dynamic adaptation to different resource types. When you switch from one resource page to another, the displayed shortcuts change to match the specific operations for that resource. Let’s see this in action.
Currently, the Pods resource is active, indicated by the blue background. If you press enter, you'll navigate to the container page, as depicted in the image below:
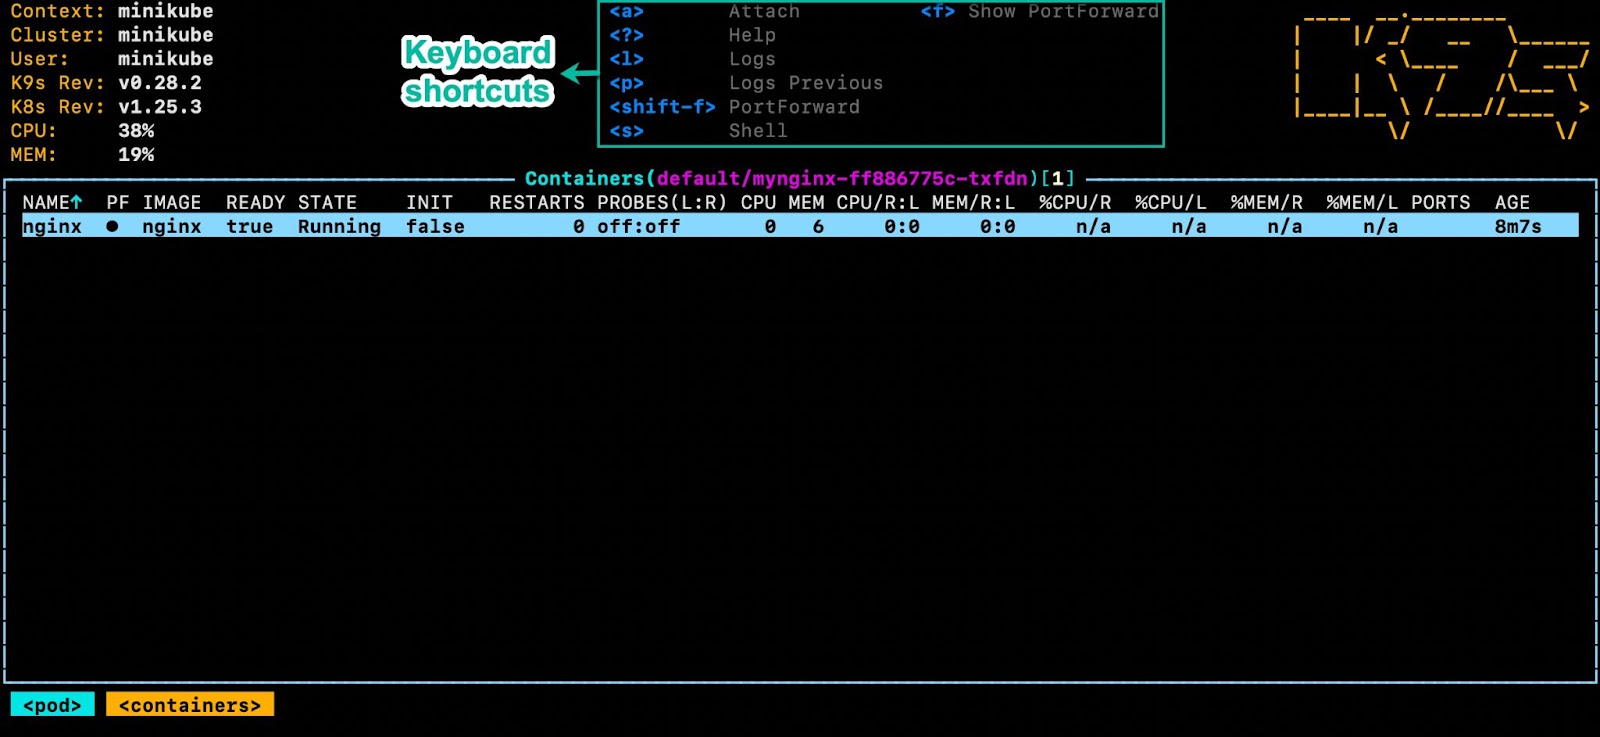
Notice how the list of commands has now changed to suit container operations.
Backward navigation
In K9s, one of the keys you'll find yourself using frequently is the esc (escape) key. It's used to go back one level or exit from the current view. We are currently on the container page. To go back to the Pods page, simply press the esc key.
Resource selection
In K9s, when you’re viewing a list of resources like Pods or Deployments, navigating through them is straightforward. Simply use the arrow keys to move to the resource that interests you. Once you’ve highlighted your desired resource, just press the spacebar to select it. This feature is especially handy for performing batch operations or focusing on specific resources for further commands.
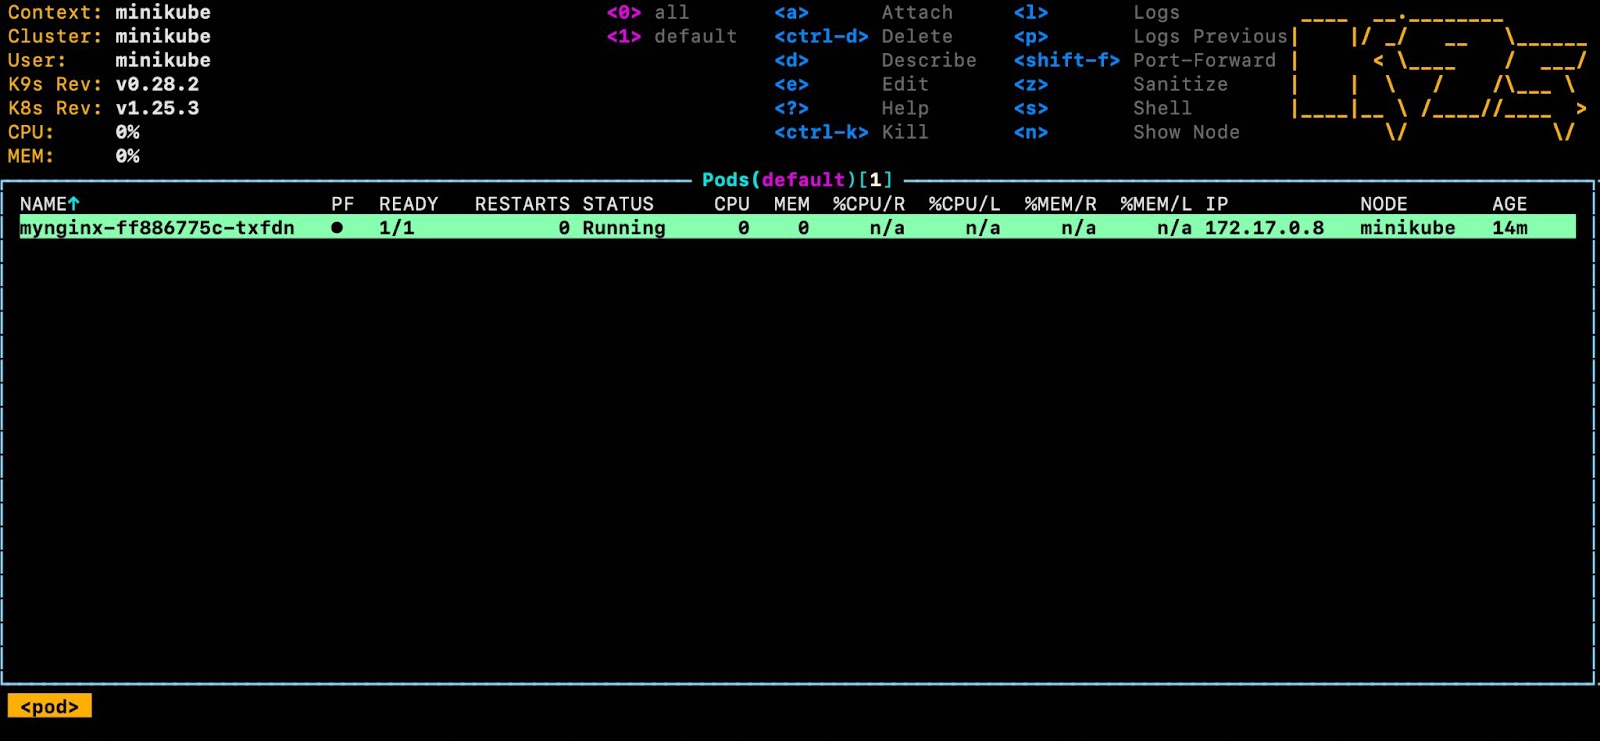
It’s worth noting the visual feedback K9s provides during selection. When a resource is selected, its background color changes from blue to green to visually signify your selection. To see this in action, press the spacebar key while the Pod row is highlighted (indicated by a blue background), and you’ll observe the background color changing from blue to green, as shown below:
Enabling search/filter mode
K9s comes equipped with a powerful search/filter mode, activated by pressing the / key. This is a direct search/filter functionality within the current resource view screen.
In this mode, as you start typing, K9s dynamically filters the list of resources to match your input. It's a real-time search that narrows down the displayed items based on your query.
This feature is particularly useful for quickly locating specific resources in a large or complex Kubernetes environment. For example, typing a part of a Pod name will show only the Pods that match that text.
For instance, press / and you will see a search bar appear. Type httpd and you’ll see an empty screen (as shown below) as we don’t have any Pod named httpd.
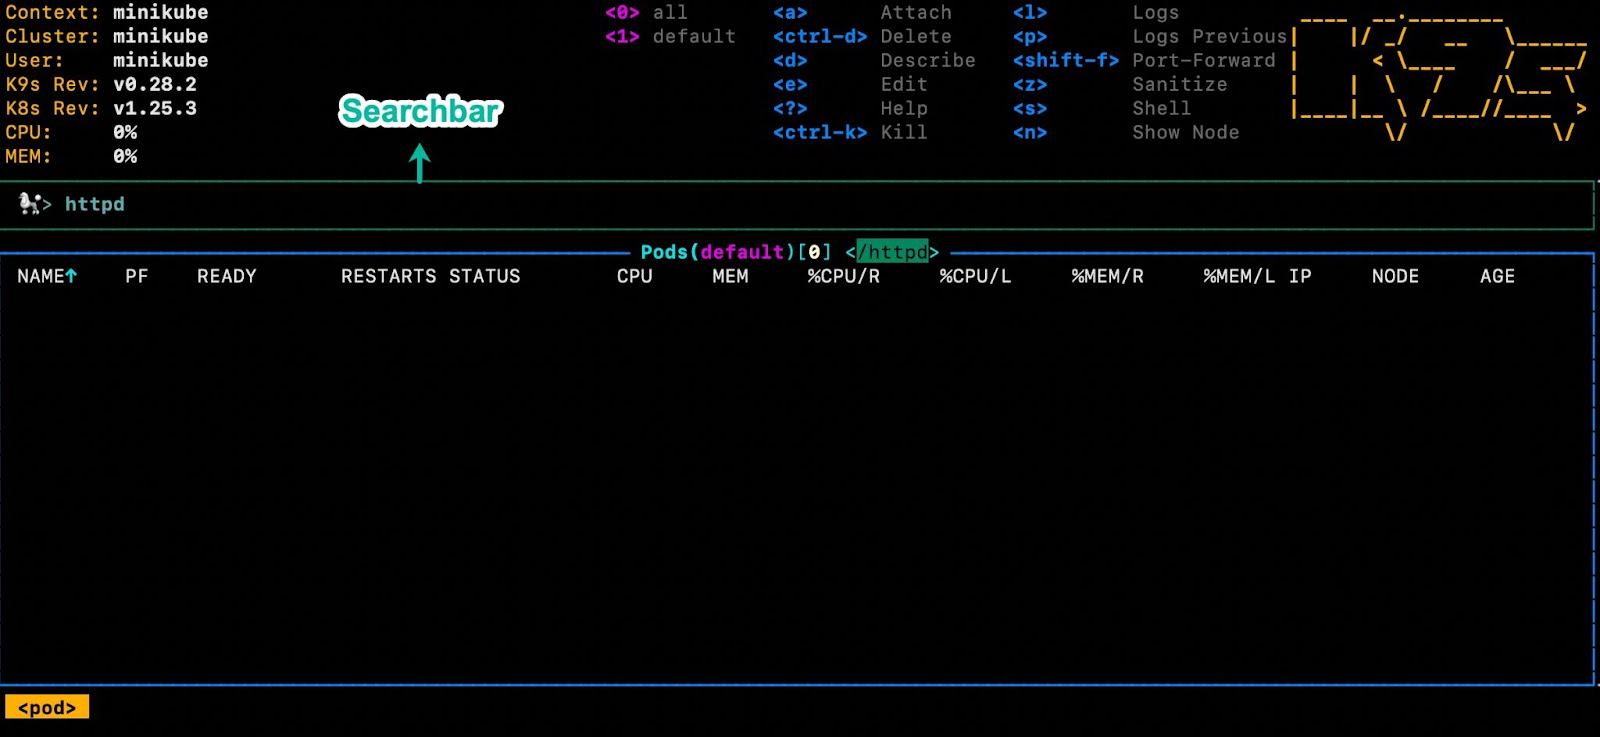
To exit this mode and remove the search bar, simply press the esc key.
Enabling command mode
In the previous section, we saw how pressing / brings up a search bar for filtering. If you press shift + :, you’ll also see a search bar pop up, as shown below:

But it’s a different kind of search bar, which is actually a command input mode. When you start typing in this mode, K9s provides suggestions and hints based on what you're typing. This is similar to an auto-complete feature that assists you in finding and executing commands.
To see this feature in action, try typing Dep in the command mode. K9s will suggest Deploy as a possible completion, as shown below:

You can then press tab to accept this suggestion and hit enter to navigate to the Deployments resource view as shown below:
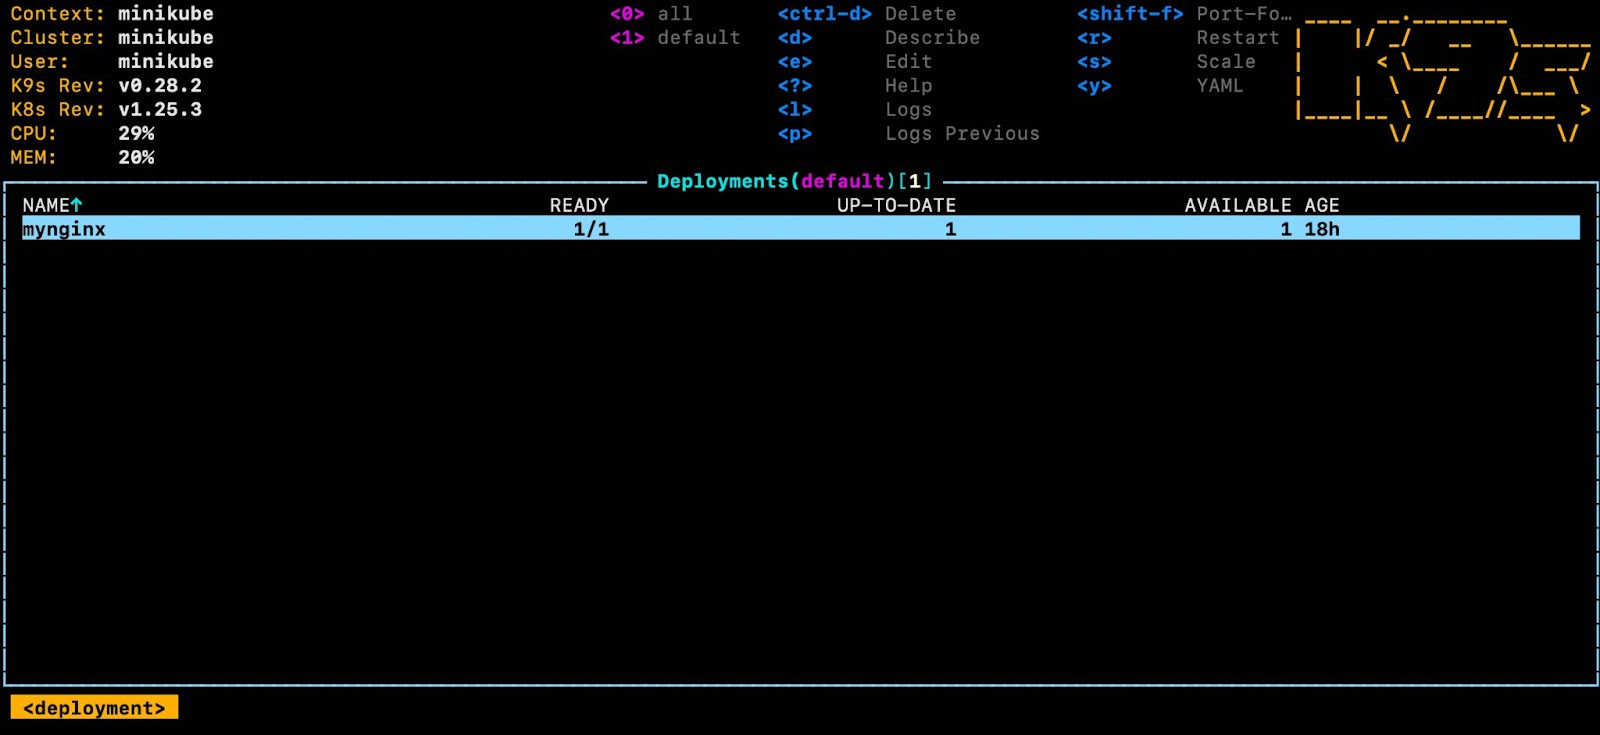
Command mode in K9s is useful for directly navigating to specific resource pages.
Help page
In K9s, you can easily find assistance with its built-in help page. You can access this page simply by pressing shift + ?. Once you hit this key combination, the help page will appear, as shown below:
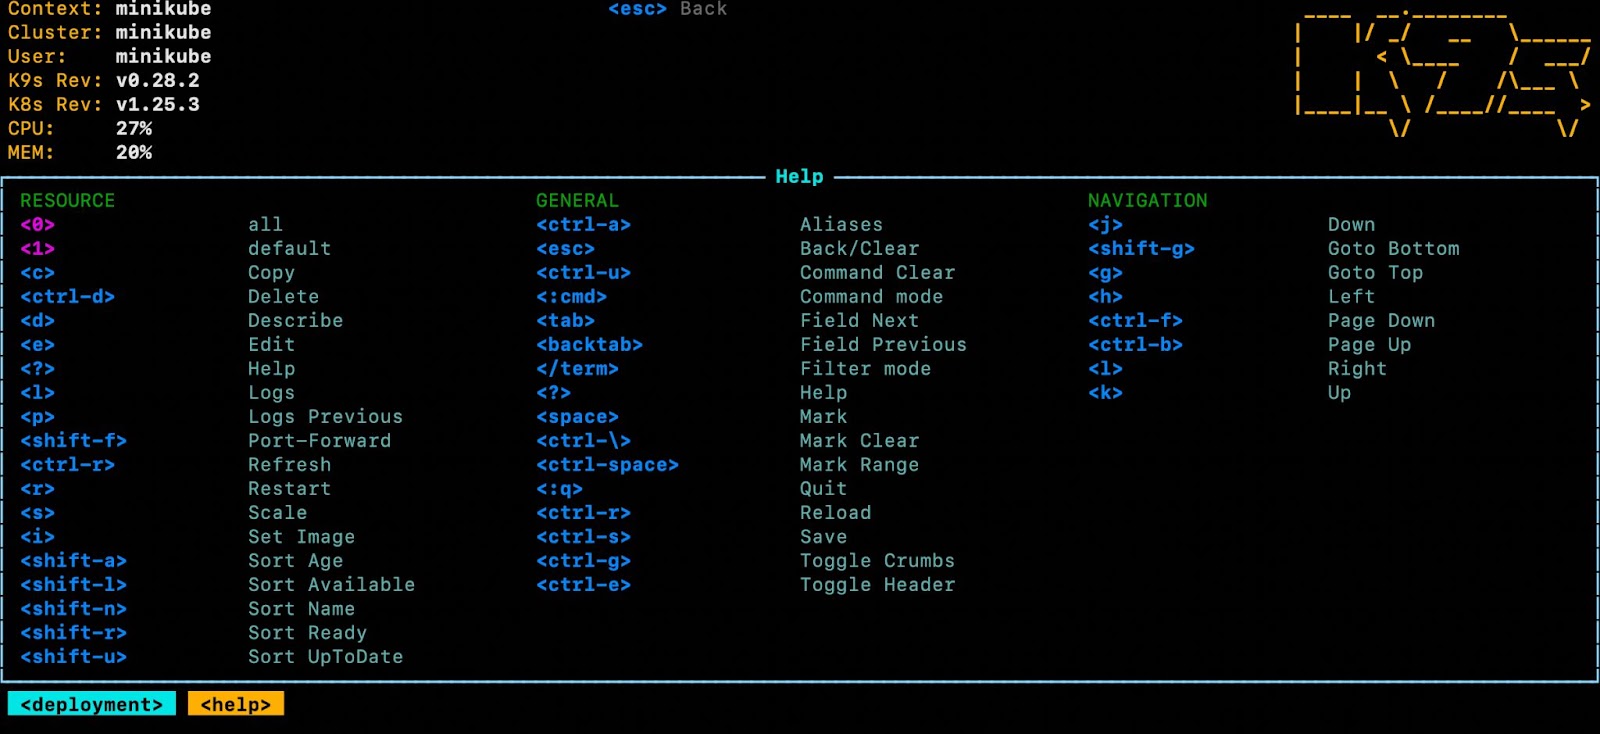
As you can see, the help page presents a well-organized list of commands and keyboard shortcuts. These are neatly categorized, making it easy for you to quickly find what you need and understand how to use various features.
Managing Kubernetes Resources With K9s CLI
Now that you can navigate your way around the K9s interface, let's put this knowledge into practice by performing some key operations on our Pod using keyboard shortcuts.
Port forwarding
Make sure you’re on the Pods resource view screen, as shown below:
Next, press shift + f to open the port forwarding dialog box. In this box, enter nginx:80 in the Container Port field and 8080 for the Local Port. This configuration forwards traffic from port 80 on the Pod to port 8080 on your local machine.
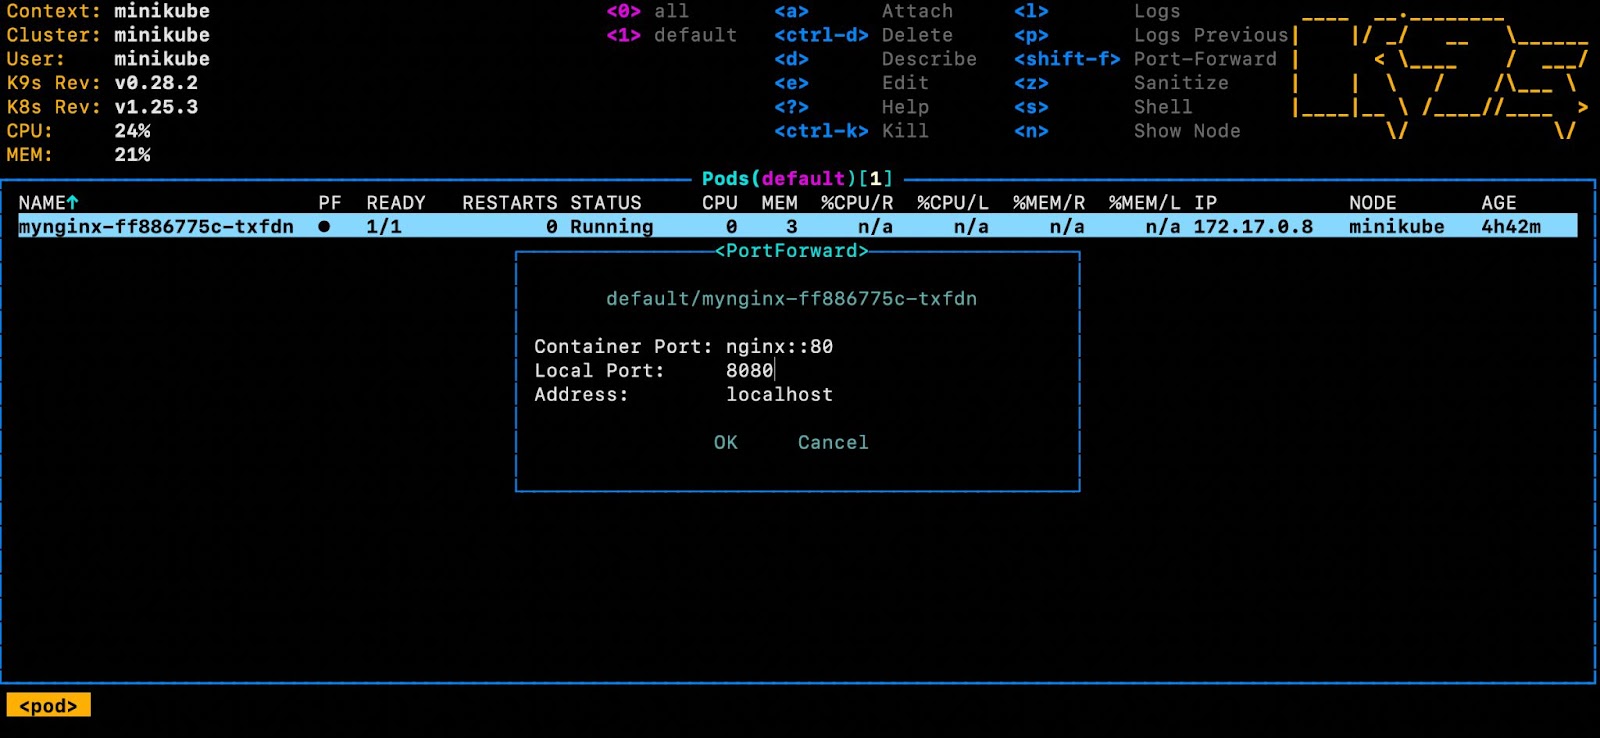
Now, use the arrow keys to select OK and press enter. A confirmation message will appear, signaling successful port forwarding. Your Pod's service is now accessible on local port 8080.
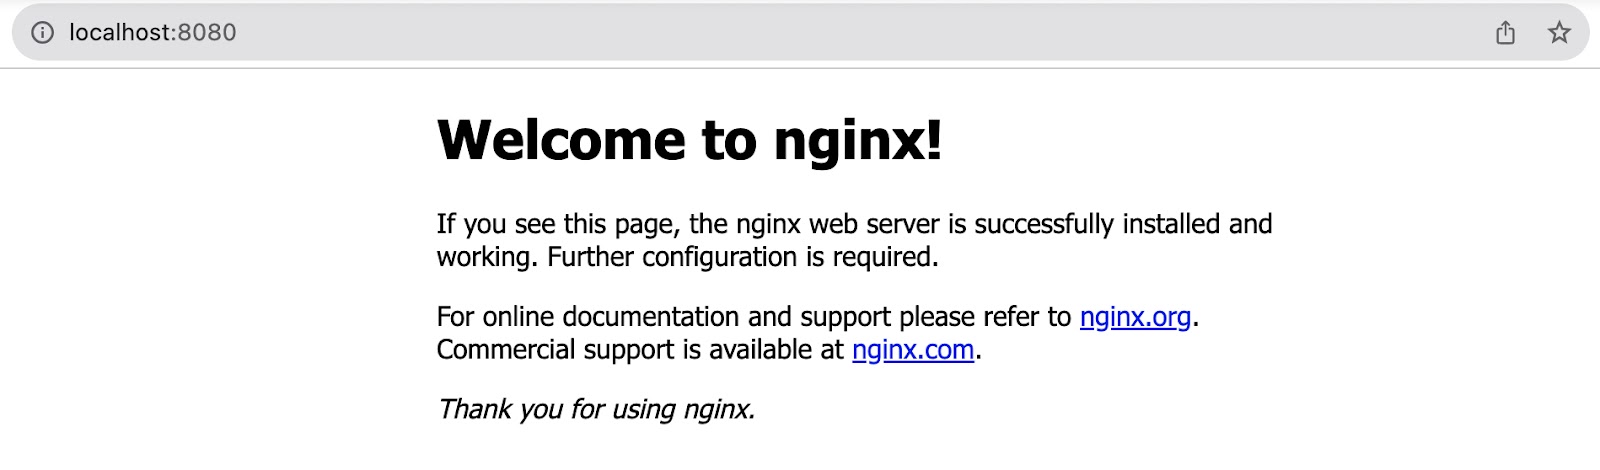
To verify the setup, open a web browser and navigate to http://localhost:8080. You should be greeted with the default Welcome to nginx! page, indicating a successful connection to the nginx server running inside the Pod. The page should look like this:
To learn how to forward traffic from your local computer to the Pod housing the containerized application, check out our blog post: What Is Kubectl Port-Forward and How Does It Work?
Viewing logs
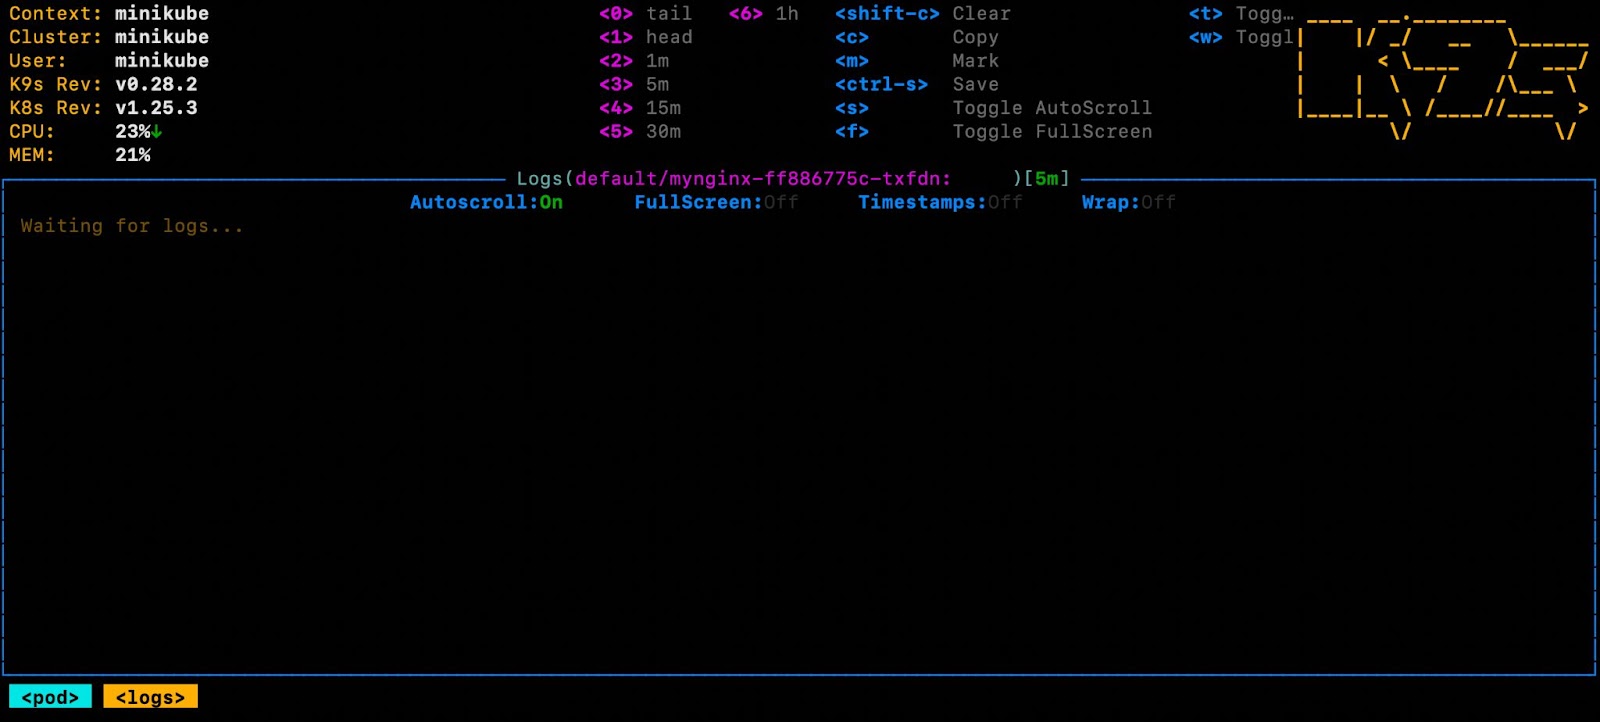
Ensure that you are on the Pods resource view page. Next, press L, and you will be presented with a screen like this:
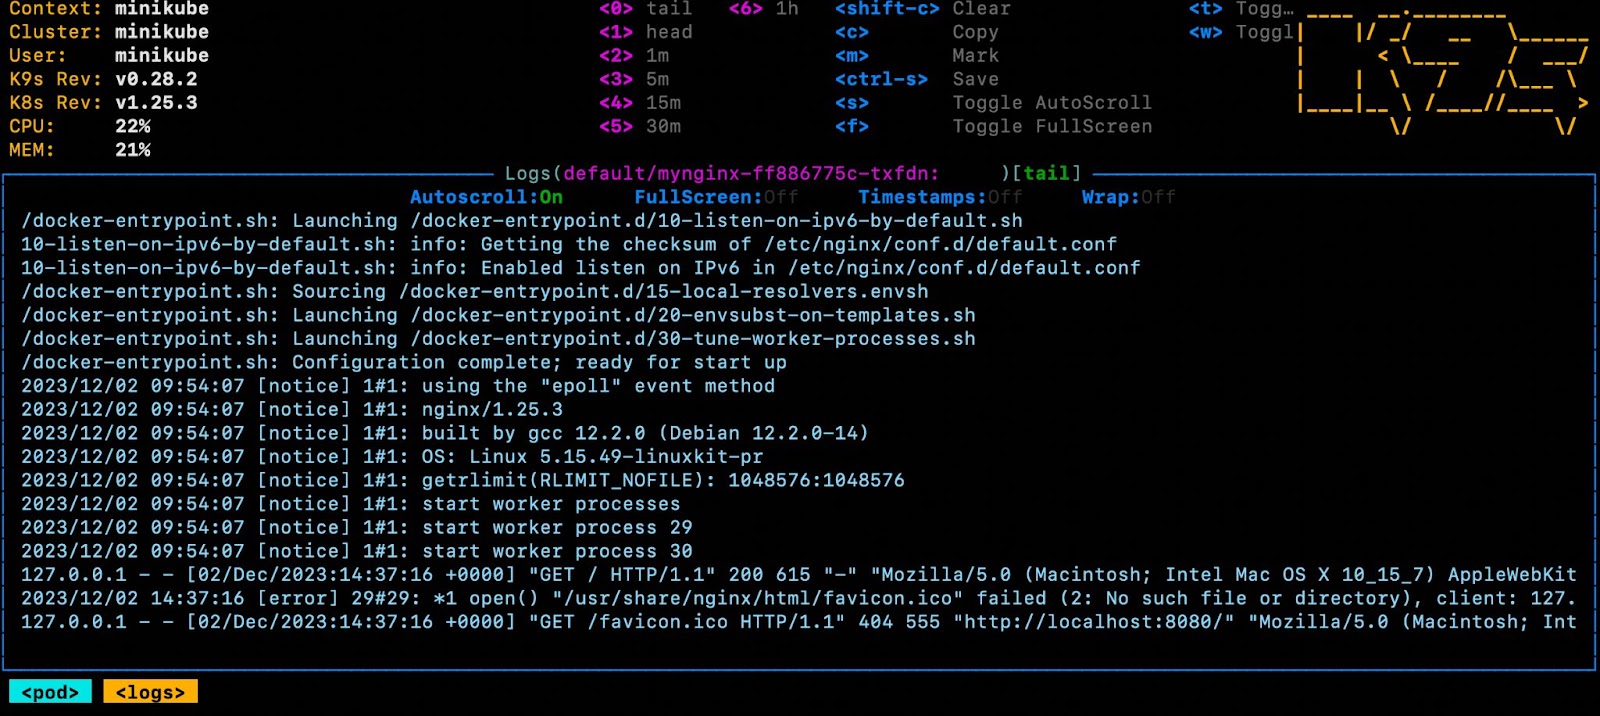
Next, press 0. This will bring up the log stream for the Pod right on your screen. You can now scroll through these logs in real-time, giving you direct insight into the operational aspects of your Pod.
To learn how to access Pod logs in Kubernetes, check out our blog post: kubectl logs: How to Get Pod Logs in Kubernetes (With Examples)?
Scaling deployments
Let's start by switching from the Logs view to the Deployments resource view. Here’s how to make the switch:
- Access the command mode by pressing
shift + :. - Type
deployand pressenter.
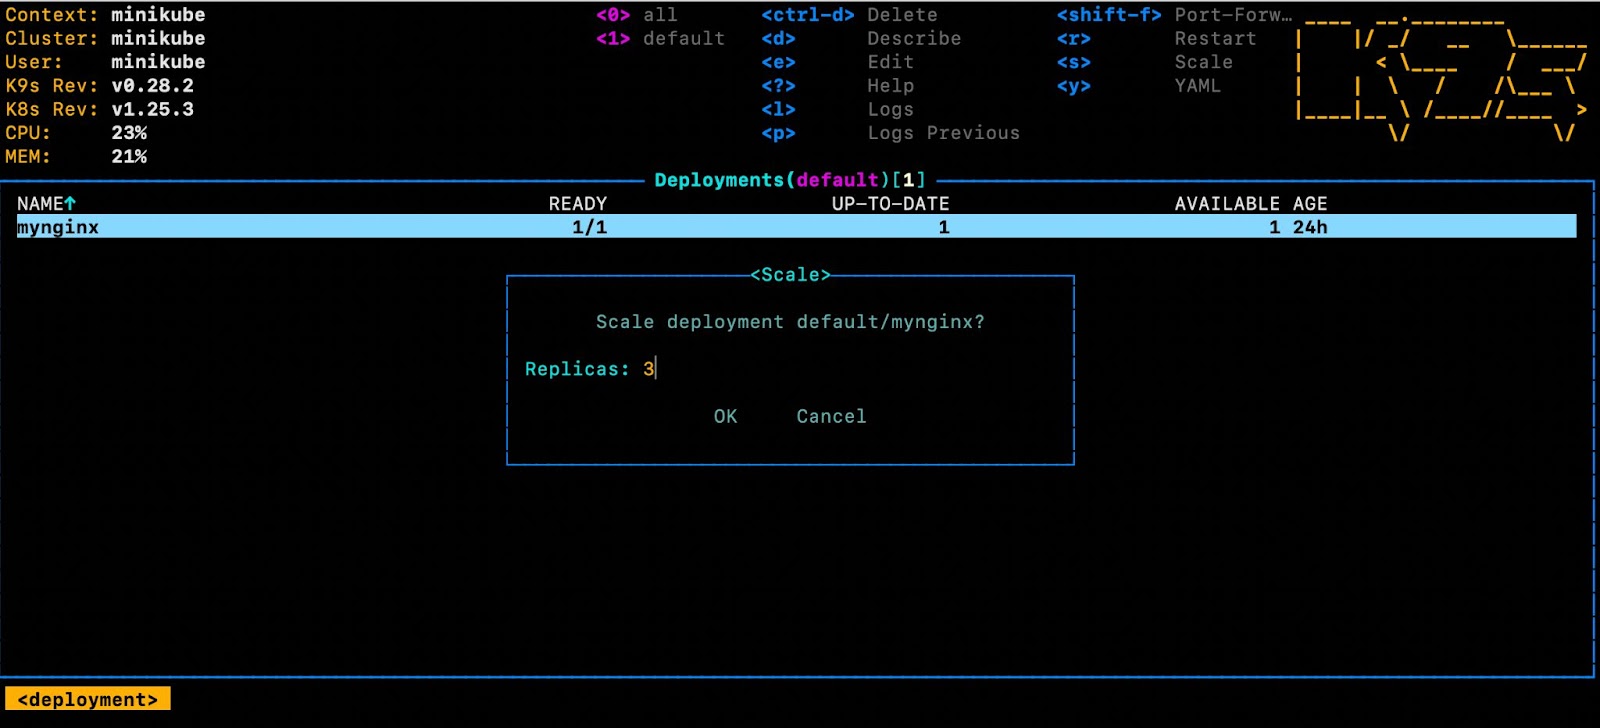
With the mynginx Deployment highlighted, press s. This action brings up a prompt where you can specify the number of replicas for the Deployment. At the prompt, type in the number of replicas you wish to set for your Deployment. For example, entering 3 will scale the Deployment to have three replicas.
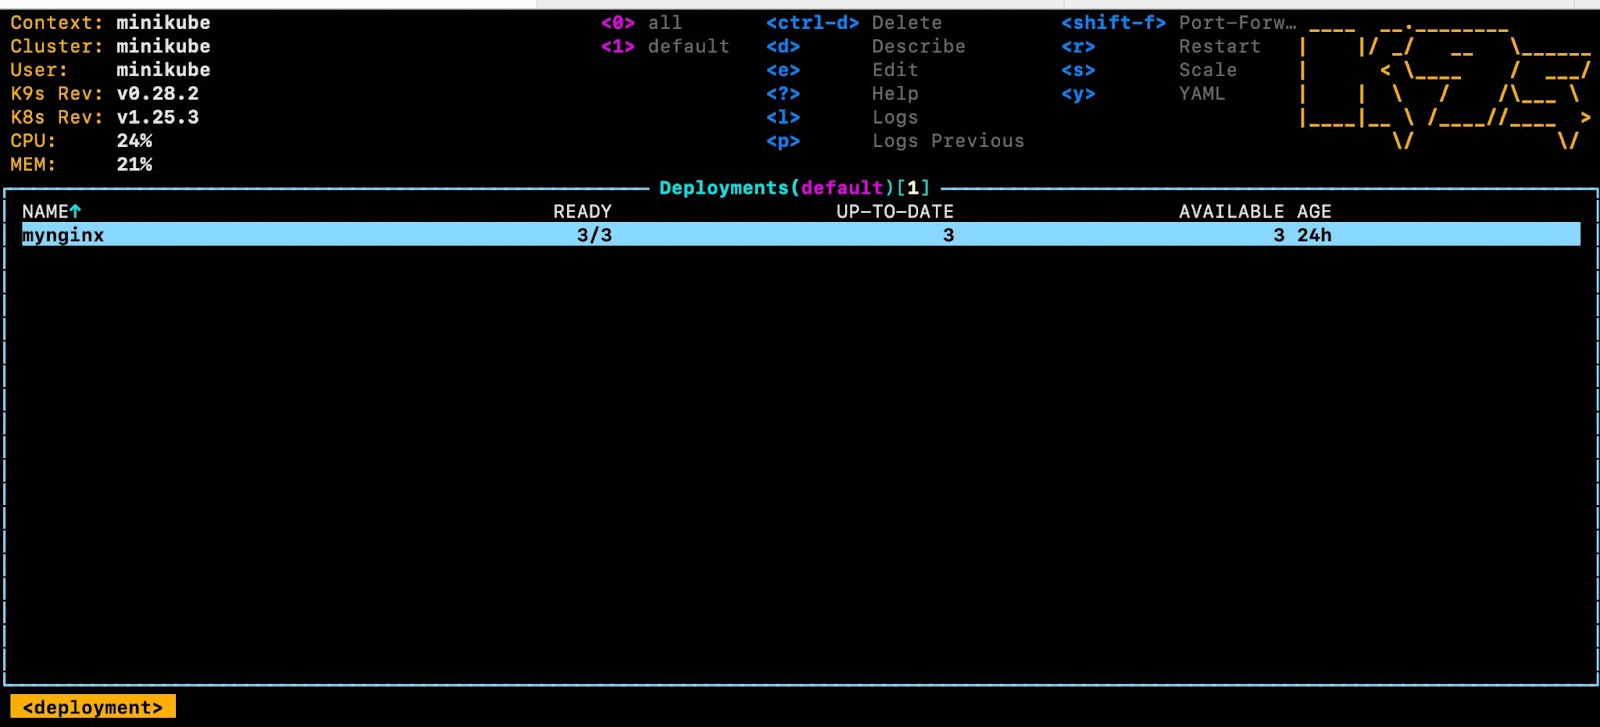
Next, use the arrow keys to navigate to the OK button and press enter. Watch as the number of replicas updates live on your screen. After a few seconds, you should see the Deployment reflect the new state with three replicas ready, as shown below:
While covering every keyboard shortcut available in K9s is beyond the scope of this blog post, it's clear to see just how easy and efficient it is to manage kubernetes with k9s. With a little practice, you'll find that these keyboard shortcuts greatly simplify your workflow. I encourage you to explore further and familiarize yourself with more of K9s's functionalities.
Conclusion
In this blog post, we learnt what K9s is and how it simplifies the monitoring and management of Kubernetes resources. We learnt how to effortlessly navigate the K9s interface and perform operations on Kubernetes resources using only keyboard shortcuts. We didn’t have to look up command syntax, something we would usually do when working with kubectl.
While we covered several key features of K9s, the tool offers much more. To unlock its full potential, I highly recommend exploring the K9s documentation.
Interested in learning more about Kubernetes? Check out the following courses from KodeKloud:

.png)
.png)
.png)
FAQs
Q1: Is K9s a replacement for kubectl?
No, K9s is not a replacement but a complementary tool. While kubectl is the official command-line tool for scripting and CI/CD pipelines, the k9s cli provides a visual, interactive interface that makes real-time monitoring and manual management much faster.
Q2: How do I install K9s?
You can install K9s using package managers like Homebrew on macOS (brew install k9s), Scoop or Chocolatey on Windows (scoop install k9s), or by downloading the binary from the official GitHub releases page for Linux.
Q3: Does K9s support multiple clusters?
Yes. K9s uses your local kubeconfig file. You can switch between different contexts (clusters) easily within the interface using the :ctx command.
Q4: Can I view logs for crashed pods in K9s?
Yes. By pressing l (lowercase L) on a selected pod, you can view the logs. If a container has crashed, you can often still see the previous logs to diagnose the issue using the k9s kubernetes interface.
Q5: Is K9s read-only, or can I make changes?
K9s is fully interactive and allows you to make changes. You can edit resources (press e), delete resources (press ctrl+d), and scale deployments (press s), provided your user account has the necessary RBAC permissions in the cluster.


Discussion