


Highlights
- The kubectl logs command retrieves logs from the stdout and stderr streams of containers running inside a Pod.
- The
-f(follow) flag allows you to stream Pod logs in real time as new entries are generated. - The
--tailflag helps limit log output to the most recent lines, which is useful for large or noisy logs. - The
-p(or--previous) flag enables access to logs from a container that has crashed and restarted. - Time-based filtering using
--sinceand--since-timeallows you to focus on logs from a specific period. - For multi-container Pods, the -c flag is required to fetch logs from a specific container.
Kubernetes is a container orchestration tool used to deploy and manage containerized applications. Like any software, these applications can sometimes fail or not perform as expected due to various reasons.
When such failures occur, it’s important to identify and rectify the issue quickly. One key aspect of troubleshooting involves analyzing the application logs, which can provide valuable information about the root cause of the problem.
Logs are essentially records of events happening within your application. By examining these logs, we can often gain insights into what went wrong.
In this blog post, we’ll learn how to access Pod logs in Kubernetes using the kubectl logs command. Note that when we say Pod logs, we’re generally referring to the logs of the applications running in containers inside the Pod.
Prerequisites
To easily follow along with the examples in this post, we recommend using KodeKloud’s Kubernetes playground. This playground will provide you instant access to a running Kubernetes cluster with kubectl already installed. No need for you to install any software. With just one click, you'll be ready to run the example code snippets and start experimenting right away.
Alternatively, if you prefer to set up your own Kubernetes cluster, you can use a tool such as minikube. Just make sure you have kubectl installed on your local machine, which is a command-line tool used to interact with Kubernetes clusters.
Note that the commands provided in the examples below have been tested on KodeKloud’s Kubernetes playground.
Try the Kubernetes Pods Lab for free
Create a Pod
Before we can access the logs of a Pod, we need to create a Pod first. Open a terminal window and run the following command:
kubectl create deployment mynginx --image=nginxThis command creates a Deployment named mynginx using the nginx Docker image. The Deployment creates a Pod that hosts the container running the nginx web server.
Running the command above will produce an output like this:

Once the Deployment is created, we need to check the Pod status to ensure that it's running correctly. To do this, run the following command:
kubectl get podsThis command will display a list of all the Pods running in your Kubernetes cluster, as shown below:

Look for the Pod with a name starting with mynginx and ensure that it's in the Running state. Note that Kubernetes creates Pod names by adding unique characters to the Deployment name. Hence, your Pod name will be different from mine.
How to View Pod Logs
Now that we have a nginx web server up and running, we can view its logs using the kubectl logs command:
kubectl logs <POD-NAME>Replace <POD-NAME> with the name of your Pod.
Running the command above will generate an output similar to the following:
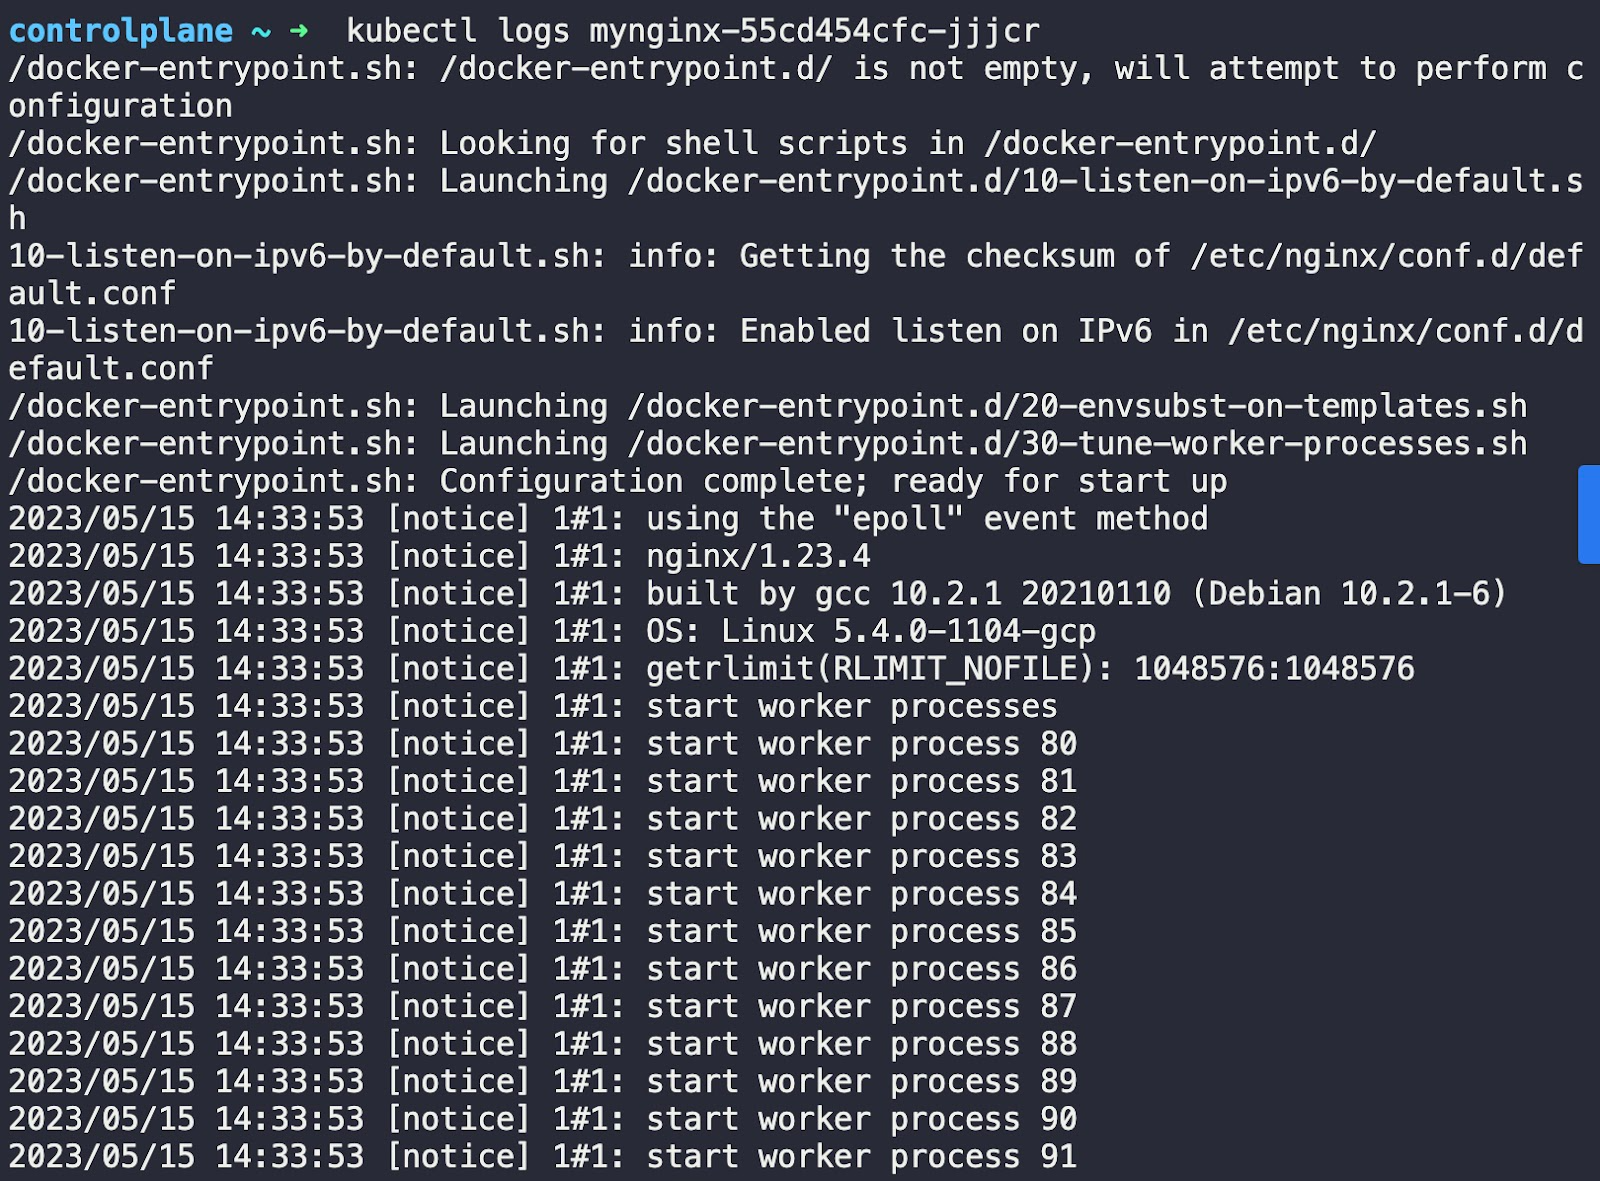
In the output above, the entries with the date and [notice] are actual logs from the nginx server itself. The kubectl logs command retrieves these logs from the stdout and stderr output streams of the specified Pod.
View Pod logs in real time
To view logs in real time, we can use the -f flag (short for "--follow") with the kubectl logs command. This will continuously print new log entries to your terminal as they are generated.
However, before we can see these logs in real time, we need to attach to the Pod. Attaching to the Pod essentially means that we're connecting our terminal to the running container within the Pod. This will allow us to observe the internal operations of the container as they happen.
Run the following command:
kubectl attach <POD-NAME>Running this command will give you the following output:

Our terminal is now attached to the running container. Next, open a new terminal window. In this new terminal, run the following command to get a shell to the running container.
kubectl exec -it <POD-NAME> -- /bin/bashNote: To learn about the kubectl exec command in detail, check out our blog post: kubectl exec: How to Execute Shell Commands Into a Container (With Examples)
Running the command above will initiate an interactive bash shell session, as shown below:

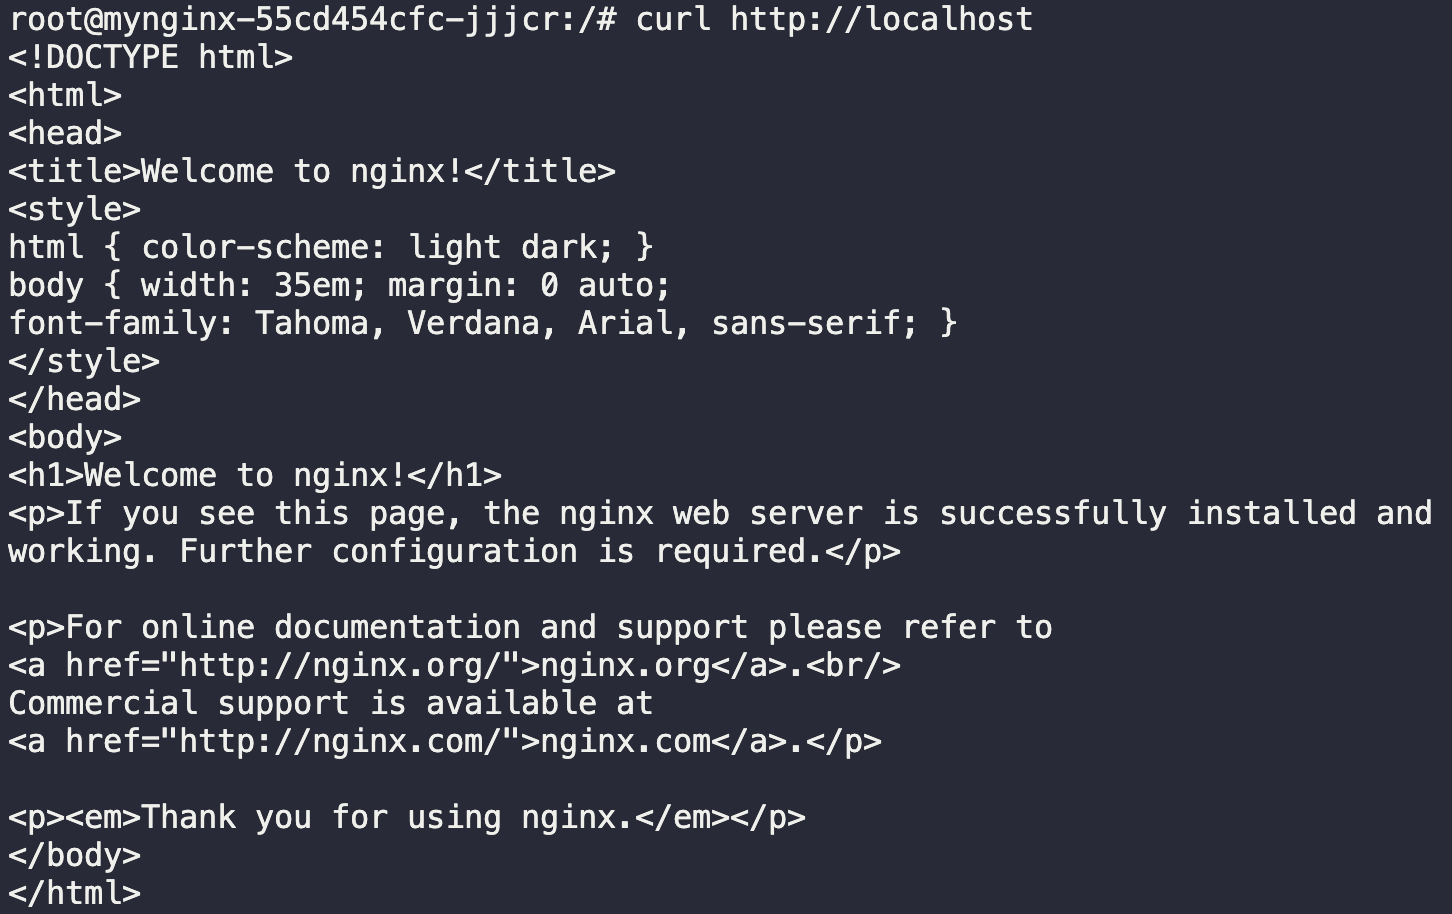
Now that we're inside the bash shell, we can interact directly with the nginx server. Let's send a GET request using the curl command:
curl http://localhostThis command sends a GET request to the nginx server, which will then log the details of this request.
After executing this command, you’ll see the default index.html page served by the nginx server printed in your terminal, as shown below:
Switch back to the first terminal tab, which we have attached to the running container. Here, you should see the live log entries produced by the nginx server in response to the GET request, as shown in the output below:

Ensure that you keep the second terminal window open. We'll be using it in an upcoming section.
Fetch a specific number of lines of Pod logs
Certain applications can generate extensive and lengthy logs. At times, you may only want to examine the most recent lines of the log. The kubectl logs command provides a convenient flag --tail for this purpose.
Before I demonstrate the use of the --tail flag, we first need to detach from the currently running container and let it run in the background. To do this, press CTRL + C. This will return you to your local terminal.
Now, to retrieve the most recent five lines of the log generated by the nginx server, execute the following command:
kubectl logs --tail=5 <POD-NAME> In this command, 5 is the number of lines of logs we want to view.
After running the command above, you’ll see the last 5 lines of the log printed in the terminal, as shown below:

View logs of an exited container
The kubectl logs command retrieves logs only from the currently running container. However, if a container had crashed and was replaced, you can still retrieve the logs from its previous instance using the -p (or --previous) flag. This can be particularly useful when investigating the root cause of a container crash.
First, navigate to the second terminal window where we have an interactive shell session running. Execute the following command to terminate the main process of the container:
kill 1This command will cause the container to crash. Kubernetes will then automatically restart the container. The output of the above command will look like the following:

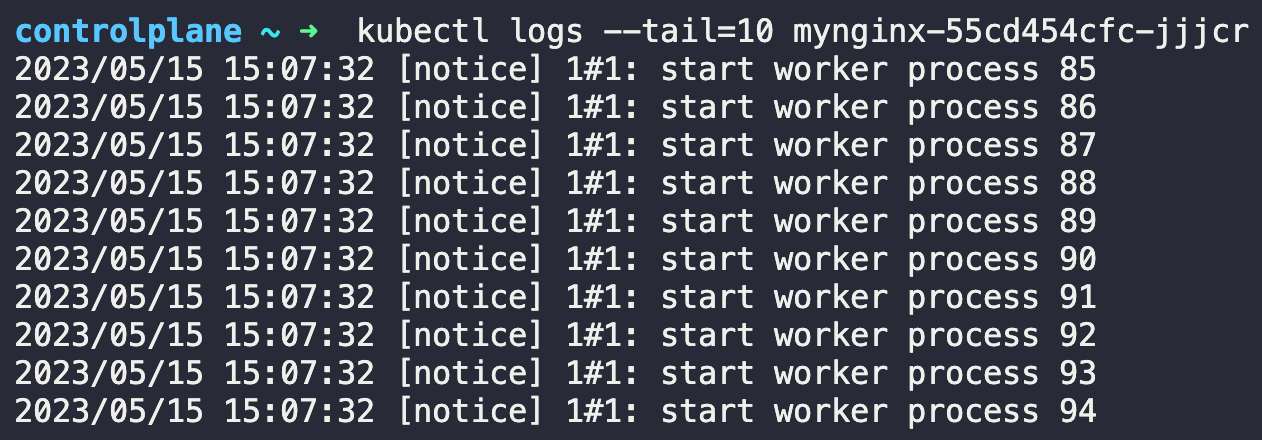
Now, return to the first terminal window. We'll first retrieve the logs of the currently running container and then the logs of the exited container. This way you’ll be able to compare the outputs and confirm that you're genuinely retrieving logs from the exited container. We'll use the --tail flag for the purpose of limiting the log output.
Run the following command:
kubectl logs –tail=10 <POD-NAME>The output will appear as follows:
Next, let's retrieve the logs from the previously exited container. To do so, run the following command:
kubectl logs –tail=10 <POD-NAME> -pThe only difference in this command is the addition of the -p flag.
Running the command above will print an output similar to the following:
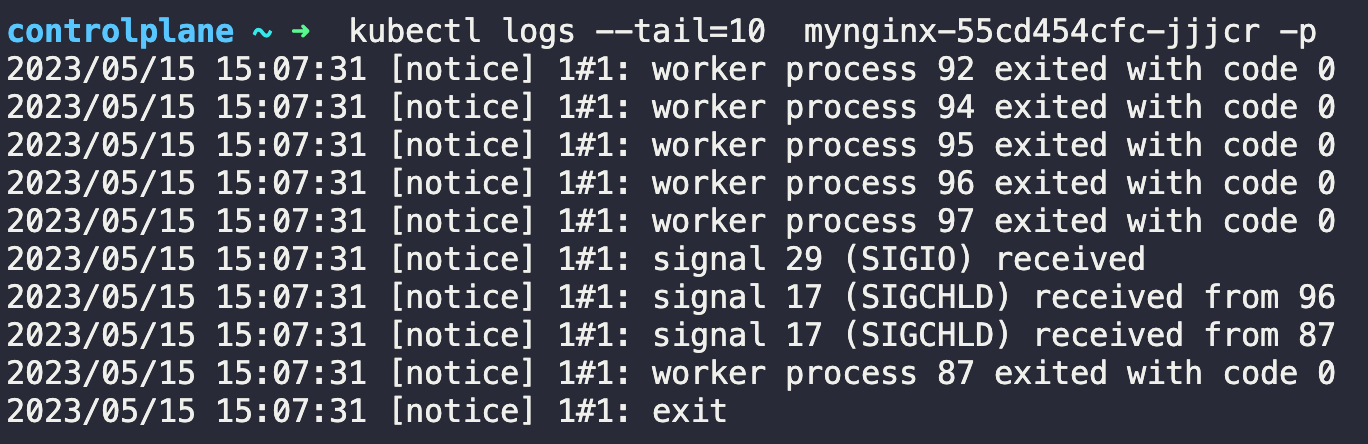
These are the logs from the previously exited container — the one we intentionally caused to restart by terminating its main process.
Fetch Pod logs from a specific time period
If you want to retrieve logs from a particular time period, you can utilize two flags: --since and --since-time.
Let's start with the --since flag. This flag accepts a time duration as its argument, and returns logs generated from that time duration onwards.
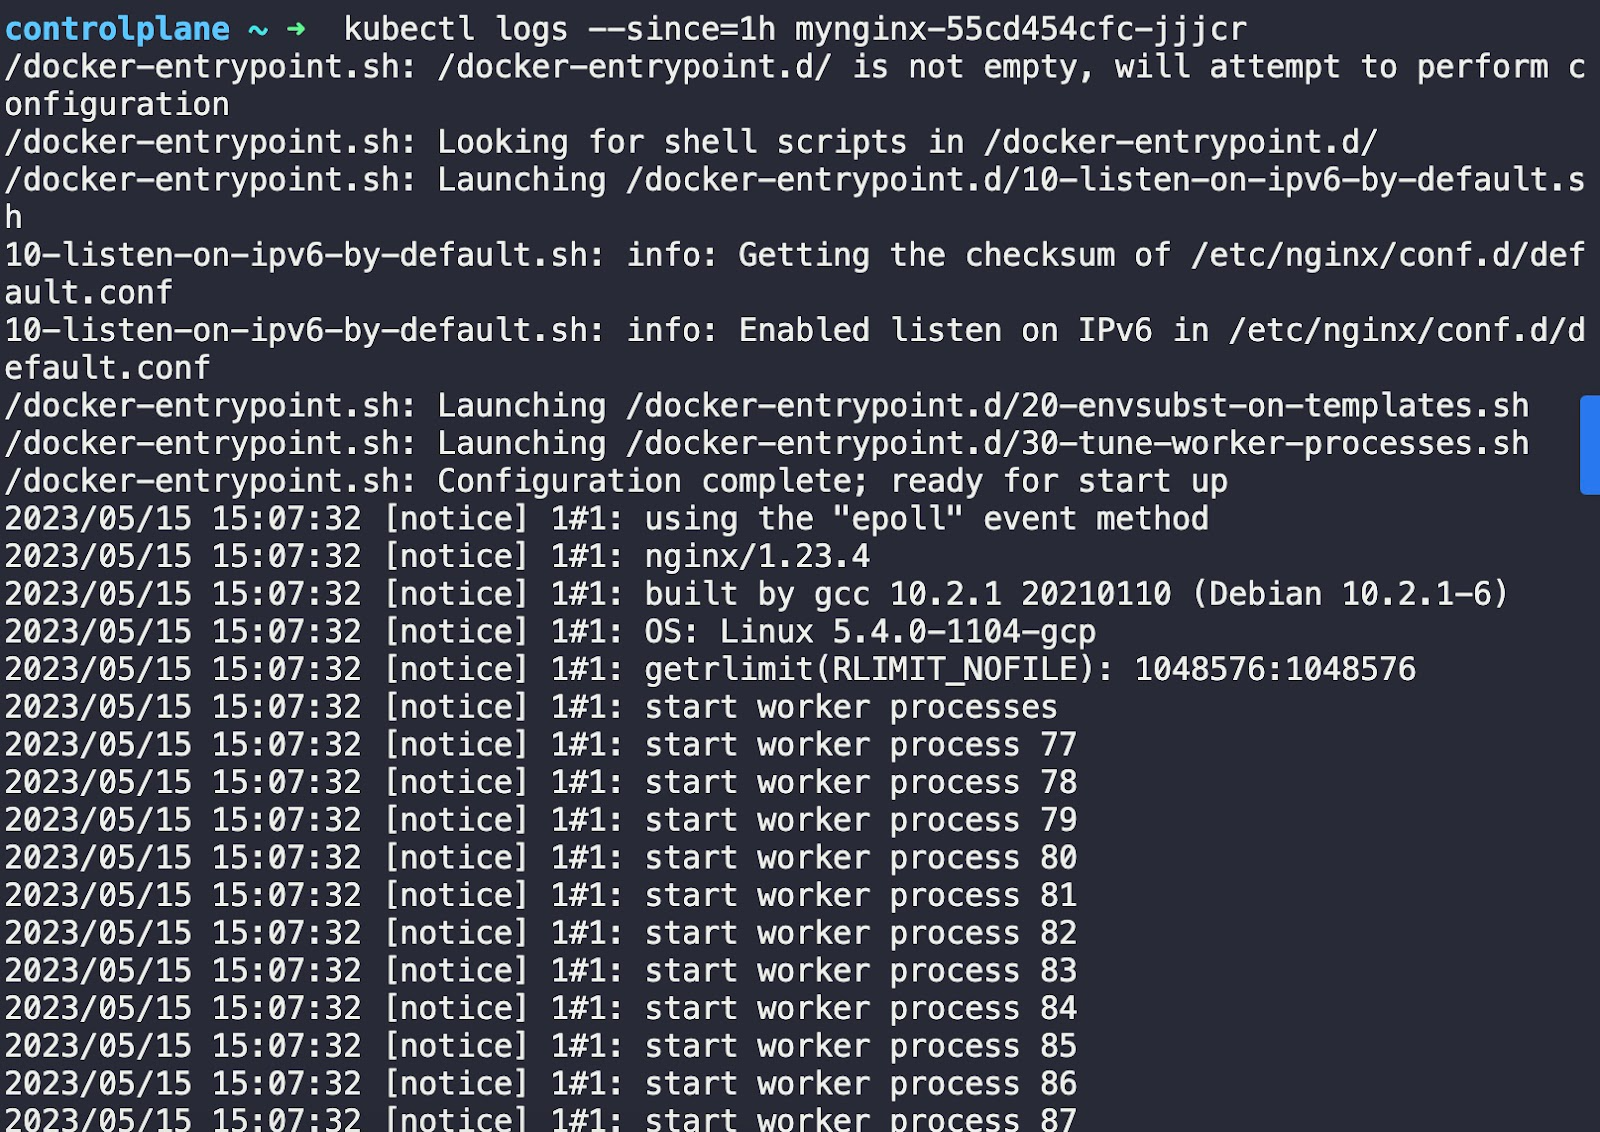
For example, to fetch logs produced by the nginx container within the last hour, execute the following command:
kubectl logs --since=1h <POD-NAME>Note that you can specify the duration in hours, minutes, or seconds. For instance, to fetch logs from the last 1 hour, 30 minutes, and 20 seconds, you would use --since=1h30m20s.
Running the command above will print the following output:
The --since flag allows us to retrieve logs from a specific duration onwards. However, if you need to retrieve logs from a specific date and time onwards, you'll want to use the --since-time flag. This flag requires an argument in the following format:
YYYY-MM-DDTHH:MM:SSZWhere:
YYYYrepresents the yearMMrepresents the monthDDrepresents the dayTis a separator indicating the start of the time portionHHrepresents the hourMMrepresents the minuteSSrepresents the secondZsignifies Coordinated Universal Time (UTC)
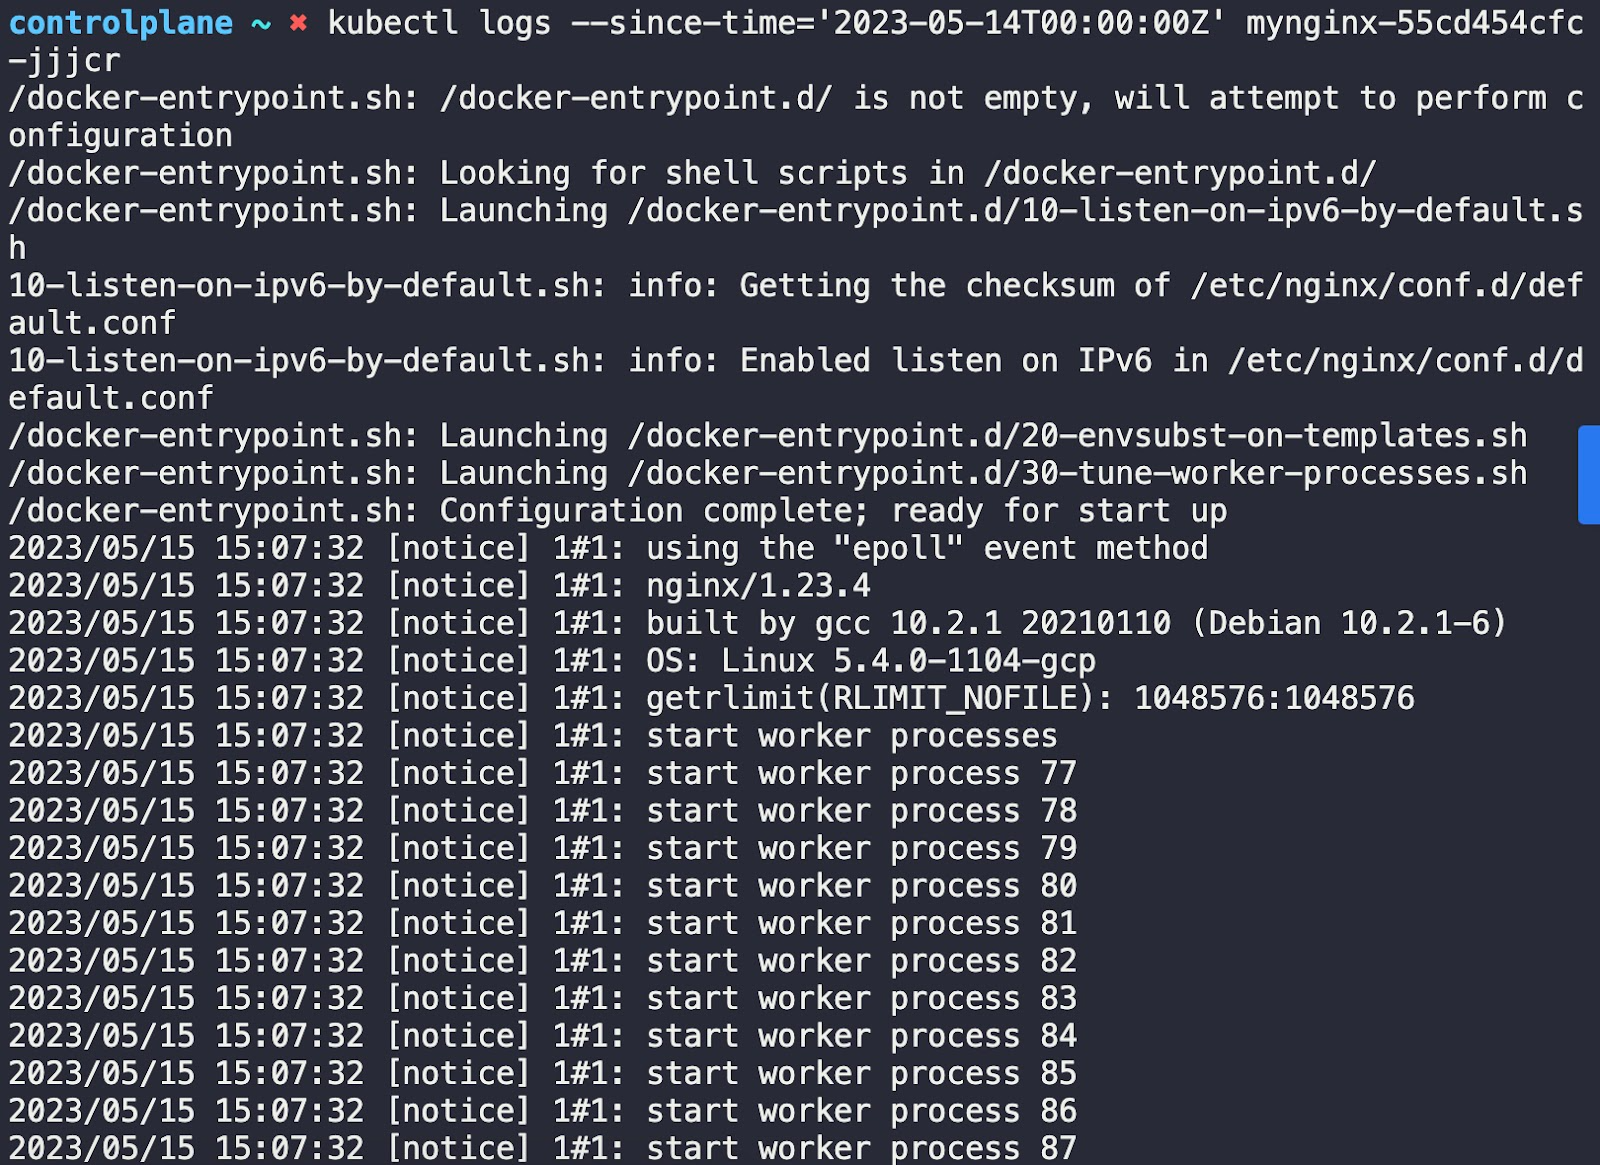
For example, to fetch logs starting from midnight on 14th May 2023, run the following command:
kubectl logs --since-time=’2023-05-14T00:00:00Z’ <POD-NAME>Running the command above will show you an output similar to the following:
Fetch the logs of a specific container in a multi-container Pod
In Kubernetes, a Pod can host one or multiple containers. When dealing with a multi-container Pod, you can fetch the logs of a specific container by specifying its name using the -c flag.
Consider a scenario where we have a Pod named my-pod that is running two containers: nginx and apache. If we want to fetch the logs specifically from the nginx Container, we can execute the following command:
kubectl logs my-pod -c nginxIn this command, the -c flag is followed by the name of the specific container ("nginx") from which we want to retrieve the logs.
Want to master container orchestration? Check out our Kubernetes Learning path:

Conclusion
The ability to retrieve Pod logs is essential for debugging and troubleshooting your applications running in a Kubernetes cluster. In this blog post, you learned how to use the kubectl logs command to fetch Pod logs. You also learned to use various flags to further customize and filter the log output according to your needs.
More on Kubernetes:
- How to Collect Kubernetes Events and Extract Values
- How to Fix ImagePullBackOff & ErrImagePull in Kubernetes
- How to Use Kubectl Config Set-Context
- How to Copy File From Pod to Local (With Examples)
- How to Use Kubectl Delete Deployment (With Examples)
- How to Create a Custom Namespace
- Optimizing Kubernetes Clusters for Cost & Performance: Part 1 - Resource Requests
- Deploying, Maintaining, and Scaling Kubernetes Clusters
FAQs
Q1: Where does kubectl logs get its log data from?
It retrieves log output from the stdout and stderr streams of containers running inside a Pod.
Q2: Why can’t I see logs after a container restarts?
By default, kubectl logs shows logs only from the currently running container. Use the -p flag to access logs from the previous container instance.
Q3: How do I stream logs continuously for debugging?
Use the -f (follow) flag to stream logs in real time as new entries are generated.
Q4: What should I do if a Pod has multiple containers?
Specify the container name with the -c flag to fetch logs from a specific container.
Q5: Can I filter logs by time when troubleshooting issues?
Yes. Use --since for duration-based filtering or --since-time for logs starting from a specific timestamp.
Q6: How does Pod logging fit into a broader [keyword] strategy?
Accessing and filtering Pod logs is a foundational practice in [keyword], enabling faster diagnosis and resolution of application-level issues in Kubernetes environments.


Discussion