


Highlights
- kubectl exec allows you to run commands directly inside a running container.
- You can exec into a Kubernetes pod interactively using the
-itflags. - kubectl exec bash is commonly used to open a shell session inside containers.
- The command is frequently used for Kubernetes troubleshooting and debugging.
- Proper use of kubectl exec examples helps validate container behavior without redeploying workloads.
Kubernetes is a powerful container orchestration platform for easily deploying and managing containerized applications. However, managing containerized applications is about more than just getting them up and running. Sometimes, you’ll need to interact with the containers to perform important tasks, such as debugging issues or modifying files or directories.
So, how can you interact with a running container? One way is to use the "kubectl exec" command.
The "kubectl exec" command enables you to get inside a running container by opening and accessing its shell. The shell provides a command-line interface for running commands and interacting with the container's environment, similar to running commands on your own computer's command line.
In this blog post, I'll explain how to use "kubectl exec" to get a shell to a running container. Let’s get started!
Kubectl Exec Syntax
The syntax for the kubectl exec command is as follows:
kubectl exec [OPTIONS] POD_NAME -- COMMAND [ARGS...]Here's what each part of the syntax means:
- kubectl exec: This is the command used to execute commands inside a container.
- [OPTIONS]: These are optional flags you can pass to "kubectl exec" to modify its behavior. For example, you can use the "-it" flag to run the command in interactive mode (more on this later).
- POD_NAME: This is the name of the Pod containing the container you want to execute commands in.
- --: This is a separator that tells "kubectl exec" to treat all subsequent arguments as the command to execute inside the container.
- COMMAND: This is the command you want to execute inside the container.
- [ARGS...]: These are optional arguments to the command you want to execute.
Try the Kubernetes Deployments Lab for free
Prerequisites
To make it easier for you to follow along with the example in this post, we recommend using KodeKloud’s Kubernetes playground. This playground will provide you instant access to a running Kubernetes cluster with kubectl already installed. No need for you to install any software. With just one click, you'll be ready to run the example code snippets and start experimenting right away.
Alternatively, if you prefer to set up your own Kubernetes cluster, you can use a tool such as minikube. Just make sure you have kubectl installed on your local machine, which is a command-line tool used to interact with Kubernetes clusters.
Open and Access a Container’s Shell Using Kubectl Exec
In this section, we'll explore how to open and access a container's shell using the "kubectl exec" command. I'll walk you through an example that involves five simple steps.
Step 1: Create a Deployment
Before we can execute shell commands inside a container, we need to create a Kubernetes deployment. Open a terminal and run the following command:
kubectl create deployment mynginx --image=nginxThis command creates a deployment resource named "mynginx" using the "nginx" Docker image. The deployment creates a Pod that hosts the container running the "nginx" web server

Step 2: Check the Pod status
Once the deployment is created, we need to check the Pod status to ensure that it's running correctly. To do this, run the following command:
kubectl get podsThis command will display a list of all the Pods running in your Kubernetes cluster. Look for the Pod with a name starting with "mynginx" and ensure that it's in the "Running" state.

Step 3: Open & access the container's shell
A shell is a program that provides a command-line interface for interacting with an operating system, including a container's operating system. It allows you to enter commands and execute them within the container's environment.
To open and access the shell of the container running the "nginx" web server, run the following command:
kubectl exec -it mynginx-56766fcf49-4b6ls -- /bin/bashHere, "/bin/bash" is the command that will be executed inside the container running inside the "mynginx-56766fcf49-4b6ls" Pod. Because we have specified "bash", you'll see a Bash shell session that's connected to the container.

You can now run any command that you would normally run using a shell. Before we jump into that, let's explore the -it flag in more detail.
The -it flag is actually a combination of two flags: -i and -t.
The -i flag stands for "interactive" and tells kubectl that we want an interactive session with the container. This means that we'll be able to send commands to the container and see its output.
The -t flag is used to allocate a pseudo-TTY (terminal) and tells kubectl that we want a terminal session with the container. This means that we'll see the output from the container in a terminal window.
Without the -t flag, we won’t see the shell prompt. The output from the container will still be displayed, but we won't be able to interact with the container's shell. We won't be able to execute any commands that require user input.
Step 4: Run commands using the shell
Now that we have access to the container's shell let's run some commands inside the container. Let’s use the curl command to access the default page served by the "nginx" web server running inside the container. Run the command below:
curl http://localhostAfter executing the command, you’ll see an output similar to this:
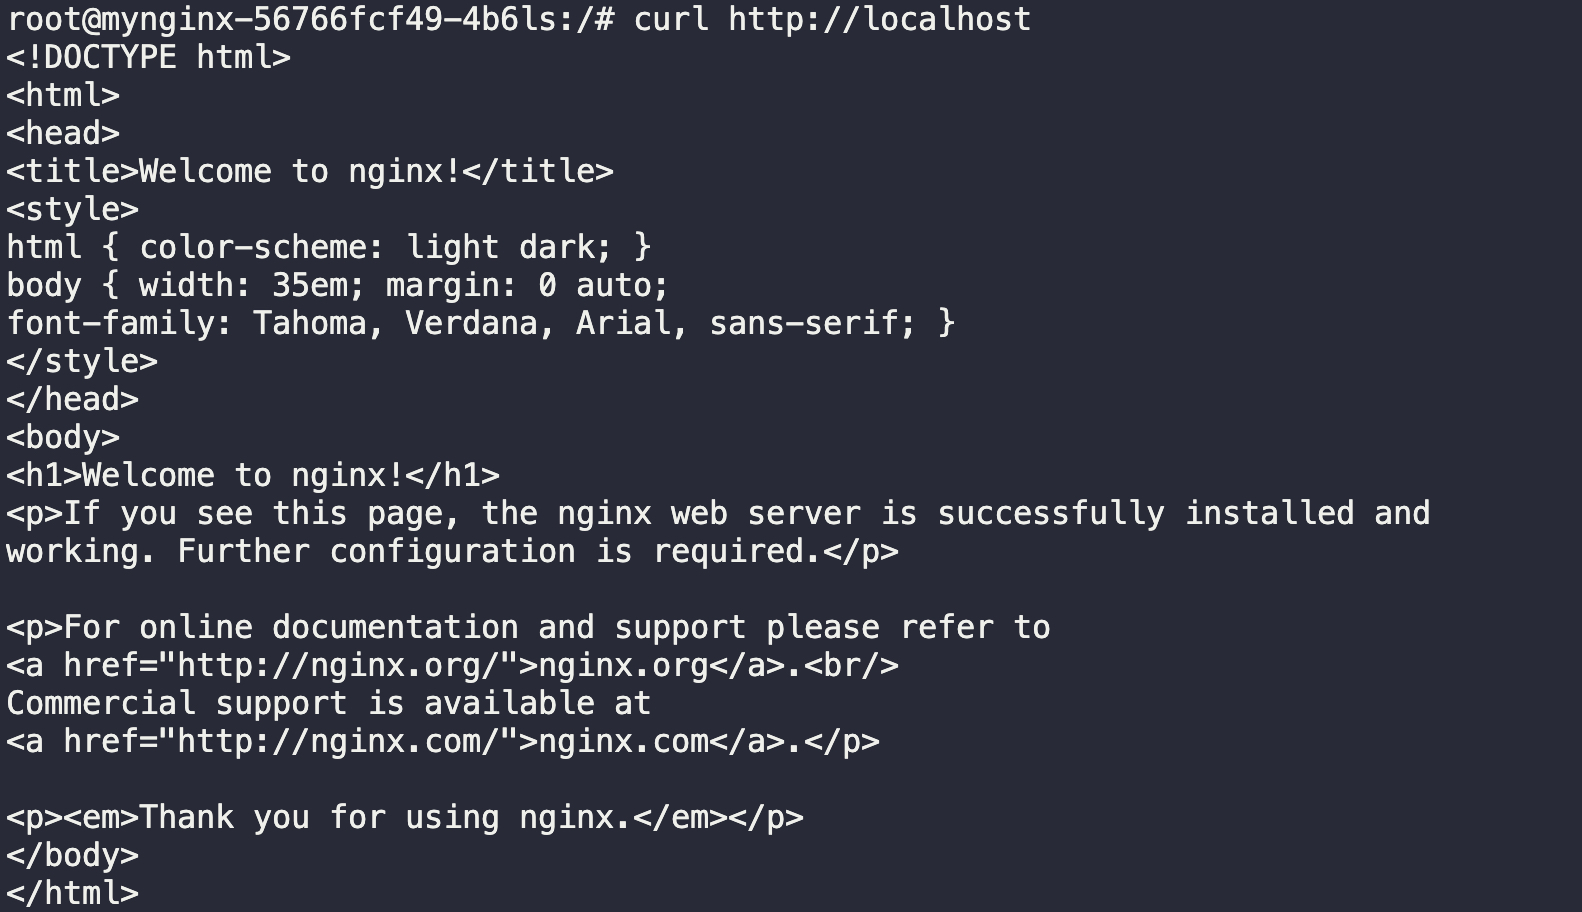
The output you see above is the content of the "index.html" file, which is the default page served by the "nginx" web server. Note that the "index.html" file is stored in the "/usr/share/nginx/html/" directory inside the container.
Now, let's replace the contents of the "index.html" file with the text "Welcome to KodeKloud". To do this, run the following command:
echo "Welcome to KodeKloud" > /usr/share/nginx/html/index.htmlThis command will write the text "Welcome to KodeKloud" to the "index.html" file, effectively replacing its content.
Now, let's execute the "curl" command again to verify that the change has been implemented successfully.
curl http://localhostAfter executing the command, you’ll see an output similar to this:

As you can see, the default page is replaced with the text "Welcome to KodeKloud."
Congratulations! You have now successfully interacted with a running container from its shell.
Step 5: Exit the Container's Shell
To exit the container's shell and return to your terminal, you can press "CTRL + D" or run the exit command.
Master the essential orchestration skills with our Kubernetes Learning path:

.webp)
Conclusion
This post covered how to execute shell commands into a running container using the "kubectl exec" command. It is a powerful tool for managing and troubleshooting containerized applications in a Kubernetes cluster.
If you have a Docker container that's not yet deployed to a Kubernetes cluster, you can still execute shell commands inside the container using the docker exec command. This article below covers this topic in detail: Docker Exec: How to Enter Into a Docker Container's Shell?
More on DevOps:
- 10 Essential DevOps Tools You Should Learn in 2024
- 17 DevOps Monitoring Tools to Learn in 2024
- Container Security Best Practices in DevOps Environments
- Top 15 DevOps Automation Tools You Should Learn in 2024
- Container Security Best Practices in DevOps Environments
- Demystifying Container Orchestration: How Kubernetes Works with Docker
- Optimizing Kubernetes Clusters for Cost & Performance: Part 1 - Resource Requests
- Deploying, Maintaining, and Scaling Kubernetes Clusters
FAQs
Q1: What does kubectl exec do?
kubectl exec allows you to execute commands inside a running container in a Kubernetes Pod.
Q2: How do I kubectl exec into pod interactively?
Use the -it flags with kubectl exec to open an interactive shell session.
Q3: When should I use kubectl exec bash?
Use kubectl exec bash when you need a full shell environment inside a container for debugging or inspection.
Q4: Can kubectl exec run single commands without a shell?
Yes. You can execute a single command by specifying it directly after --.
Q5: Is kubectl exec safe for production environments?
It is commonly used for troubleshooting, but changes made inside containers are ephemeral and may be lost on restart.
Q6: How does kubectl exec help with Kubernetes troubleshooting?
It allows real-time inspection of container state, logs, files, and runtime behavior without redeploying workloads.


Discussion