


Highlights
- Blueprint for Images: A Dockerfile acts as a script of instructions that Docker reads to automatically build an image.
- Sequential Execution: Instructions like
FROM,RUN, andCOPYare executed in order, with each instruction creating a new layer. - Context Matters: The build context (usually the current directory) determines what files are available to the Docker engine during the build.
- Ignore Unnecessary Files: Use a
.dockerignorefile to keep your image light by excluding files like theDockerfileitself or local git history.
Containers have become the preferred method for packaging and deploying applications in modern software development. Among container platforms, Docker has emerged as the most popular choice for building and managing these containers.
Before we can run an application as a container using Docker, we must first build a Docker image. One widely adopted approach is using Dockerfiles.
In this blog post, I’ll guide you through the process of creating a Docker image using a Dockerfile from scratch. Although we will use a Python/Flask app as an example, the principles we discuss can be broadly applied to build a Docker image for almost any type of application.
But before we dive into the process, let’s first get a basic understanding of what a Dockerfile is.
What Is a Dockerfile?
A Dockerfile is essentially a text file (literally written as "Dockerfile" with no extension) that contains instructions for creating a Docker image. These instructions are written in the following format:
DIRECTIVE argumentAlthough the DIRECTIVE is case-insensitive, it is recommended that all directives be written in uppercase to differentiate them from arguments. A Dockerfile usually consists of multiple lines of instructions that the Docker engine executes sequentially during the image-building process.
Now that you understand the purpose of a Dockerfile, let's get our hands dirty by building one for a sample Python application.
Prerequisites
To follow along with the examples in this post, you need a code editor. You also need to have Docker Desktop installed and running on your system. If you don’t have Docker Desktop, you can download it from the link: Get Docker.
Try the Docker Images Lab for free

Building a Dockerfile for a Sample Python/Flask Application
The application we'll be working with is a simple Flask app with only one home route that returns Hello, World!.
Let's start by setting up the Flask application. Open your favorite code editor and create a new directory for your project. In this directory, create a new file named app.py and add the following Python code:
from flask import Flask

app = Flask(__name__)

@app.route('/')
def hello():
    return 'Hello, World!'
Now, let’s build the Dockerfile. In the same directory as your app.py, create a new file named Dockerfile (with no file extension). This is where you'll write the instructions for Docker to build your image.
Now, follow the steps below to create the Dockerfile:
#1: Specify the base image
The very first instruction you write in a Dockerfile must be the FROM directive, which specifies the base image. The base image is the image from which all other layers in your Docker image will be built. It's the foundation of your Docker image, much like the foundation of a building.
Add the following instructions to your Dockerfile:
FROM python:3.11-slimHere, we're telling Docker to use the official Python Docker image, and, more specifically, the 3.11-slim version. This slim variant of Python Docker image is a minimal version that excludes some packages to make the image smaller. Note that the base image you specify will be downloaded from Docker Hub, Docker's official image registry.
We're using Python as the base image because the application we're containerizing is written in Python. The base image includes a Python interpreter, which is necessary to run Python code, as well as several commonly used Python utilities and libraries. By using the base image, we're ensuring that the environment within the Docker container is preconfigured for running Python code.
#2 Set the working directory
Once you've chosen the base image, the next step is to determine the working directory using the WORKDIR directive. Insert the following line after the FROM directive:
WORKDIR /app Here, we tell Docker to create an app directory in the Docker container and use it as the current working directory. All subsequent instructions (such as RUN, COPY, and CMD) will be run in this directory.
Think of this as typing the command cd /app in a terminal to change the current working directory to /app. The difference here is that it's being done within the Docker container as part of the build process.
A working directory within the container is necessary because it designates a specific location for our application code within the container and determines where commands will be run from. If we don't set a working directory, Docker won't have a clear context for where your application is located, which would make it harder to interact with.
#3 Install dependencies
Once the working directory is set, the next step is to install the dependencies. Our Python application relies on the Flask web framework, which manages requests, routes URLs, and handles other web-related tasks.
To install Flask, add the following instruction in your Dockerfile just under the WORKDIR directive:
RUN pip install flask==2.3Here, we instruct Docker to use pip (a Python package installer) to install the specific version of Flask we need for our application.
#4 Copy application files to the container
After setting up the working directory and installing the necessary dependencies, we're now ready to copy the application files into the Docker container.
To do this, add the following instruction just below the RUN directive:
COPY . /appThis line copies everything in the current directory (denoted by .) on our host machine into the /app directory we previously set as our working directory within the Docker container.
It's like using the cp command in the terminal to copy files from one directory to another, but in this context, it's copying files from your local machine to the Docker container.
Why do we need to do this? It's simple. Without this step, the Docker container wouldn't have access to our application's code, making it impossible to run our app.
#5 Specify the environment variable
Once the application files are copied, we need to set up the FLASK_APP environment variable for our Docker container using the ENV directive. You may wonder why we need this environment variable.
In our app.py file, we create an instance of the Flask application and assign it to the variable app. This application instance is what Flask needs to run, and it's located in the app.py file.
When starting our Flask application using the flask run command (which we'll discuss in the next section), Flask must know where to locate the application instance to run. Flask uses the FLASK_APP environment variable to find this instance. Hence, we need to use the ENV directive to set the value of FLASK_APP to app.py.
To do this, add the following line under the RUN directive:
ENV FLASK_APP=app.pyThis line ensures Flask knows exactly where to find the application instance to run, which, in our case, is app.py.
#6 Define the default command
The last instruction that we need for our application is to specify the default command that will be executed when the Docker container starts from the image we'll build from this Dockerfile. Insert the following instruction below the ENV directive:
CMD ["flask", "run", "--host=0.0.0.0", "--port=5000"]Here's what each part of the argument passed to the CMD directive does:
- flask: This is the program that we want to run. In this case, it's the Flask command-line interface.
- run: This command instructs Flask to start a local development server.
- --host=0.0.0.0: This argument tells the Flask server to listen on all public IPs. In the context of Docker, this means the Flask application will be accessible on any IP address that can reach the Docker container.
- --port=5000: This argument specifies the port number that the Flask server will listen on. Port 5000 is the default port for Flask, but it's good practice to explicitly declare it for clarity.
After this, our Dockerfile is ready. It should look like this:
FROM python:3.11-slim
WORKDIR /app
RUN pip install flask==2.3
COPY . /app
ENV FLASK_APP=app.py
CMD ["flask", "run", "--host=0.0.0.0", "--port=5000"]
It's worth noting that the directives we used in the Dockerfile for our Python app aren't the only ones available in Docker. But they are the ones you'll often encounter when working with Dockerfiles.
#7 Create a .dockerignore file
Before we build our Docker image, we need to take care of one last thing. Remember the following COPY directive?
COPY . /appThis line instructs Docker to copy everything from our current directory to the app directory inside the container, which includes the Dockerfile itself. But, the Dockerfile isn't required for our app to work—it's just for us to create the Docker image.
So, we need to ensure that the Dockerfile isn't copied to the app directory in the container. Here's how we do it:
Create a new file called .dockerignore in the same directory as your Dockerfile. This file works much like a .gitignore file if you're familiar with Git. Then, add the word Dockerfile to this file. This tells Docker to ignore the Dockerfile when copying files into the container.
Now that we've prepared everything, let's learn exactly how to build docker image artifacts from these files.
Building and Running the Docker Image
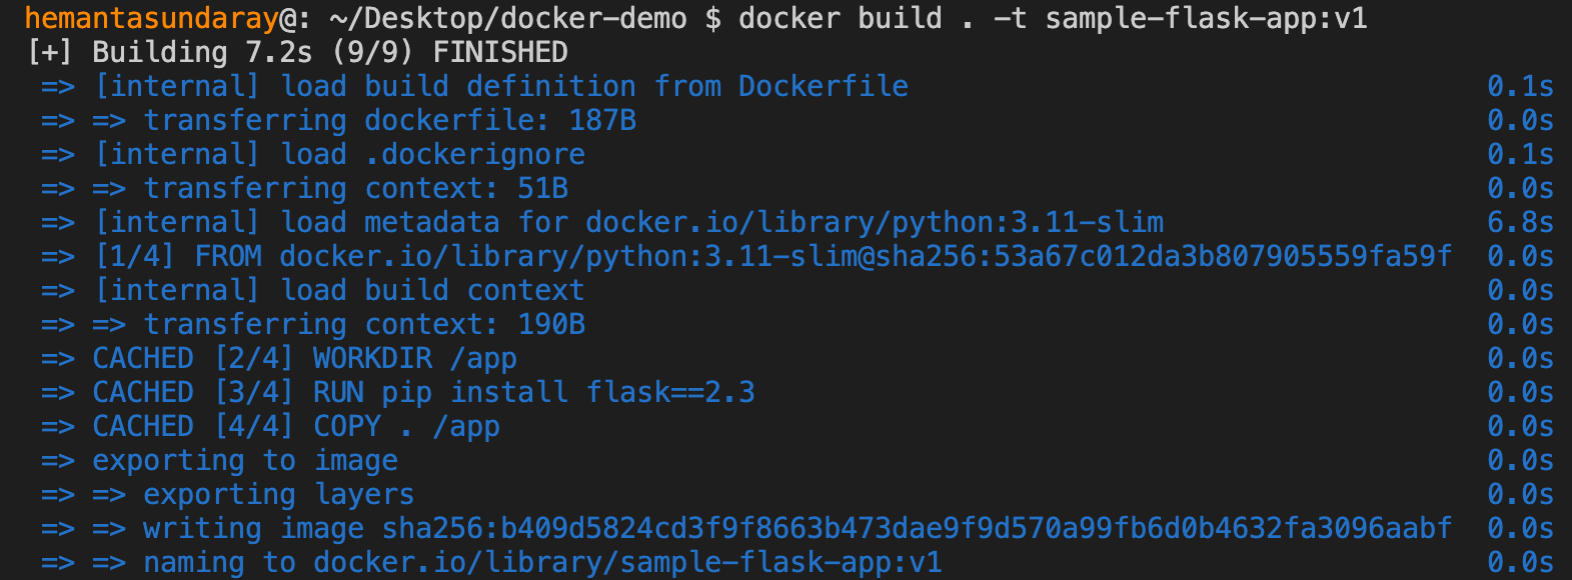
Open a terminal and navigate to the directory where your Dockerfile is located. Now, run the following command to create an image named sample-flask-app:v1 (you can name the image anything you prefer):
docker build . -t sample-flask-app:v1
In the command above, the dot (.) after the build command indicates that the current directory is the build context. We’re using the -t flag to tag the Docker image with the name sample-flask-app and version v1.
After running this command, you’ll see an output similar to this:
To make sure the image sample-flask-app:v1 has been successfully created, run the following command to check the list of Docker images on your system:
docker image lsThe resulting output should look something like this:

In the list, you should see sample-flask-app:v1, which confirms the image is now in our system.
Now, run the sample-flask-app:v1 image as a container by executing the following command:
docker container run -d -p 5000:5000 sample-flask-app:v1The -d flag is short for --detach and runs the container in the background. The -p flag is short for --publish and maps port 5000 of the host to port 5000 of the Docker container.
After running this command, you’ll see an output like this:

The long string you see printed in the terminal is the container ID. To make sure the container is running, list the currently active Docker containers by running the following command:
docker container lsYou should see something like this:

The container is up and running as expected.
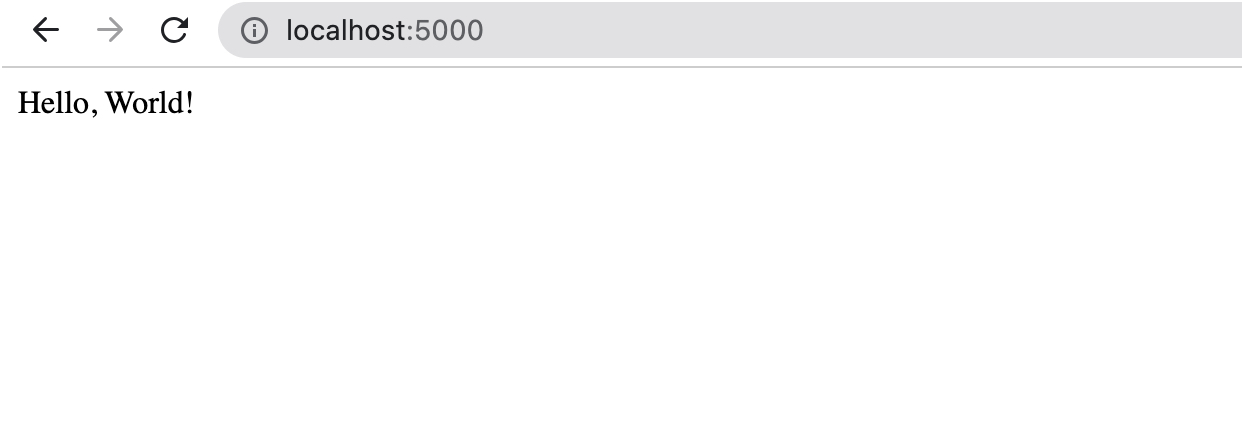
Our Flask application is now running inside the container. To test it, open a web browser and go to http://localhost:5000. You should see the message Hello, World! displayed like this:
Master containerization with our Docker Learning Path:

Conclusion
In this article, we learned how to build docker image files from scratch for a Python/Flask application using a Dockerfile. You should now have a strong understanding of the key Dockerfile directives and their role in building Docker images.
What you learned here isn't just for Python/Flask apps. You can use the same ideas to build Docker images for apps written in other languages.
More on Docker:
- How to Fix Docker Build Requires Exactly 1 Argument
- How to Clear Docker Logs for a Container
- How to Keep Docker Container Running
- How to Build a Docker Image With Dockerfile From Scratch
- How to Pass Environment Variables to Docker Containers
- How to Use Docker CP Command With Examples
- How to Tag a Docker Image
- How to Create Docker Image From a Container
FAQs
Q1: What is the difference between RUN, CMD, and ENTRYPOINT?
RUNexecutes a command during the build process (e.g., installing a package) and creates a new image layer.- `CMD` specifies the default command to run when the container starts. It can be overridden by the user when running the container.
ENTRYPOINTconfigures a container that will run as an executable. It is harder to override than CMD.
Q2: Why should I use .dockerignore?
Using .dockerignore reduces the image size and speeds up the build process by excluding unnecessary files (like git history, local logs, or temporary files) from the build context. This prevents them from being copied into the image layer, which also improves security.
Q3: What happens if I don't specify a TAG when building an image?
If you don't specify a tag using the -t flag (e.g., just docker build .), Docker will successfully build the image but it will not have a repository name or tag attached to it immediately, often resulting in a "dangling" image designated as <none>:<none>. If you specify a name but no version tag (e.g. docker build -t my-app .), Docker defaults to assigning the latest tag.
Q4: Can I build an image without a Dockerfile?
While you can commit changes from a running container to create a new image, using a Dockerfile is the standard best practice. It provides a reproducible, version-controlled, and automated way to define exactly how to build docker image environments consistently.


Discussion