


Highlights
- Snapshot State: Creating an image from a container allows you to save the current state, including file changes and configuration updates, preserving your work.
- Troubleshooting: It is an excellent way to debug issues by capturing the exact environment where a problem occurred for further analysis.
- Docker Commit: The
docker commitcommand is the primary tool used to convert a running or stopped container into a new image. - Metadata Management: You can add authors and commit messages to your new image, making it easier to track changes and version history.
- Manual Workflow: While useful for quick fixes, this method is less reproducible than using a Dockerfile, so it's best for ad-hoc tasks or debugging.
Docker is a platform that helps run applications inside containers. One of its powerful features is that you can create custom Docker images from containers.
Now, you might be wondering, why bother creating an image from a container when you can just use Dockerfiles?
One important reason is when you want to persist the changes made in a container and use them as a base for creating new containers. This can be particularly useful when troubleshooting issues with a containerized application.
For example, suppose you need to change the container's environment or configurations to diagnose and fix a problem. In that case, building a custom Docker image from the container allows you to capture those changes and create a snapshot of the container's state. You can then further analyze this snapshot or share it with others for debugging.
In this post, we'll guide you on how to create docker image from container instances effectively.
The Process of Creating Docker Images From Containers
At a high level, the process of docker image creation from a container involves three steps:
- Create a container from an existing image: The first step is to choose a base image you want to customize and run it as a container.
- Make changes to the container: Once the container is up and running, you change it. You could modify files, install additional software, or do whatever you need to meet your requirements.
- Commit the changes to create a new image: After you’ve made the desired changes to the container, the next step is to commit those changes to create a brand-new Docker image. Now, you can use the new image to spin up new containers with your customizations.
And that’s it! Now that you're familiar with the basic steps for creating a Docker image from a container let's dive into an example to see it in action!
Prerequisites
To follow along with the examples in this post, we recommend using KodeKloud’s Docker playground. This playground will provide you instant access to a Docker environment where you can run and manage containers. No need for you to install any software. With just one click, you'll be ready to start working with containers.
Alternatively, you can use Docker Desktop. If you don’t have a Docker Desktop, you can download it from here. You can find the official installation guide here.
Note that the commands provided in the examples below have been tested on KodeKloud’s Docker playground.
Try the Docker Images Lab for free

3 Steps to Build a Docker Image From a Container
As discussed earlier, we’ll go through the following three steps to build a Docker image from a container, using the popular "nginx" web server as an example.
#1 Create a Container From an Existing Image
The first step in creating a Docker image from a container is to create a container from an existing image. Run the following command to create a container from the "nginx" image.
docker container run -d --name mynginx nginxThis command will create a container named mynginx using the "nginx" image and run it in detached mode (indicated by the -d flag), which means the container will run in the background.
Executing the command above will give you an output similar to this:
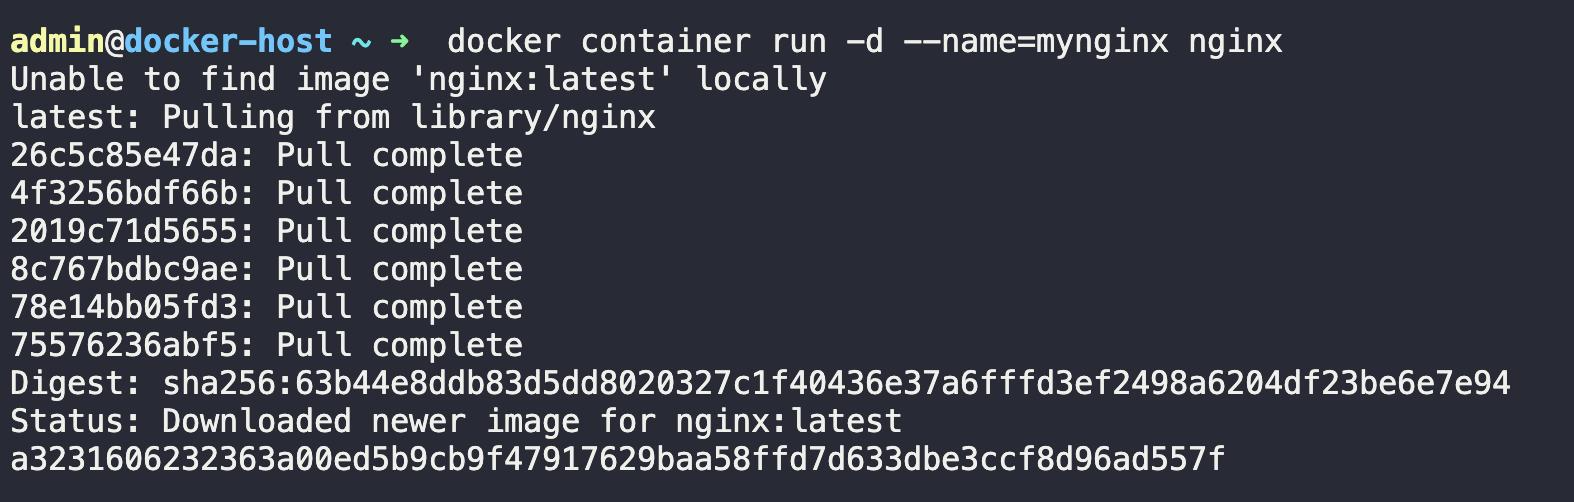
The long string that you see printed in the terminal window is the container ID.
Next, let’s verify that the mynginx container is up and running using the docker ps command.

As you can see, the mynginx container is running successfully, as expected.
Note: For all the upcoming commands you’ll be running, make sure to swap out mynginx with the name of your container. Alternatively, you can use the container ID as a replacement for the container name. However, using an easy-to-remember container name is way more convenient.
#2 Make Changes to the Container
Currently, we have the "nginx" web server running inside a container named mynginx. Now, let’s change the default welcome message served by the "nginx" web server from Welcome to nginx! to Welcome to KodeKloud!. If you have no idea what I’m talking about, don’t worry; things will become clearer in the subsequent steps.
To make the change above, follow the instructions below:
Step 1: Get a shell to the running container
Run the following command to get a shell to the mynginx container.
docker exec -it mynginx /bin/bashThis command will start an interactive Bash shell session inside the mynginx container, allowing you to run commands and make changes to the container.
After running the command, you’ll get the following output:

The output you see (root@32316062323: /#) is the command prompt of the Bash shell session running inside the container.
Note: To get an in-depth understanding of the docker exec command, check out our blog post, Docker Exec: How to Enter Into a Docker Container's Shell?
Step 2: Navigate to the nginx configuration file
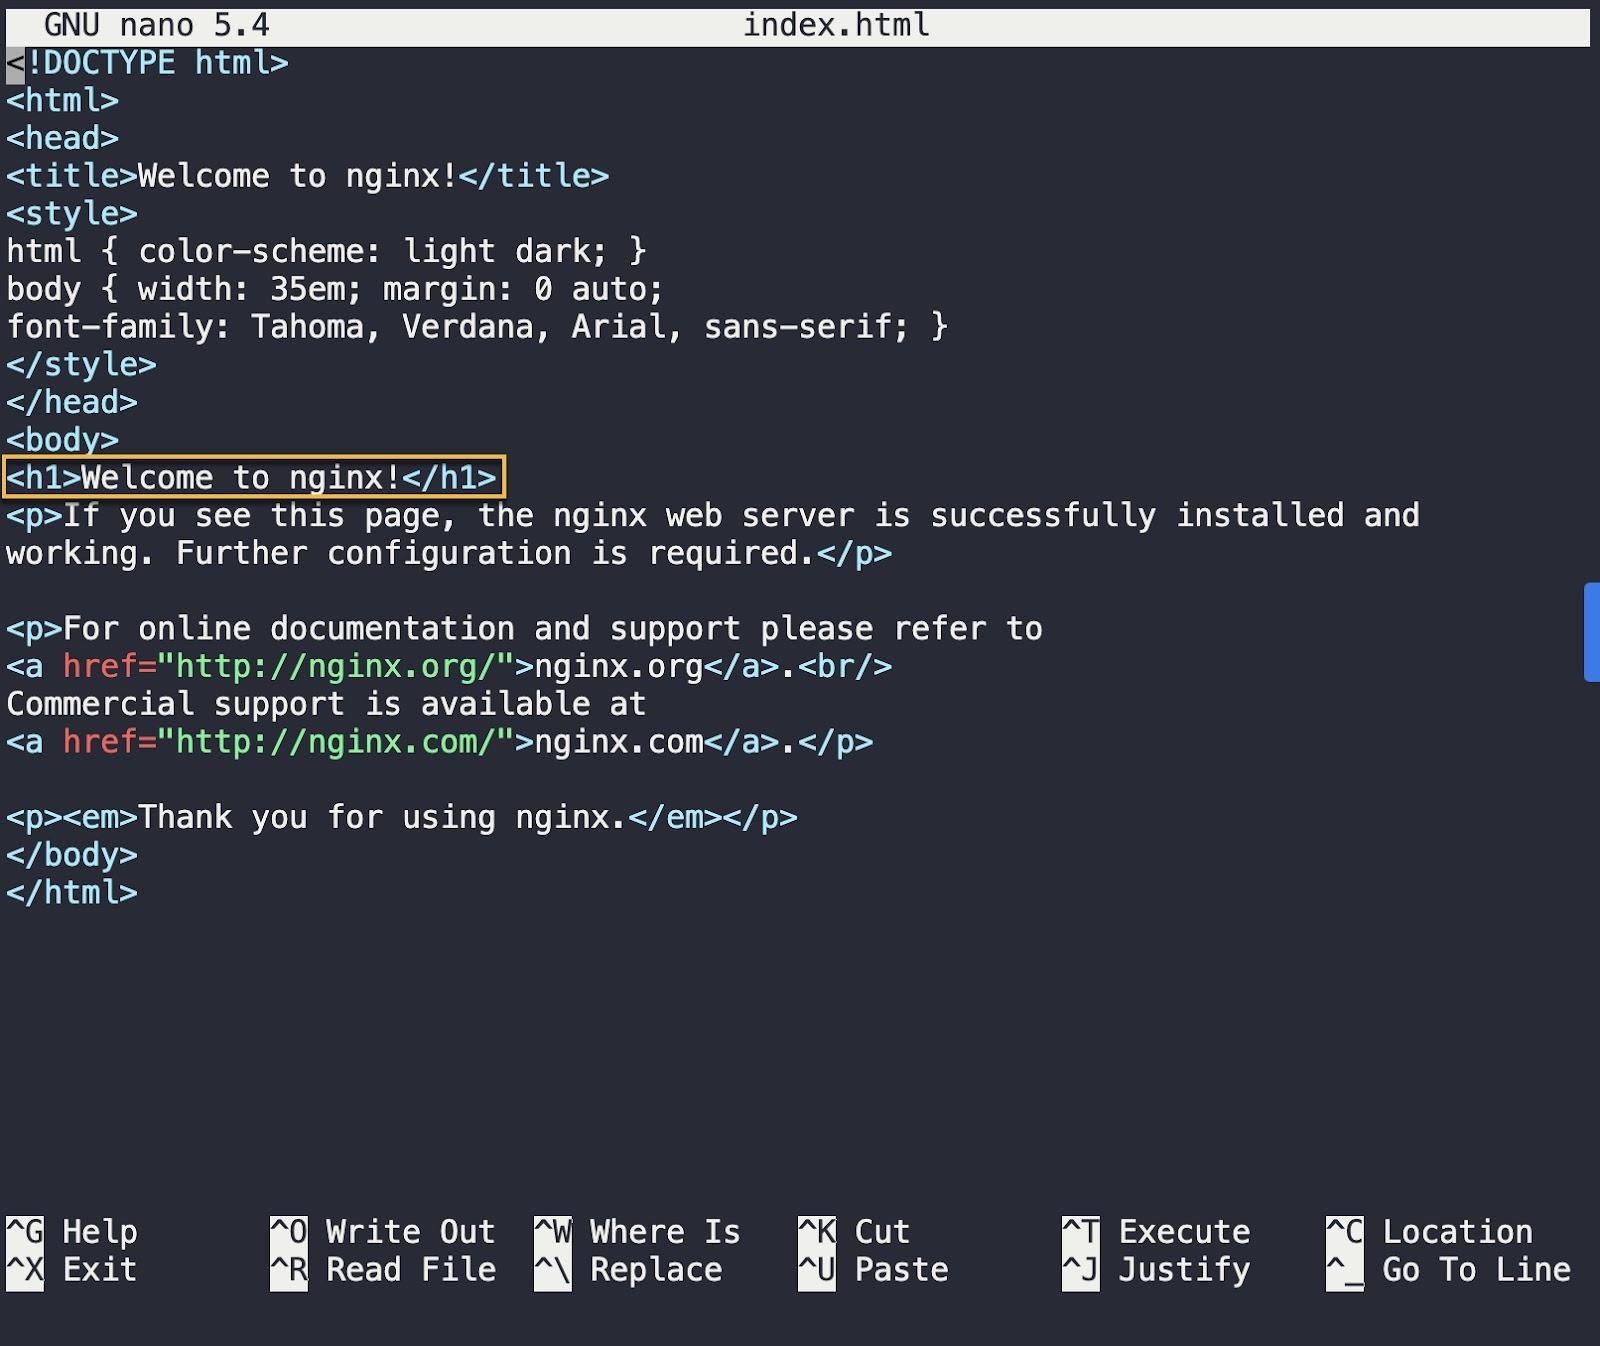
We now have an interactive shell session running inside our container. Remember what our objective is? Our objective is to change the default welcome message served by the "nginx" server. Before we do so, let’s first see the contents of the index.html file that nginx serves by default. This file is located at /usr/share/nginx/html/index.html and contains the default welcome message.
Run the following command on the command prompt of the Bash shell session:
cat /usr/share/nginx/html/index.htmlAfter executing the command above, you’ll see an output like this:
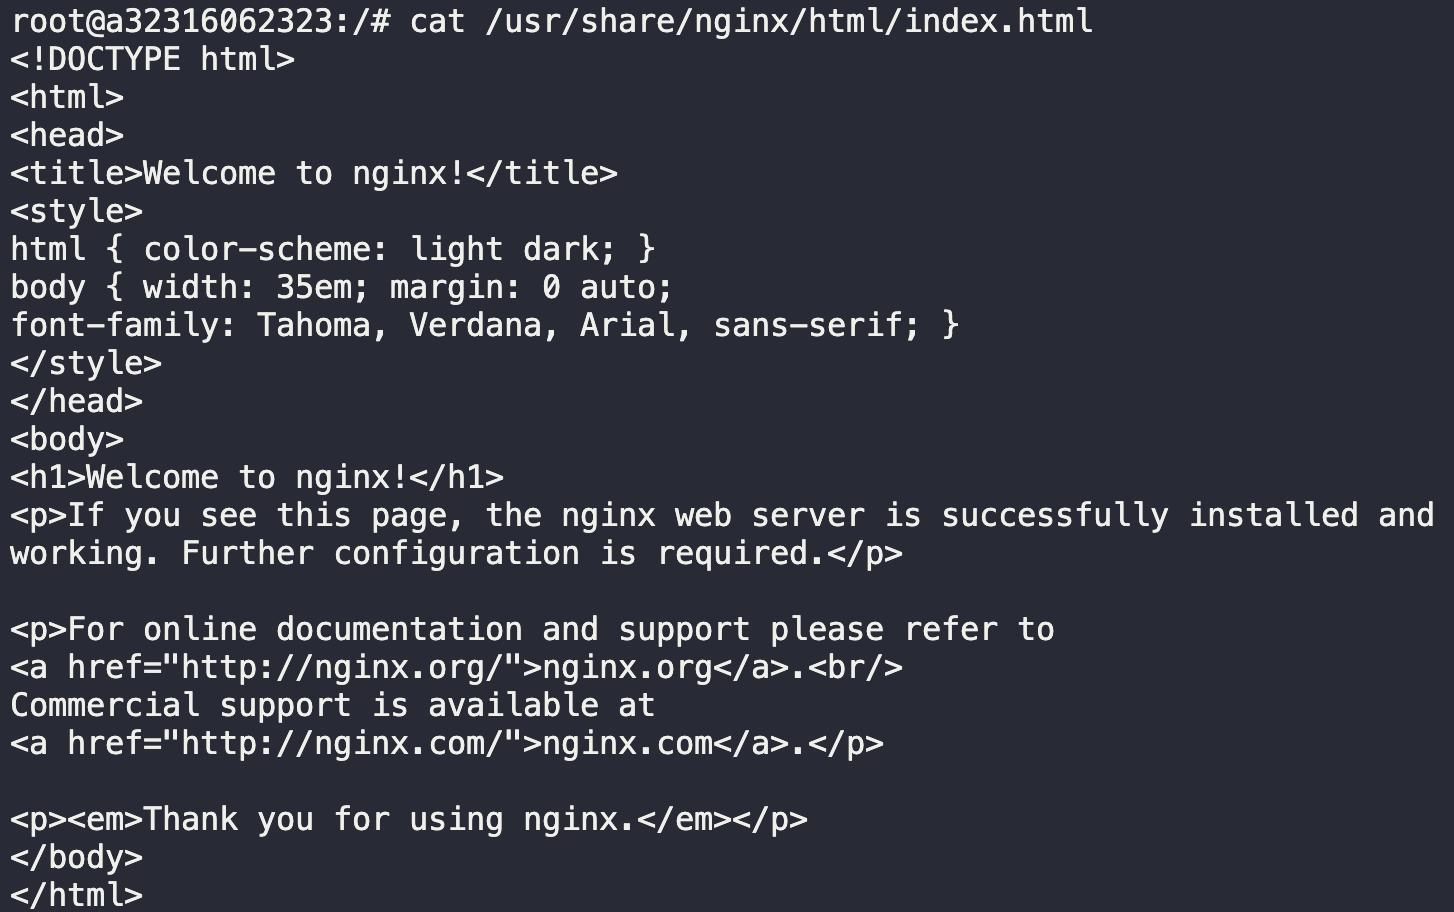
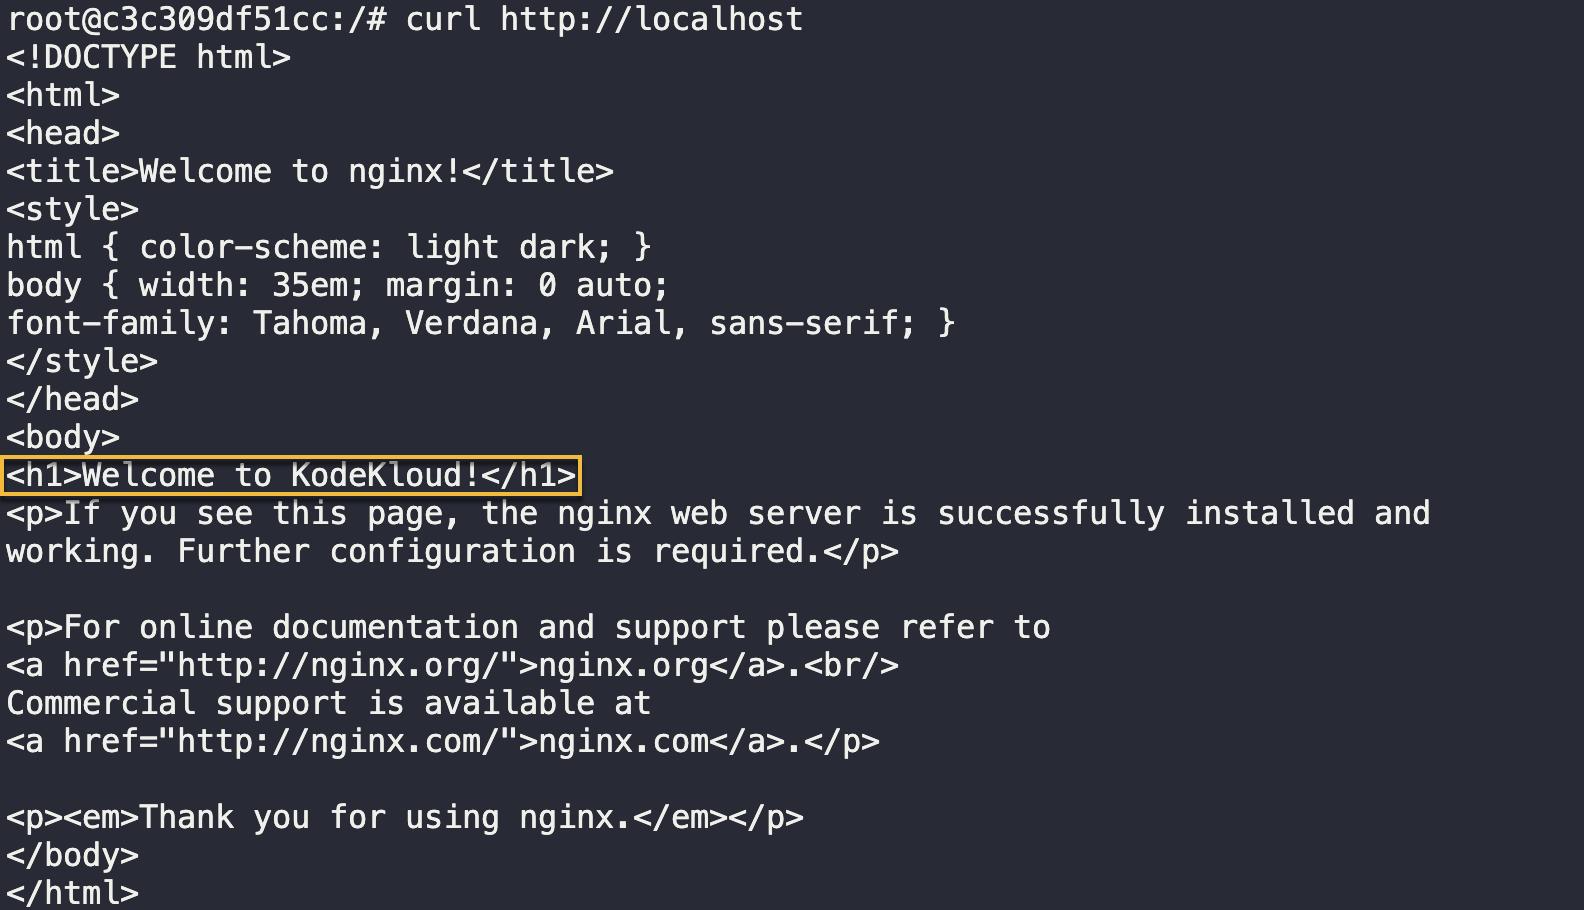
The contents of this file are what get displayed when accessing the "nginx" server. Let’s observe this in action. Run the command below:
curl http://localhostYou’ll get the following output:
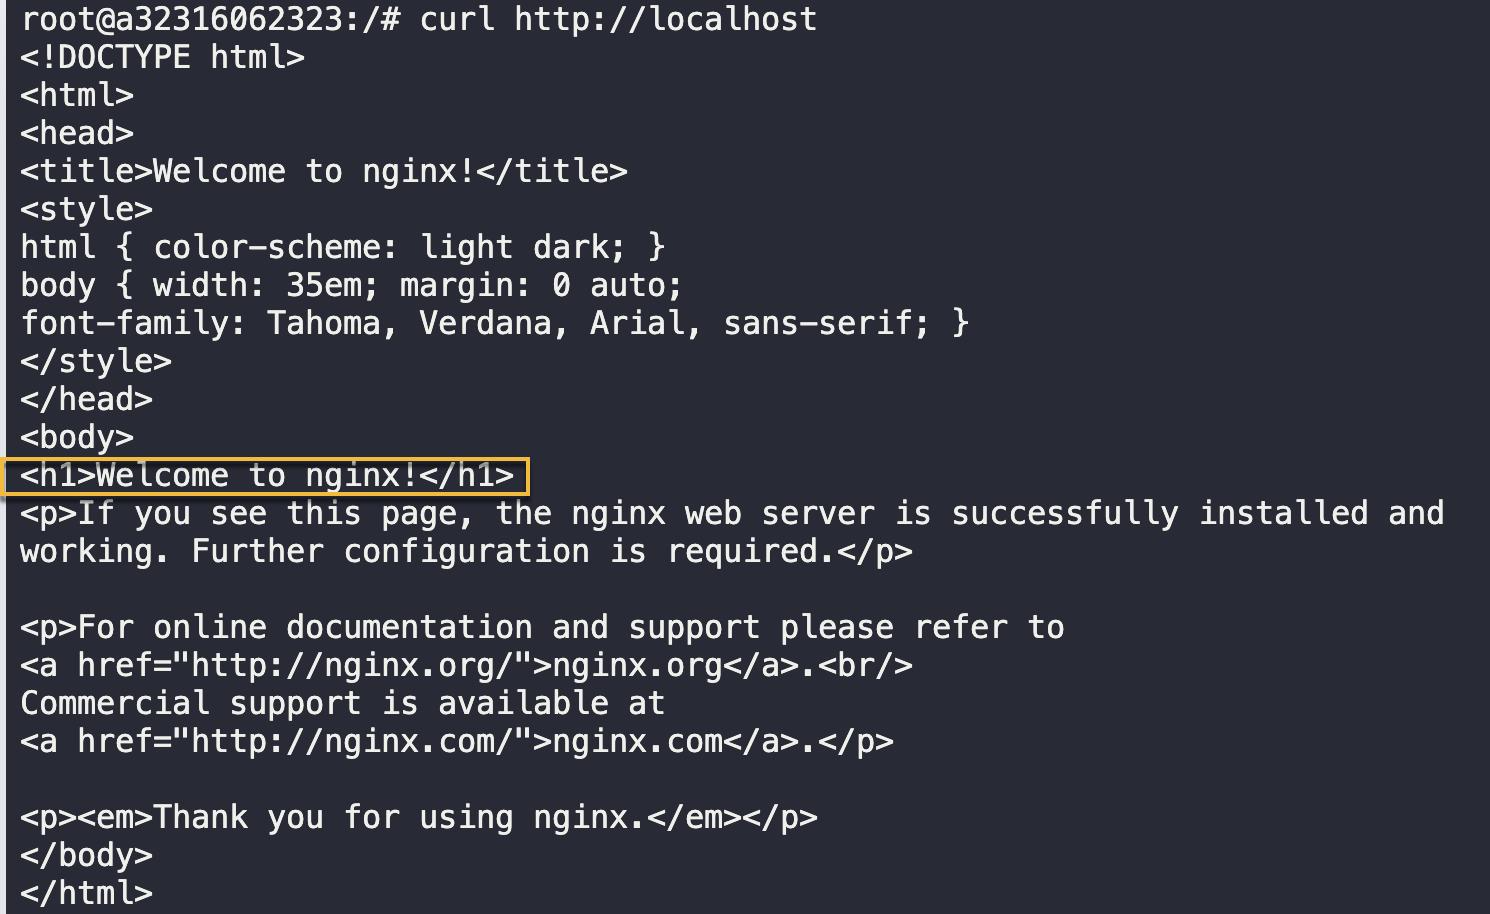
Notice the welcome message, which is enclosed within <h1> tags, as highlighted in the screenshot above. We’ll change this message to Welcome to KodeKloud!
Step 3: Modify the nginx configuration file
Run the following command to open the index.html file in the nano text editor:
nano index.htmlExecuting the command above resulted in the following output, which says: command not found.

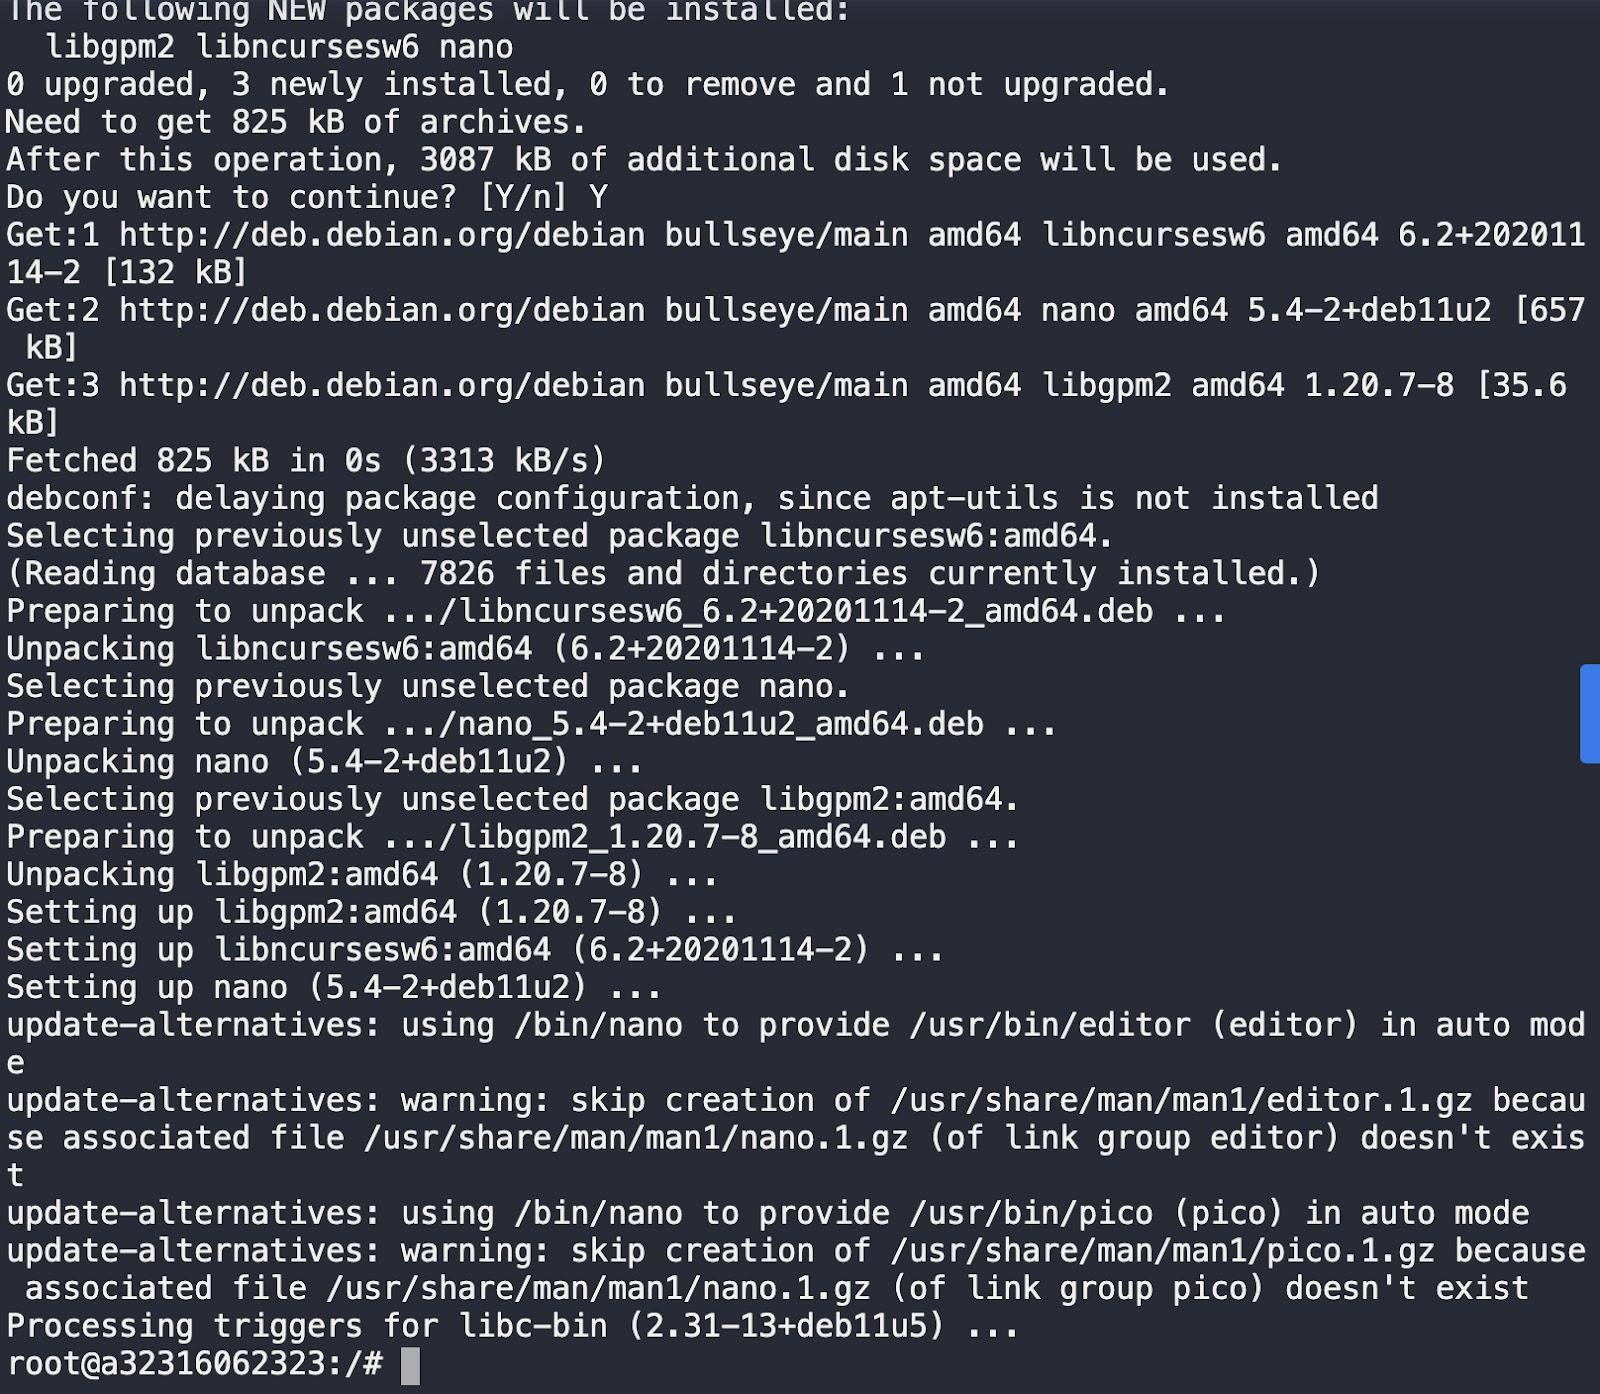
This means that the nano editor is not available in the container. Let’s install it using the apt package manager.
Note: apt is a package manager commonly used to manage software packages on a Linux system. It simplifies the installation, removal, and management of software packages.
First, run the apt-get update command to ensure that the container has the most up-to-date package information.

Then run the apt-get install nano command to install the nano text editor.
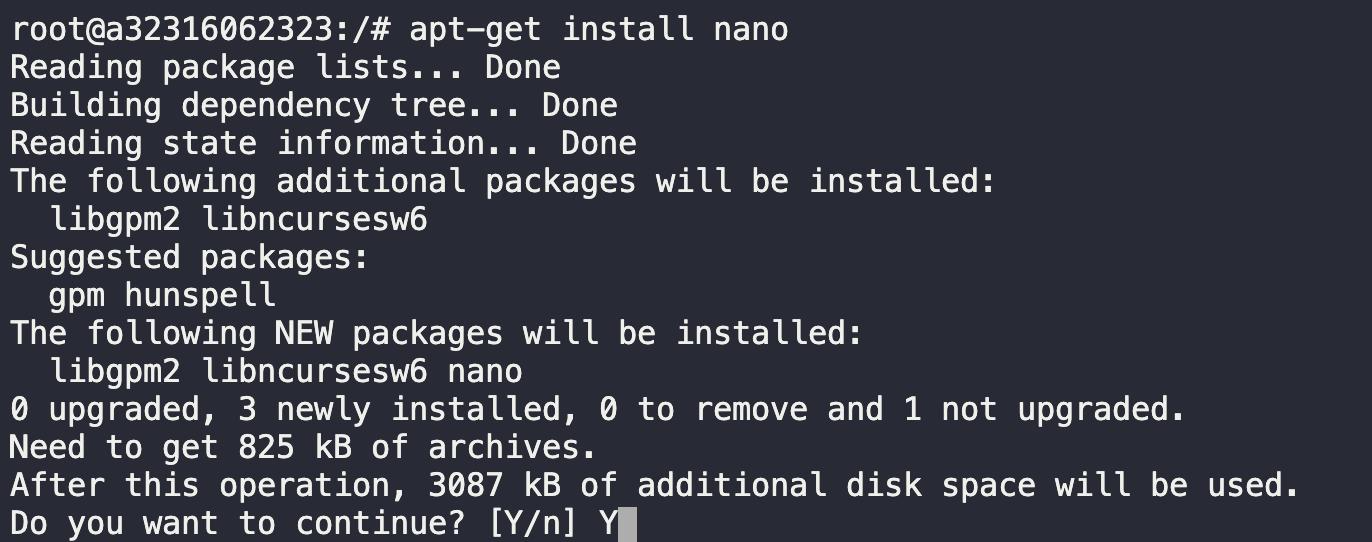
During the installation process, the system will prompt you with a message stating that additional disk space will be used, and it will ask for your confirmation to continue. Respond by typing Y and hitting Enter to proceed with the installation.
After the installation is complete, you’ll receive an output like the following:
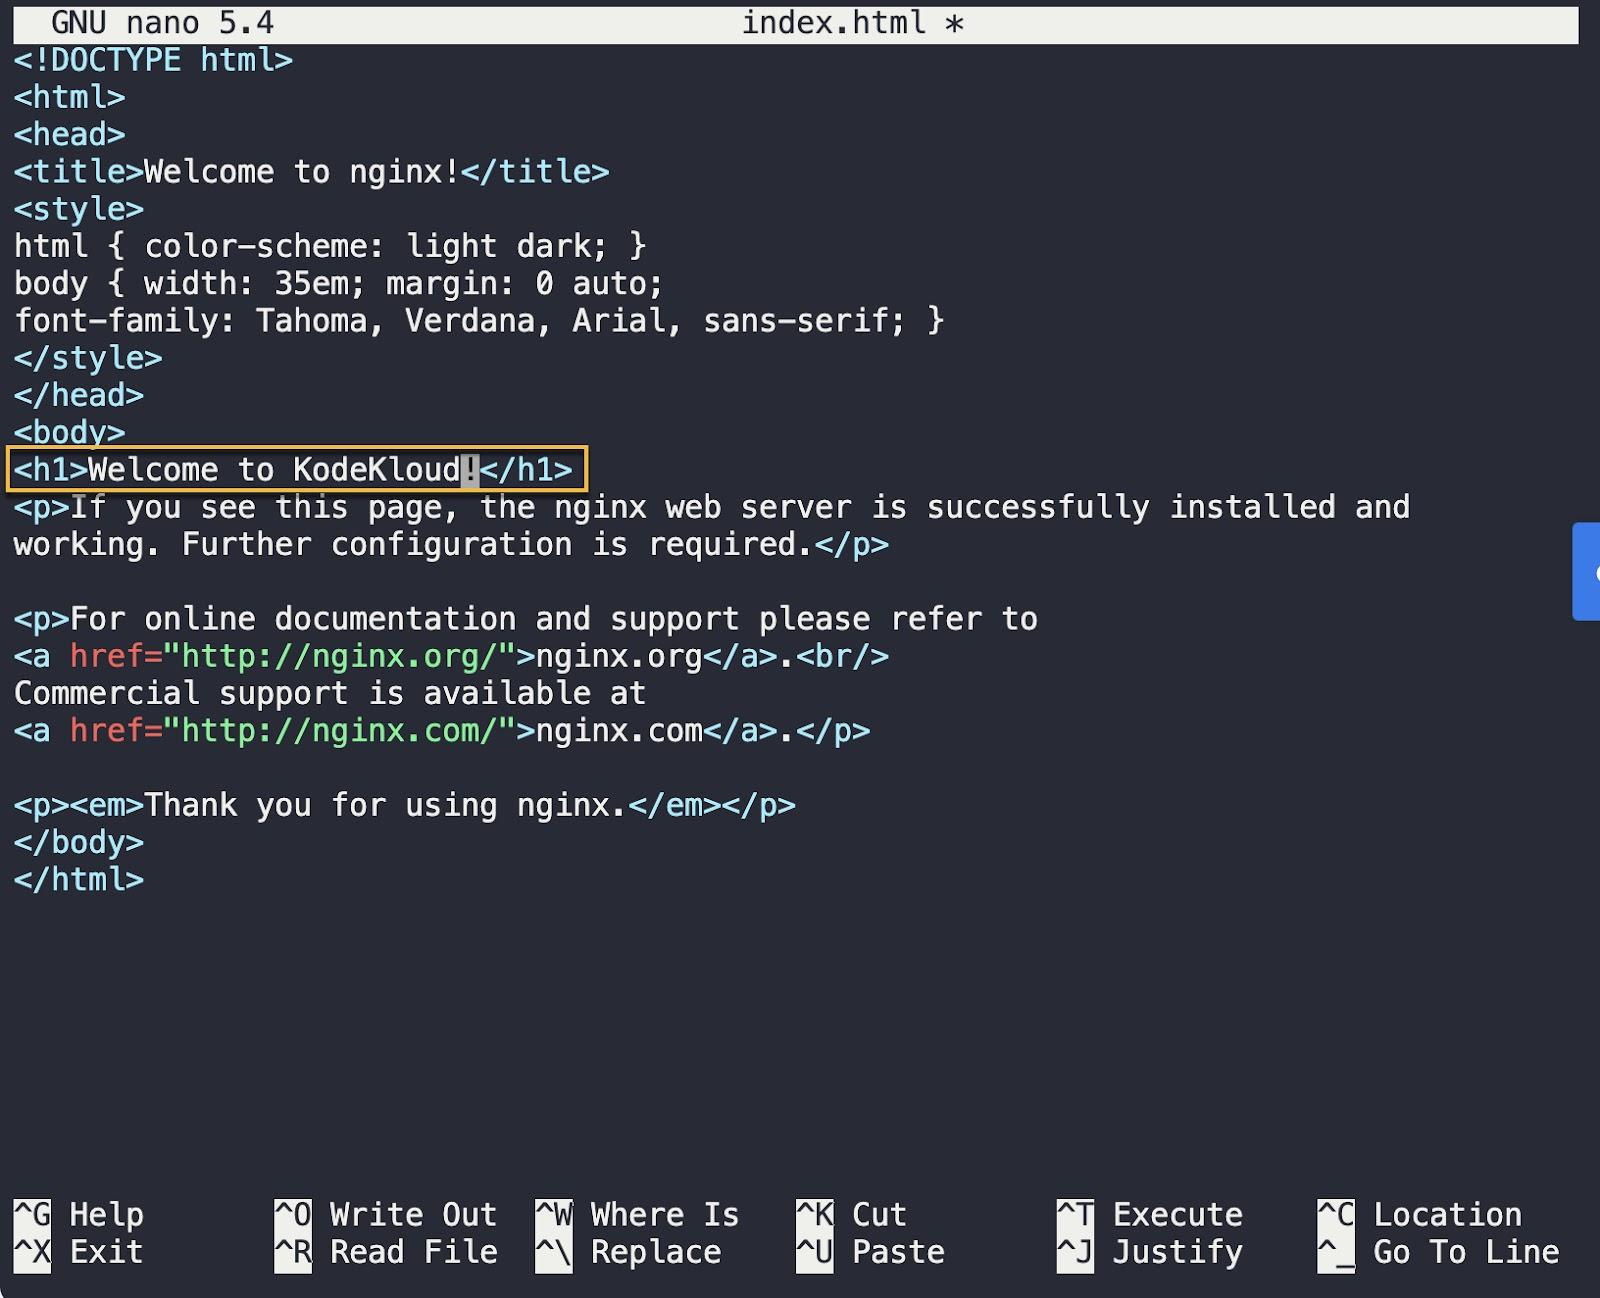
Now, run the following command to open the index.html file in the nano text editor:
nano /usr/share/nginx/html/index.htmlThe file will open in the nano text editor, as shown below:
Use your arrow keys to move the cursor and edit the message to say Welcome to KodeKloud!, or any other custom message you prefer. I have changed it to Welcome to KodeKloud! as shown below:
After you are done making the changes, press CTRL + O, and the editor will prompt you to confirm whether you want to write the changes to the index.html file. See the highlighted section in the screenshot below:
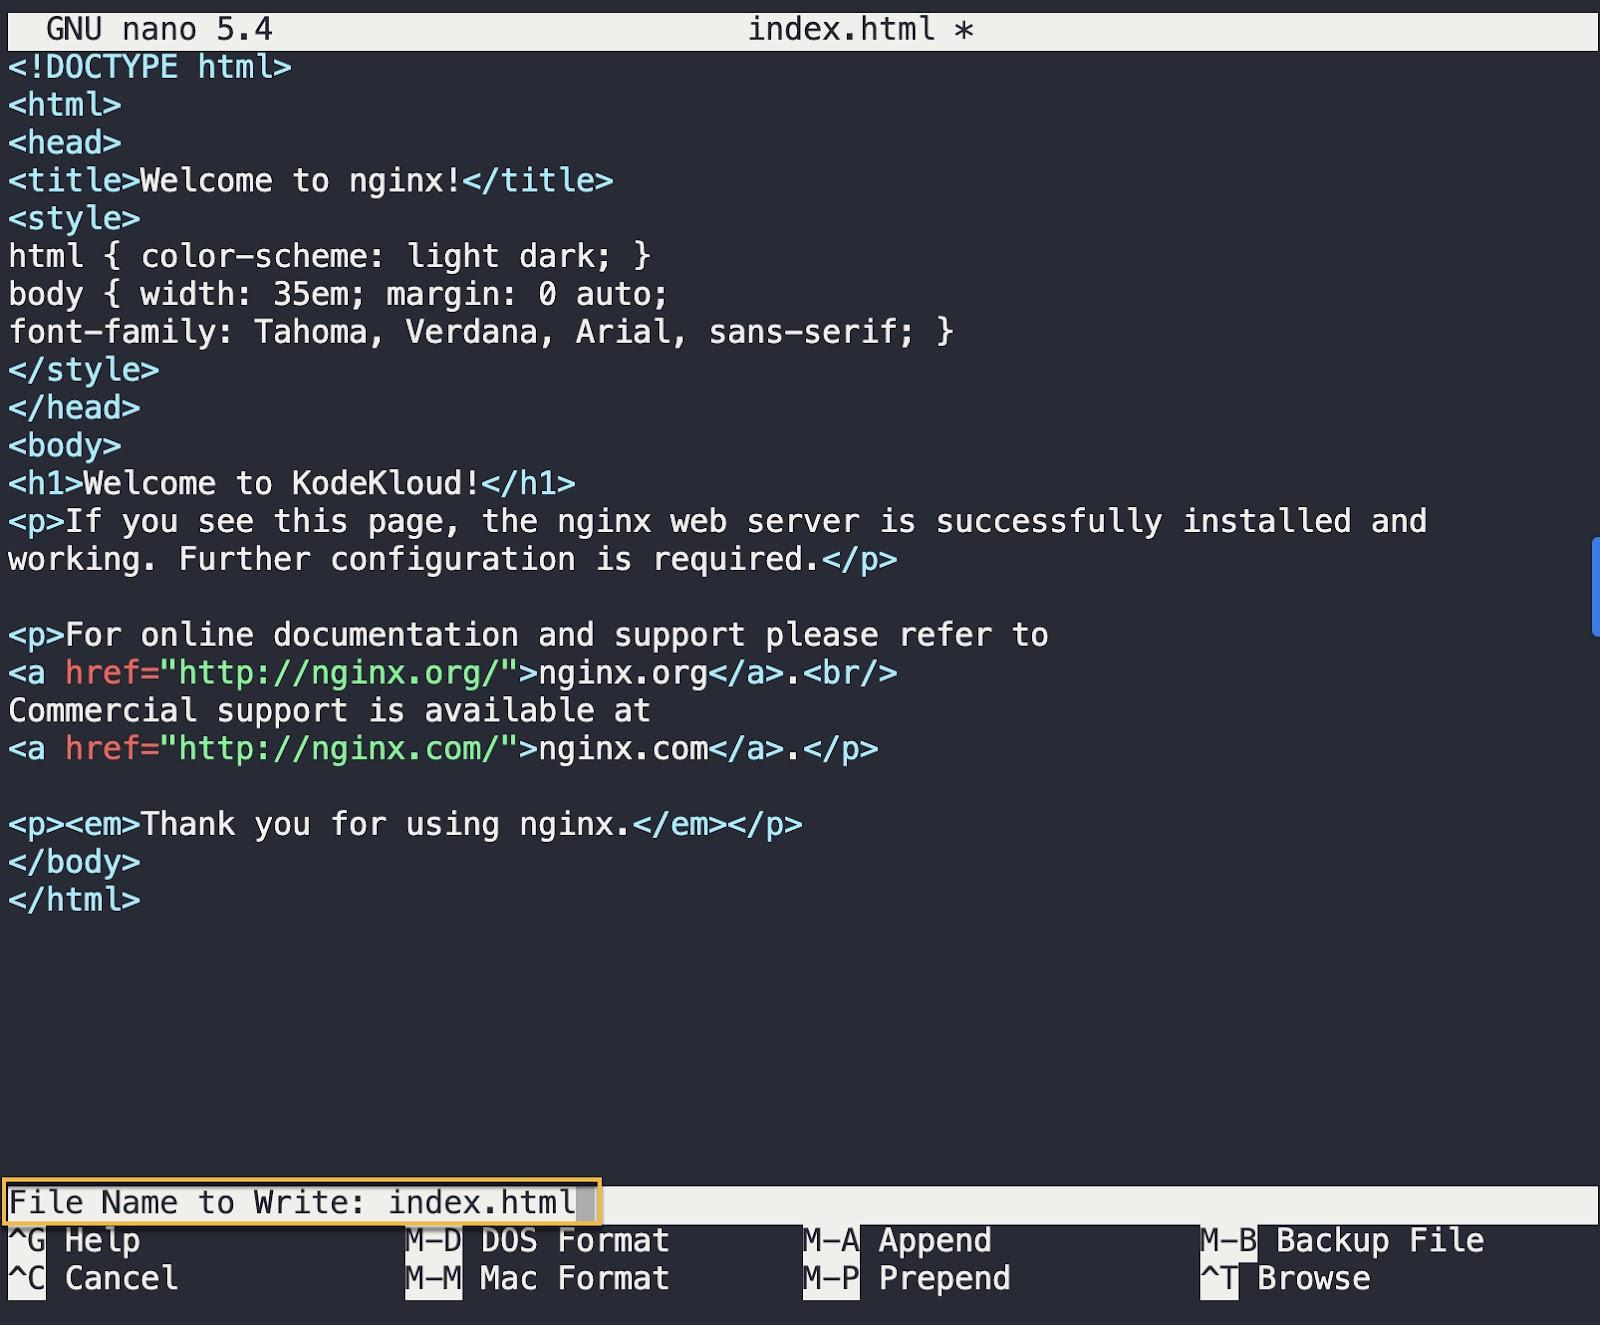
Hit Enter to write the changes. Then exit the nano editor by pressing CTRL + X.
Note: You can make any modifications to the index.html file as you wish. If you want to add additional text, be sure to use appropriate HTML tags for formatting.
Step 4: Exit the container
We have made the required changes to the "nginx" configuration file (index.html). we no longer need to be in the Bash shell session. You can exit from the session by pressing CTRL + D or typing exit and then pressing Enter. You'll be returned to the command prompt of your own computer.
#3 Commit the changes to create a new image
Once you have made changes to a container, you can commit those changes to convert the docker container to image format using the docker container commit command. Think of this command as making a commit in a version control system like Git.
Run the following command:
docker container commit -a "KodeKloud" -m "Changed default NGINX welcome message" mynginx nginx-kodekloudThis command will create a new Docker image named nginx-kodekloud from the modified mynginx container. Note that it's considered best practice to use the -a flag to sign the image with an author and include a commit message using the -m flag.
Executing the command above will give you an output like this:

Let’s verify that the new image has been created and is listed among the existing Docker images. Run the following command:
docker imagesYou’ll get an output as shown below:

You should see the nginx-kodekloud image listed, indicating that the image has been successfully created. You can now use this newly created Docker image to create containers as needed, just like you would with any other Docker image.
Let’s run the nginx-kodekloud image as a container using the following command:
docker container run -d --name=hello-nginx-kodekloud nginx-kodekloudThis command will create a container named hello-nginx-kodekloud using the nginx-kodekloud image, which includes the changes made to the "nginx" configuration file.
Running the command above will give you the following output:

Let’s verify that the hello-nginx-kodekloud container is up and running with the docker ps command.

As highlighted in the screenshot above, the container is running successfully.
Next, let’s use the curl command to send a request to the container and verify that the "nginx" server is serving the modified welcome message. But before we can run any command, we’ll have to get a shell to the running container first. Run the following command:
docker exec -it hello-nginx-kodekloud /bin/bashYou’ll get an output like this:

We have an interactive shell session running inside the container. Now, run the command, curl http://localhost and you’ll see an output like this:
You should see the modified welcome message (highlighted above) Welcome to KodeKloud!, confirming that the changes made to the "nginx" configuration file have been successfully committed to the new Docker image and reflected in the container created from that image.
Congratulations! You have successfully learned to create docker image from container modifications running the "nginx" web server.
If you're interested in learning more about Docker and how it can help you streamline your development workflow, be sure to check out the following Docker Learning path.

.webp)
Conclusion
In this blog post, you learned how to create a custom Docker image from a container. This method is useful when you want to save docker container changes and use them as a base for creating new containers. With this knowledge, you can now build any custom image you need to supercharge your workflows.
More on containerization:
- Why and How to Tag a Docker Image?
- What Are Docker Image Layers and How Do They Work?
- How Dockerfile Works
- Where Docker Images are Stored
- How to Fix ImagePullBackOff & ErrImagePull in Kubernetes
- Demystifying Container Orchestration: How Kubernetes Works with Docker
- How to Clear Docker Logs for a Container
- Security & Containerization
FAQs
Q1: What is the command to create an image from a running container?
The command docker commit <container_id> <new_image_name> is used to create a new image from a container’s changes. This effectively performs a docker commit operation, saving the current state of the container.
Q2: Does docker commit save data in volumes?
No, docker commit only saves changes made to the container's writable layer (the filesystem). Data stored in mounted volumes or bind mounts is not included in the new image.
Q3: Is creating an image from a container better than using a Dockerfile?
Generally, no. Using a Dockerfile is the recommended best practice because it documents the build process, makes it reproducible, and allows for easier updates. Creating an image from a container is best reserved for debugging or quick experiments.
Q4: Can I pause a container before committing changes?
Yes, by default, the docker commit command pauses the container while creating the image to ensure data consistency. You can override this behavior using the --pause=false flag if you need the container to keep running.
Q5: How do I view the history of my new image?
You can use the docker history <image_name> command to see the layers and commands that were used to create the image, including the commit you just made.


Discussion