


Highlights
- Containerization packages an application and all its dependencies into a single portable unit called a Docker image.
- Docker images ensure consistent behavior across different operating systems - “one image, many OS environments.”
- Deployments become drastically faster by avoiding OS-specific installers and dependency conflicts.
- You can create Docker images in two ways:
- Using a Dockerfile (automated, repeatable, CI/CD friendly)
- From a running container (useful for debugging and manual tweaks)
- Dockerfile instructions like FROM, WORKDIR, COPY, RUN, and ENTRYPOINT define how the image is built.
- After building the image, you can run the application in a container and expose it using port mappings.
- Docker images make application deployment scalable, reliable, and portable across any environment - cloud, VM, or local.
App deployment has become easier because of containerization. But what is containerization? Let's understand it using an example.
Think of a laptop box. It contains a laptop, a charger, a power cable, and a battery. The laptop is dependent on the charger and its accessories. This box has everything that the laptop needs to run. After packing it, we can ship and use it anywhere. Consider this section a simple Docker images tutorial that explains how images work and why they make deployments easier.
Docker containerization does the same thing for an app. It packages the application, or code, and all its dependencies into one image. The app can require additional software packages and libraries to run. So, everything that the app needs is packed into one image. This makes it portable and allows us to deploy it anywhere. The target operating system doesn't matter anymore. Normally, apps are dependent on what the operating system provides. But in this case, we provide everything it needs inside that image.
Why Create Docker images?
The traditional method of deploying apps can be troublesome. Imagine you have to deploy an app on five servers. How will you deploy it using the traditional method?
You need to download the app based on the operating system. For example, there will be different packages or installers for each OS. One for Ubuntu, one for CentOS, one for Debian, and so on. And you will also need to install the packages dependent on the app, and this can cause a problem in the servers.
Here are the key advantages of Docker images and containerization over traditional deployment.
- One image, many operating systems: Every application is packaged into a Docker image, and it can be used on multiple operating systems.
- Speed up the deployment process: The deployment process speeds up as you can directly copy or download the image to the server and create a container of the image to run the app.
This is why most teams containerize applications with Docker to simplify deployments across environments.
Try our Docker Images Lab for free

How to Create Docker Images?
A Docker image contains everything that is needed to run an app. Most times, we create a Docker image by using a parent image which serves as a base. Then we add our app and whatever else it needs on top of that. And you end up with the final image, built specifically for your app.
There are two ways of creating a Docker image:
- The first way is to create them using a Dockerfile. A Dockerfile contains a set of instructions that runs on top of the parent image and creates an intermediate container for every instruction. After completion of an instruction, the context is sent forward for the next instruction.
- The second way is by creating the image from a container. We create a container of an existing image. We run commands inside the container that can perform tasks like copy files, installing packages, etc. When we are making these changes to a container, its environment is different from what the container was created with.
When you run another container of the same image, these changes will not be present. To make these changes persistent, we do what is called “commit a container.” It creates an image from the container and makes all the changes persistent, so when you run a container of this new image, all the changes will be there.
Now that we understand Docker images, let’s see how to create Docker images step-by-step using two methods.
Prerequisites for Running a Docker Image
Before running or building images, let’s look at the prerequisites for Docker images. To run a Docker image, you can use KodeKloud’s Docker Playground. The advantage? You don't have to set up anything. With one click, you get almost instant access to a Docker environment that is accessible in your web browser.
Sign up to KodeKloud to get instant access to the Playground and the free course, Docker for absolute beginners.
Alternatively, you can use Docker Desktop. If you don’t have a Docker Desktop, make sure to download and install it on your system first. You can find the official installation guide by following this link.
Create a Docker Image Using a Dockerfile
To get started, we’ll clone a repository containing everything needed to build a Docker image from Dockerfile.
git clone https://github.com/thakarprathamesh/python-hello-world-program.gitThe snapshot below shows the files that are present in the git repository.
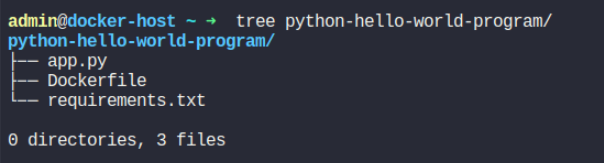
The Dockerfile is used to create the docker image using the first method. The app.py file contains code written in the Python programming language. The requirements.txt file contains all the Python dependencies to run that code. The app will return an answer when it receives an HTTP request, and we have configured the app to run on port 9999.
We’ll use the Dockerfile below to build an image of the Python app.
FROM python:alpine3.17
WORKDIR /app
COPY . /app
RUN pip install -r requirements.txt
ENTRYPOINT ["python", "app.py"]
Below is a breakdown of the common Dockerfile instructions (FROM, COPY, RUN, ENTRYPOINT) used to build the image.
FROM - This represents the parent image, and in our case, we are using Python 3.17 as the parent image.
WORKDIR - It sets the working directory for the commands that follow it.
COPY - This keyword is used to copy the contents into the image
RUN - Tells the image builder to run a certain command inside a shell (within the image's environment).
ENTRYPOINT - This tells Docker how to start the container. Here, we instructed Docker to run the code in our app.py file
To build the image, we use the docker build command, as shown below:
docker build . -t hello-python:1.0Let’s see if the image has been created by listing all the images using the command below:
docker imagesHere is the output we get after executing the command.

Perfect. Let’s now start a container based on this image.
In our Python image, we are running the code on port 9999. To access the app from the host, we need to publish a port, which involves mapping a host port to the container port.
We will do it by using the -p flag in the docker run command. Here, we are mapping the host port 9998 to container port 9999. So you will be able to access the app from the 9998 port of the host.
docker run -d -p 9998:9999 hello-python:1.0Now we can test the application using curl as shown in the snapshot below:

That’s how you create an image from a Dockerfile. Now, let’s create an image from a container.
Create a Docker Image from Container
In this method, we will create an image by running the container, making required changes to the container, and then committing the container to an image.
1. Create a container of the base image
Run the below command to create a container of the base image. We will make the changes in this container. Docker will pull the image if it is not present on the server.
docker run -itd --name python-base python:alpine3.172. Copy the required files into the container
We will need to copy the required files to the container using the docker cp command. We will copy the files from our local machine to a directory inside the container.
docker cp app.py python-base:/
docker cp requirements.txt python-base:/
3. Install the required dependencies
The code requires the Flask package to run (specified inside our requirements.txt file), and we install it using the pip command. We do this by telling Docker to execute the command inside this active container, as shown below:
docker exec -it python-base pip install -r requirements.txtLearn more about this from this blog: Docker Exec: How to Enter Into a Docker Container's Shell?
4. Create the image of the container
Now, we need to create an image of this container. To do that, we will use the "docker commit" command. While doing that, we also change the entry point of the image.
docker commit --change='ENTRYPOINT ["python","app.py"]' python-base python-hello:1.0The new image has been created. Let's run a container based on this image and see if our app.py file executes correctly. Like the first method, we will map a host port to the container port.
docker run -itd -p 9998:9999 python-hello:1.0Let’s deploy app using Docker image and verify that the application responds correctly.
The app returns the expected output after sending an HTTP request to it.
Enroll in KodeKloud to access our Docker Learning Path:

Also, checkout - How to Deploy a Docker Image on AWS ECS Cluster:
Conclusion
We created Docker images using two different methods. The first method (creating images from Dockerfile) is very helpful when you try to automate certain processes. For example, it greatly helps when you want to automatically build images and launch containers with the help of a CI/CD pipeline.
The second method (creating images from containers) brings you better clarity in the case of debugging. If you are facing any issues while building the image using Dockerfile, create a container of the base image and run the same commands that you were running in Dockerfile.
More interesting reads:
- How Dockerfile Works
- Top 15 DevOps Automation Tools You Should Learn in 2024
- 10 Essential DevOps Tools You Should Learn in 2024
- DevOps Tutorial for Beginners
- How To Learn Cloud Computing
- Demystifying Container Orchestration: How Kubernetes Works with Docker
- Container Security Best Practices in DevOps Environments
❓FAQs
Q1: Can I create Docker images without installing Docker on my machine?
Yes. If you don’t want Docker Desktop locally, you can still create Docker images using cloud environments like KodeKloud’s Docker Playground or GitHub Actions. This is helpful when you're learning how to create Docker imageson limited hardware or from a Chromebook.
Q2: Is it possible to reuse parts of a Dockerfile when building different images?
Absolutely. You can modularize Dockerfile instructions (FROM, COPY, RUN, ENTRYPOINT) using multi-stage builds or custom base images. This reduces duplication and makes large projects faster to build Docker images.
Q3: Why do some companies prefer Dockerfile builds while others use docker commit?
Teams that need automation, code review, and CI/CD rely on building a Docker image from Dockerfile for consistency.
But in rapid prototyping, experiments, or incident debugging, engineers may generate a Docker image from containerusing docker commit container to image because it captures environment changes instantly.
Q4: How do I know if I should containerize an application with Docker in the first place?
You should containerize an application with Docker when you want predictable deployments, portability, or need to run multiple versions of the same app. If your workloads require scaling, automated testing, or microservices, the advantages of Docker images become even more beneficial.


Discussion