


Linux's open-source nature and flexibility have made it increasingly popular over the years. It is a stable and secure environment for developers, with a wide range of tools and applications to meet various needs. As cloud computing continues to rise and the demand for data privacy and security increases, Linux is becoming an attractive choice for many businesses and organizations worldwide.
In this article, we will see how to access a Linux system, located locally or remotely, using the text-mode and graphical-mode methods.
How to Log Into a Linux System
We’re all used to logging in to apps or websites by providing a username and password. Logging into a Linux system is pretty much the same, so there’s not much mystery here. We’ll look at four ways to log in:
- Log into a local Linux system (local text-mode console).
- Log into a local Linux system (local graphical-mode console).
- Log into a remote Linux system (text-mode login)
- Log into a remote Linux system (graphical-mode login)
You’ll often hear terms like “console”, “virtual terminal”, and “terminal emulator”. It may be hard to understand why they are called this way. Nowadays, a console is just a screen where your operating system displays some text and it also allows you to log in or type commands. A terminal emulator is nothing more than a graphical app that runs in a window and does a similar thing to a console (i.e. shows you text output and allows you to type commands).
These terms come from the old days of computing. Computers were incredibly expensive, so a university may have had a single one available for their entire building. Multiple people could connect to it and do their work by using physical devices that allowed them to type text and commands and also display on a screen what is currently happening. These devices were consoles or terminals. So instead of buying 25 super expensive computers, you could have just one that 25 people could use at the same time.
Nowadays, consoles and terminals, in Linux, are usually things that exist in software, rather than hardware. For example:
- When you see Linux boot and a bunch of text appears on screen, telling you what happens as the operating system is loading – that’s the console.
- After a Linux machine has booted, if you press CTRL+ALT+F2 on the keyboard, you’ll see a virtual terminal (vt2).
- If you have Linux installed on your desktop, with a graphical user interface, when you want to type commands you open up a terminal emulator.
Let’s move back to logging in. In practice, most often you’ll log in to remote Linux systems. But let’s start with the less common scenarios.
Logging into Local Linux Systems
Local is just a tech word for “something that's in front of you” or “something you can physically access”. A computer on your desk is local. A server running on Google Cloud is remote.
Local GUI
Usually, when Linux is installed on servers, it is installed without GUI (Graphical User Interface) components. There’s no mouse pointer, no buttons, no windows, no menus, nothing of that sort, just text. But you might sometimes run across servers that include this GUI. Logging in is super easy, as it’s all “in your face”. You’ll see a list of users you can choose from and you can then type your user’s password.
Don’t forget to log out when you’ve finished your work.
Local Text Console (or Virtual Terminal)
If the device has the typical server-oriented Linux OS installed, without any GUI components, logging in (locally) is also easy. You’ll usually see something like this on your screen:
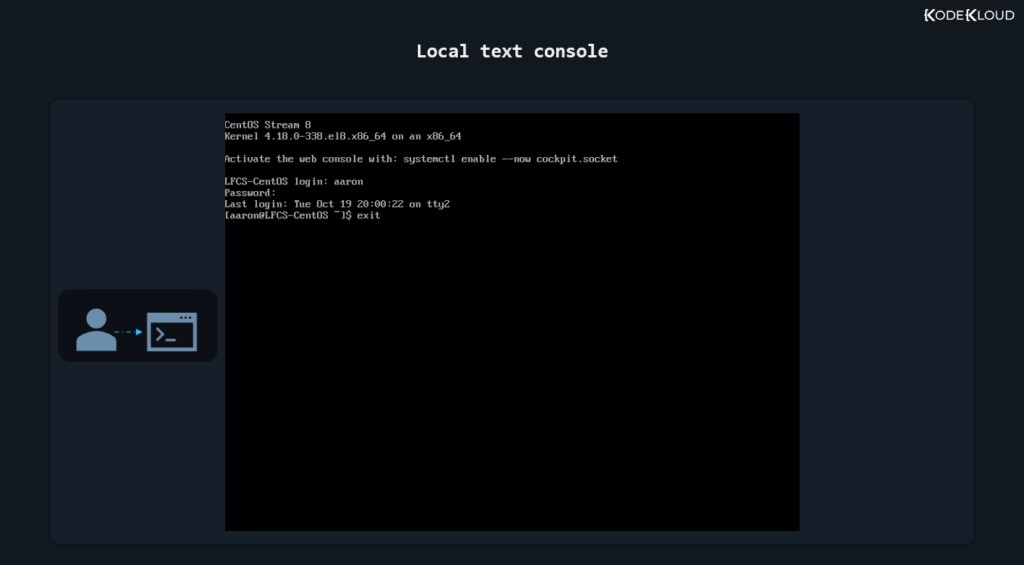
There’s no list of users this time, but you can just type your username and then your password. Note that as you type the password no text is displayed. If you’ve already done this a few times in the past, it will be no surprise. But for someone doing it for the first time, it might be misleading, giving the impression that the password is not accepted, or received, or something along those lines.
It’s no issue. And if you type something wrong, you can actually press backspace to delete the last character you mistyped. Or you can press backspace multiple times to delete the whole password and type it again.
When your work is done, you should type the command below to log out.
exitLogging into Remote Linux Systems
Most of your logins will be to remote systems as very few companies keep servers on-site these days, preferring to use the cloud.
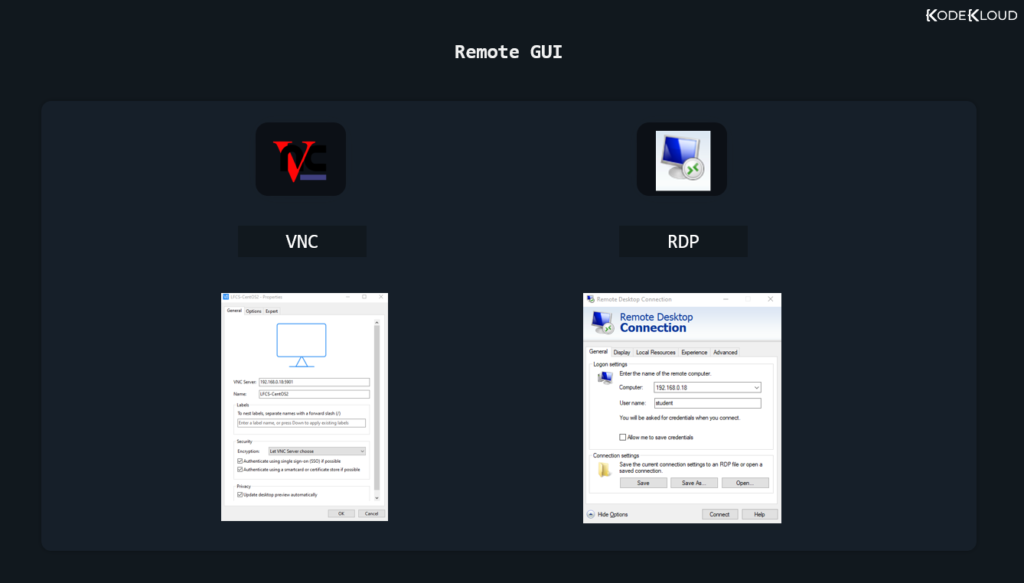
Remote GUI
Again, most Linux operating systems running on servers will have no GUI components installed. But you will sometimes run into exceptions. Connecting to a remote server, via its graphical user interface is slightly more tricky. First of all, there is no standard set in stone. Whoever configured that server chose their preferred way of dealing with these remote graphical logins. They could have chosen to install a VNC (Virtual Network Computing) solution. In this case, you’d need to download the proper VNC client (also called “VNC viewer”) to connect to it. This might be TightVNC, RealVNC, or something else entirely. It all depends on the VNC server running on the remote system and what VNC clients your local operating system supports.
If the administrator of that server wanted to let Windows users connect easily, it might mean that they used a solution allowing for RDP connections (Remote Desktop Protocol). This means you can just click on the Windows start button, type “Remote Desktop Connection”, open that app, and then enter the username and password you’ve been provided.
Whatever it might be, connecting to a remote graphical console is pretty easy. It all boils down to downloading the application that lets you do that, entering the remote system’s IP address, followed by a username and a password.
Finally, we get to the most common way you’ll log into a Linux system.
Logging into Remote Systems with SSH (text-mode logins)
Initiating a text-based remote connection to a Linux system is pretty standard. That’s because almost every Linux server uses the same tool that allows for remote logins: the OpenSSH daemon (it is a program that runs in the background, on the server, all the time).
SSH comes from Secure Shell. Until SSH, something called telnet was the standard. |Telnet was highly insecure as it did not encrypt communication between you and the server you were connecting to. This meant that anyone on the same network with you could steal your Linux user password and see everything you did on that server, during your telnet session.
The SSH protocol uses strong encryption to avoid this and the OpenSSH daemon is built carefully to avoid security bugs as much as possible. OpenSSH is used by millions of servers and has stood the test of time, proving to be very hard to hack. For these reasons, everyone happily uses it and trusts that it can do a pretty good job at only letting authorized people log into their operating systems while keeping bad people out.
In case you’re following along on your virtual machine, log in locally (directly from the virtual machine window) and then enter this command:
ip aYou’ll see what IP your machine uses.
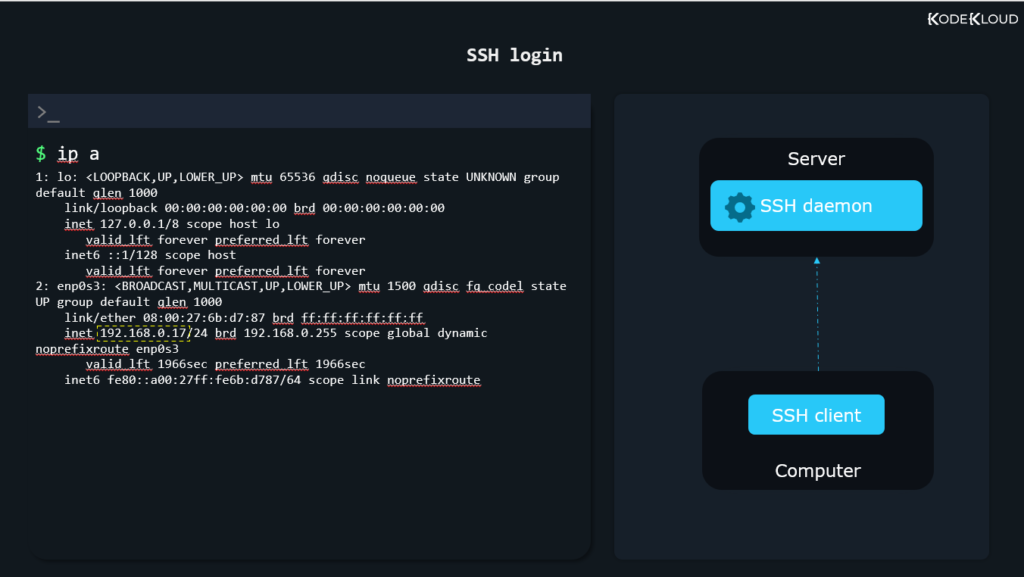
We’ll use this IP, 192.168.0.17, to simulate a situation where we have a server in a remote location.
Now to recap. We have an SSH daemon (program) running on the server. This listens for any incoming connections. To be able to connect to this remote SSH daemon, we’ll need something called an SSH client. This client will run on our current laptop/desktop computer.
MacOS systems and Linux-based operating systems, such as Ubuntu, already have an SSH client preinstalled. If your computer/laptop has a Windows operating system on it that is less than Windows 10, you need to install an SSH client like PuTTY. On Windows 10, this is no longer necessary as an SSH client is also preinstalled. If you’re on MacOS or Linux, open a terminal emulator window. If you’re on Windows, click the Start Menu and type “cmd” to open up Command Prompt.
To connect to a remote Linux system through SSH, type:
ssh alex@10.11.12.9In the command above, replace “alex” with the actual username you created inside your Linux OS running in the virtual machine. Same with the IP number.
Enroll in our Linux Basics Course to learn more Linux concepts. You'll learn how to use shells and package managers. You’ll also learn important Linux concepts such as networking, security, and storage.


Conclusion
You have seen how to log into a local or a remote Linux system using either a graphical mode or a text mode. This will give you the flexibility you need to access a Linux server via any mode in any environment. Also, understanding how to access and navigate a remote Linux system, especially via the text mode console, is a valuable skill to have as a DevOps engineer.
More on Linux:
- How to Unzip Files to a Specific Directory in Linux
- How to List All Groups in Linux
- How to Fix “host key verification failed” in SSH
- LFCS vs RHCSA: Which is Best For You? | Linux vs RedHat
- 4 Commands to Check File Size in Linux
- How to Make a Bash Script File Executable in Linux
- How to Count the Number of Files in a Directory in Linux
- How to Run Shell Script (.sh) Files in Linux


Discussion