


Highlights
- Terminology Check: Understand the core differences between an "unused" image (not attached to a container) and a "dangling" image (an image with no repository name or tag).
- Disk Management: Learn how to quickly free disk space Docker environments consume over time by clearing out old image layers.
- Targeted Deletion: Master how to selectively remove dangling images versus wiping out all unattached images.
- CLI Mastery: Utilize Docker prune images commands (like
docker image prune -a) to safely and efficiently automate your docker image cleanup. - Broader Cleanup: Discover when to use a broader command like docker system prune to clean up networks and stopped containers in addition to images.
A Docker image is a static file that contains everything needed to run an application, including the application code, libraries, dependencies, and the runtime environment. In this blog post, we'll learn how to Docker remove unused images and perform a thorough docker image cleanup. But first, let's understand what these images are.
What Is an Unused Image in Docker?
An unused image is an image not currently used by any container (stopped or running). For instance, if you pull an image using the docker pull command, but don’t start any containers using that image; the pulled image would be considered an unused image.
What Is a Dangling Image in Docker?
A dangling image is an image that neither has a repository name nor a tag. It appears in Docker image listings as <none>:<none>.
Note: In <none>:<none>, the first <none> refers to the repository name of the image, and the second <none> refers to the tag of the image.
Here’s an example to help you understand why and how a Docker image becomes a dangling image.
Let’s say you build an application image and tag it as my-image:v1. Then, you make some updates to the image and build a new image, but with the same tag. Docker will remove the tag from the previous image and then assign it to the new image. As a result, the previous image that lost its tag becomes a dangling image. It is still present in the local Docker image repository but is no longer tagged with any repository name or specific version and, therefore, appears as <none>:<none> in Docker image listings.
Don’t worry if this explanation doesn’t make complete sense at this point. The concept of dangling images will become clearer in an upcoming section where we’ll create a dangling image ourselves.
Now that you understand dangling and unused images in Docker let’s learn how to remove them.
Prerequisites
To follow along with the examples in this post, we recommend using KodeKloud’s Docker playground. This playground will provide you instant access to a Docker environment where you can run and manage containers. No need for you to install any software. With just one click, you'll be ready to start working with containers.
Alternatively, you can use Docker Desktop. If you don’t have Docker Desktop, you can download it from here. You can find the official installation guide here.
Note that the commands provided in the examples below have been tested on KodeKloud’s Docker playground.
Try the Docker Images Lab for free

Creating Unused and Dangling Images
Before we learn how to remove dangling and unused images, we must create them first.
In your KodeKloud’s Docker playground terminal, run the following command:
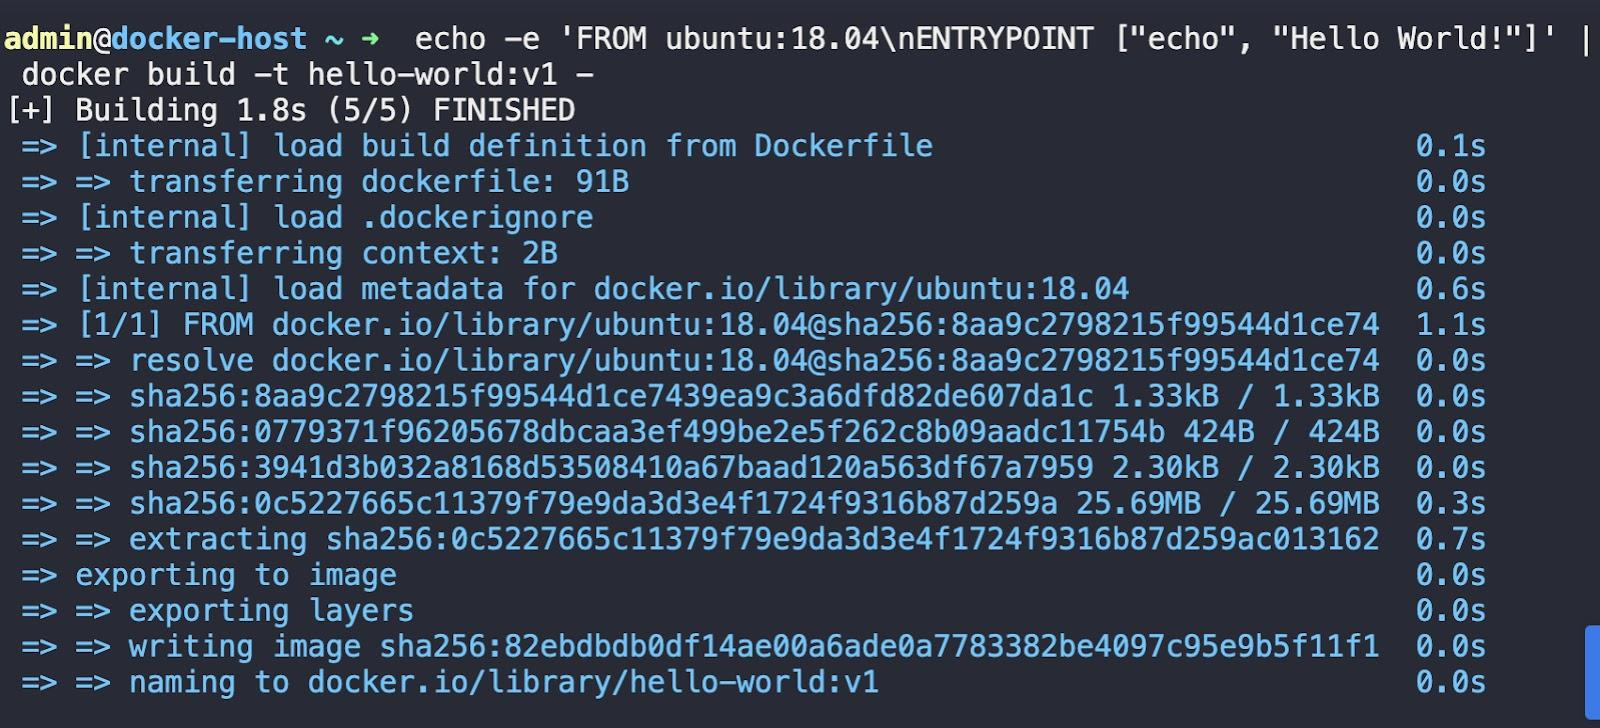
echo -e 'FROM ubuntu:18.04\nENTRYPOINT ["echo", "Hello World"]' | docker build -t hello-world:v1 -Note: If you prefer to use a Dockerfile instead, open your code editor, create a new file named Dockerfile (the file must be named Dockerfile), and add the following content to it:
FROM ubuntu:18.04
ENTRYPOINT ["echo", "Hello World"]
Make sure you are in the same directory as your Dockerfile. Then, run the following command to build an image named hello-world:v1 (you can name the image anything you prefer):
docker build -t hello-world:v1 .The command above creates a Docker image that prints Hello World! to the terminal when it is run as a container. Note that the image is tagged with hello-world:v1. The echo command prints the contents of the Dockerfile to the terminal as text.
The | symbol (the pipe operator) then pipes this text output to the docker build command, which then builds the Docker image. The -e flag interprets \n as a newline character, not a literal string. The - flag at the end of the command indicates that the build context is the output of the echo command, not a local directory.
Running the command above will give you the following output:
Let’s verify that the image has been created by running the following command:
docker image ls 
We see an image tagged with hello-world:v1, indicating that the image has been built successfully.
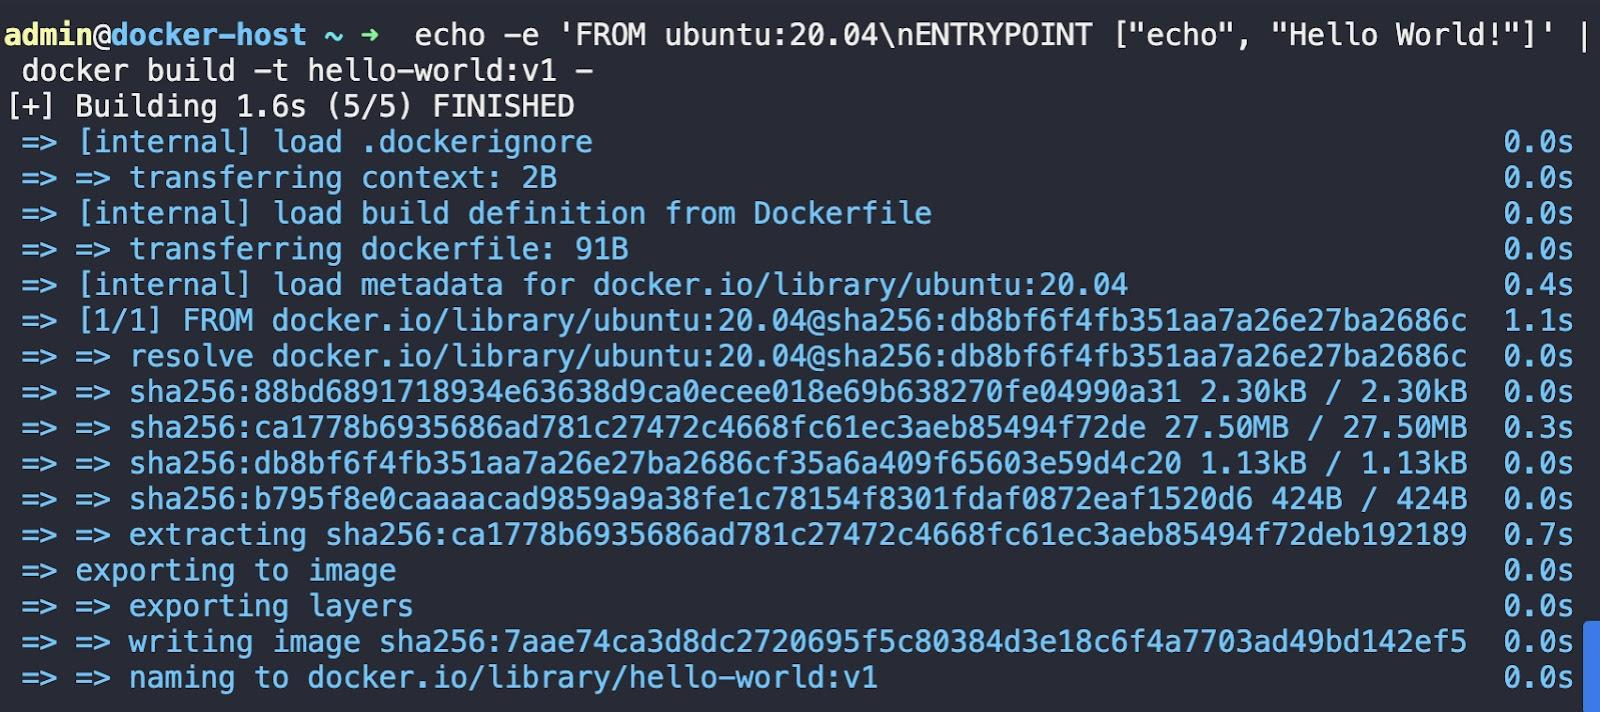
Now, let's say you want to update the version of the base image from Ubuntu 18.04 to 20.04 and build a new image with the same tag (hello-world:v1). To achieve this, run the following command:
echo -e 'FROM ubuntu:20.04\nENTRYPOINT ["echo", "Hello World"]' | docker build -t hello-world:v1 -If you are using a Dockerfile, replace the code added in the previous step with the following code:
FROM ubuntu:20.04
ENTRYPOINT ["echo", "Hello World"]
Then run the following command:
docker build -t hello-world:v1 .You’ll get the following output:
Now, run the following command to list the images on your system.
docker image lsYou’ll see an image with both the repository name and tag set as <none>, as seen in the output below:

This image is known as a "dangling" image. This is the image that we first built using the Ubuntu "18.04" base image. Since we later built a new image with the same tag (hello-world:v1) using the Ubuntu "20.04" base image, Docker automatically removed the tag from the original image and assigned it to the new image. As a consequence of this tag reassignment, the original image lost its connection to any repository or tag and therefore is considered a dangling image.
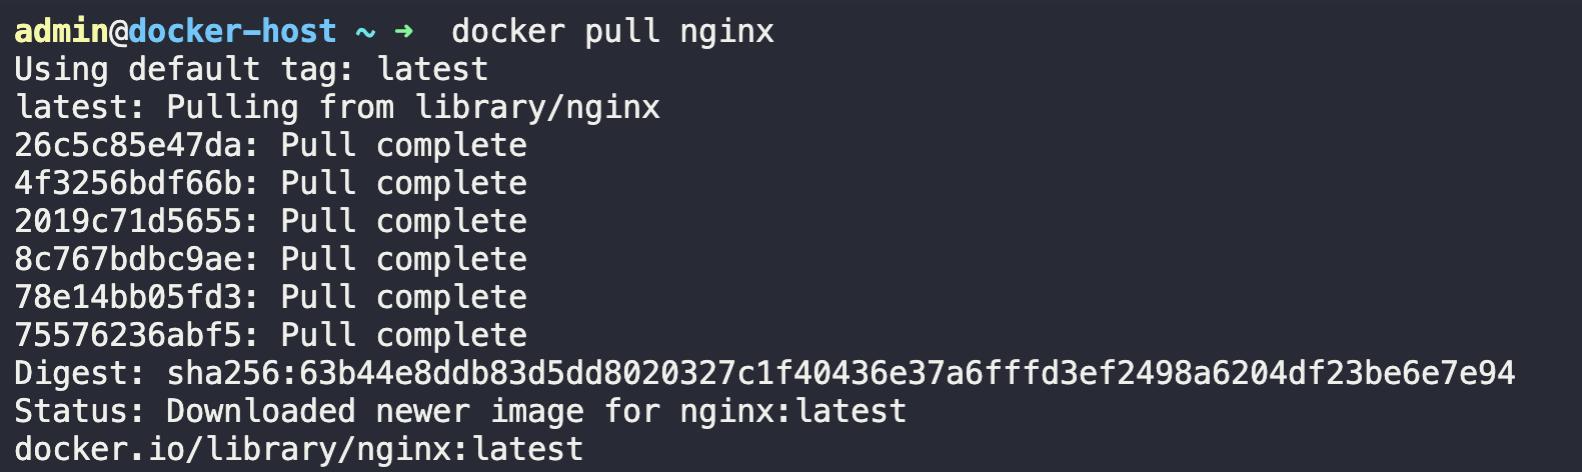
We now have a dangling image in our system. Next, let’s pull two popular web server images - nginx and httpd - from Docker Hub.
Run the following command:
docker pull nginx You’ll see the following output, which means that the nginx image has been downloaded and is now available locally on our system.
Next, run the docker pull httpd command to download the httpd image. You’ll see an output like this:
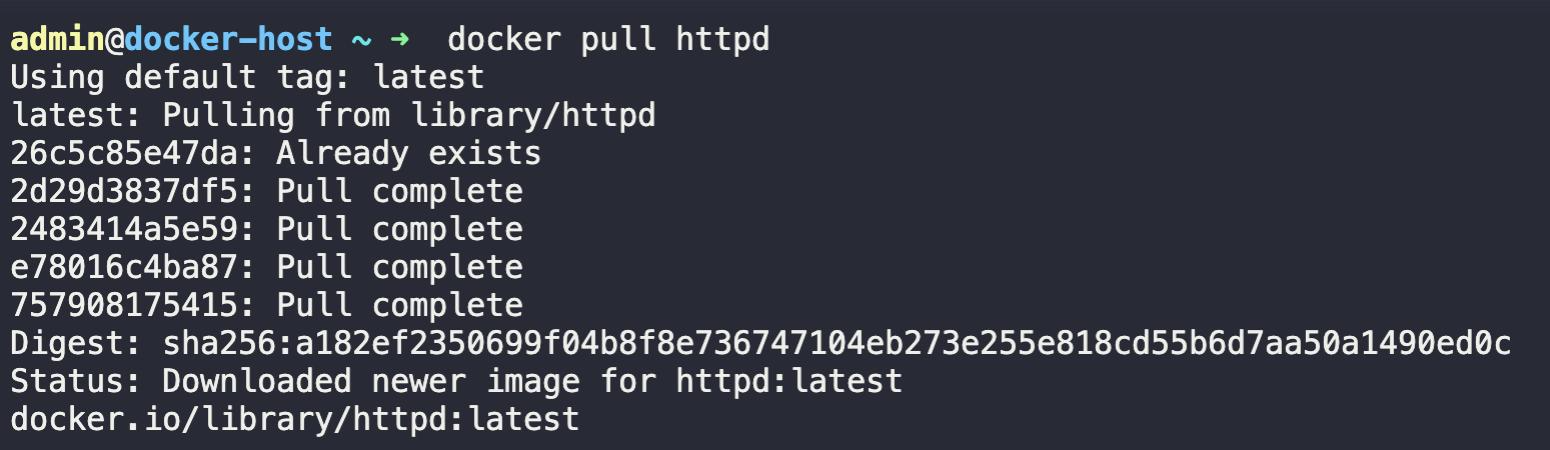
You can see that the httpd image has been downloaded and is now available locally.
Now, let’s list all the images in our system by running the following command:
docker image ls
As you can see, we have four images available in our system, but only one of them, with the id 82ebdbdb0df1, is a dangling image. Also, note that, currently, none of the images is associated with a running or stopped container. This means all four images are unused images.
To ensure that at least one image is associated with a running container, let’s start a container from the nginx image. To do this, run the following command to start a container named mynginx:
docker container run -d --name=mynginx nginxRunning the command above will give you the following output:

The long string you see printed in the terminal is the container ID. Let’s verify that the container is running using the following command:
docker ps
As you can see, the mynginx container is up and running successfully. This means that the nginx image is now attached to the mynginx container and is no longer an unused image.
To summarize, we have four available images: one is a dangling image, one is a used image (nginx), and the remaining two are unused images.
How to Remove Dangling Images?
If you want to remove dangling images specifically, run the following command:
docker image prune This command will issue a prompt asking whether you want to remove all dangling images. Type y and hit enter to proceed. This is the safest way to Docker prune images because it will not touch images that have tags.
Running the command above will give you the following output:

To check the available images in your system, run the following command:
docker image ls
As you can see, the dangling image is no longer listed in the output, which confirms that it has been successfully deleted from the system. We’re now left with three images.
How to Remove Unused Images?
To officially Docker remove unused images, you simply add the -a (all) flag to the previous command:
docker image prune -aWhen you run this command, it’ll issue a warning and will prompt you to confirm whether you want to proceed or not. Type y and hit enter to proceed. You’ll receive an output as shown below:
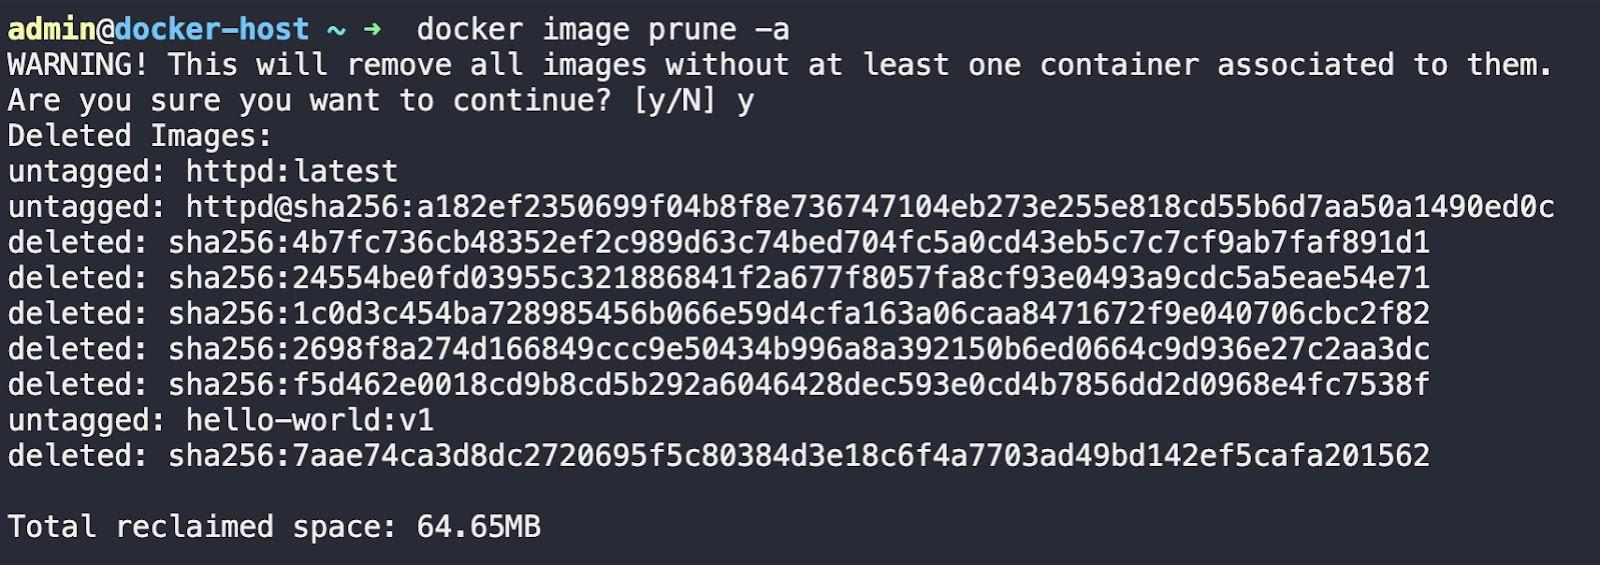
All unused images have been deleted. To confirm this, let’s list the available images. Run the following command:
docker image ls
From the output above, you can see that all unused images have been deleted. We’re left only with the nginx image. That’s because the container ismynginx running, which is linked with this image.
Note: The docker image prune command has several other flags that you can use to customize its behavior. To view the full list of available options, you can refer to the official Docker documentation page.
Interested in learning how it can help you streamline your development workflow? Check out the following Docker Learning path.

.webp)
Conclusion
In this blog post, you learned what unused and dangling images are in Docker and how to delete them. Since unused and dangling images can occupy valuable disk space, you should periodically run a docker image cleanup to free up storage and optimize resource utilization.
Other interesting reads:
- Top 15 DevOps Automation Tools You Should Learn in 2024
- 10 Essential DevOps Tools You Should Learn in 2024
- How Dockerfile Works
- How to Learn Kubernetes and Docker
- How to Clear Docker Logs for a Container
- How to Build a Docker Image With Dockerfile From Scratch
- How to Pass Environment Variables to Docker Containers
FAQs
Q1: What is the difference between dangling and unused images?
A dangling image has lost its tag (showing as <none>:<none>) and is not used by any container. An unused image still has its tag (like httpd:latest) but simply isn't actively attached to any running or stopped container.
Q2: How do I effectively free disk space Docker has consumed?
The fastest way to free disk space Docker takes up is to run docker image prune -a. This deletes all images that are not currently tied to a container, instantly recovering gigabytes of storage.
Q3: What happens if I use docker system prune instead?
Using docker system prune is a more aggressive cleanup. It will remove dangling images, unused networks, and all stopped containers. Use it carefully if you have stopped containers you wish to restart later!
Q4: Will I break my running applications if I Docker remove unused images?
No. A proper docker image cleanup using docker image prune -a explicitly skips any image that is actively being used by a container. Your running applications are completely safe.
Q5: How do I routinely Docker prune images automatically?
Many teams set up a cron job or scheduled pipeline task that runs docker image prune -f (force) weekly to automatically remove dangling images and keep their build servers clean.


Discussion