


Highlights
- Two-Way Transfer: The Docker cp command allows you to seamlessly copy data from a running or stopped container to your host machine, and vice versa.
- No Rebuilds Required: You can easily Transfer files to container directories (like updating a configuration file or a static web page) without having to rebuild the entire Docker image.
- Core Tooling: It is one of the most essential Docker CLI commands for quick debugging, testing, and extracting backup archives.
- Directory Support: Beyond single files, you can execute a Docker copy file operation on entire directories, copying everything recursively.
- Simplicity: Mastering this command greatly simplifies your day-to-day Docker file management, avoiding complex volume mounts for simple file swaps.
In Docker, the docker cp command is a powerful tool that provides a way to copy data in and out of a container. This makes it useful for performing tasks such as debugging and data backup.
In this blog post, we'll explore how to use the docker cp command to copy files from Docker container environments to the local system and vice versa. Let's get started!
Prerequisites
To follow along with the examples in this post, you need a code editor. You also need to have Docker Desktop installed and running on your system. If you don’t have it already, you can download it from the link: Get Docker.
Try the Docker Basic Commands Lab for free:

Create a Docker Container
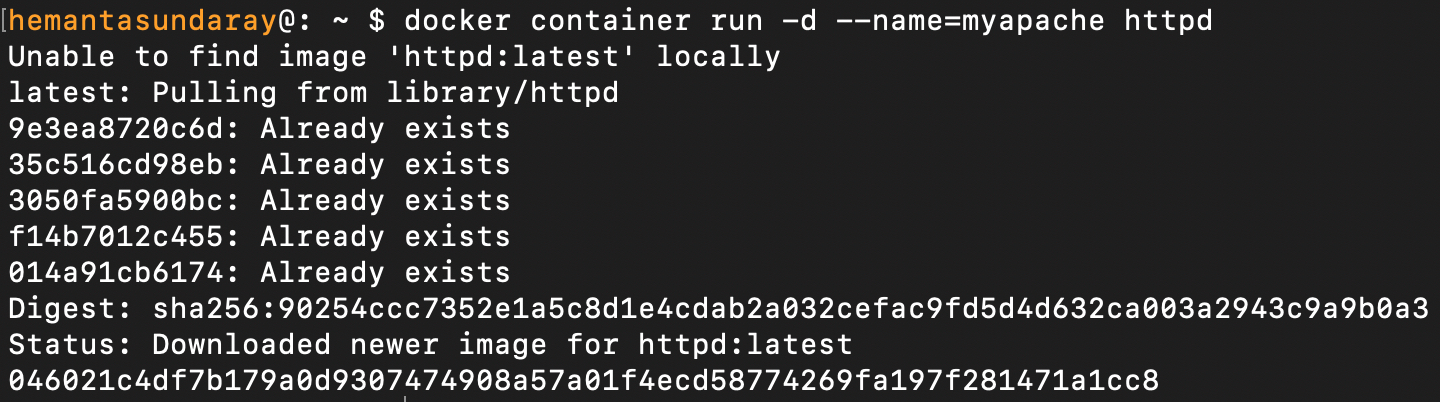
Before we can explore the docker cp command, we need to have a container to copy files from or to. To create a container, open up a terminal window and run the following command:
docker container run -d --name=myapache httpdThis command creates a container named myapache and runs an Apache HTTP server inside it. The -d flag is short for --detach and runs the container in the background. And httpd is the name of the Docker image, which is an Apache server.
Running the command above will give you an output similar to this:
The long string you see printed in the terminal window is the container ID. Next, let’s verify that the container is up and running by listing the currently running Docker containers. Run the following command:
docker container lsAs you can see below, the myapache container is up and running as expected.

Now that we have a container, we can proceed with copying files from and to the container using the docker cp command.
Docker CP Syntax
The syntax of the docker cp command for efficient docker file management is as follows:
docker cp <containerId/containerName>:/file/path/within/container /host/path/to/copy/file/toThe command above copies a file from a Docker container to the host.
docker cp /host/path/to/copy/file/from <containerId/containerName>:/file/path/within/containerThe command above copies a file from the host to a Docker container.
Copy File From Container to Host
We have an Apache HTTP server running inside a container. Let's Copy files from Docker container specifically, the default index.html page (inside the /usr/local/apache2/htdocs directory) served by the Apache server to the desktop of our local system. Run the following command:
docker cp myapache:/usr/local/apache2/htdocs/index.html ~/desktopDon’t forget to replace myapache with the name of your container.
In the command above, we pass two arguments to the docker cp command:
- myapache:/usr/local/apache2/htdocs/index.html: This is the source path inside the container.
myapacherefers to the container name./usr/local/apache2/htdocs/index.htmlspecifies the location of theindex.htmlfile within the Apache web server's document root directory. - ~/desktop: This is the destination path on the host machine. The tilde symbol (~) is a shorthand notation that represents the home directory of the current user. So
~/desktopexpands to the full path of the desktop directory within the user's home directory.
In summary, the command copies the index.html file from the container to the local system's desktop directory.
To confirm that the file has been copied, you’ll have to check the destination directory on your local machine. I see the index.html file on my desktop, as shown below:

We have successfully copied the index.html file from the container (running the Apache HTTP server) to our local system.
Copy Directory From Container to Host
The docker cp command allows you to copy not only files but directories as well. In the previous section, we copied the index.html file (inside the htdocs directory) to the desktop. In this section, let’s copy the htdocs directory itself to the desktop.
Run the following command:
docker cp myapache:/usr/local/apache2/htdocs ~/desktopTo confirm that the htdocs directory has been copied successfully, check your destination directory. In my case, I see the htdocs directory on my desktop, as shown below:

Copy File From Host to Container
The docker cp command is used not only to copy files from a container to the local system but also from the local system to a container. In this section, we'll make some modifications to the index.html file that we previously copied to our desktop and then execute a Docker copy file operation back to the /usr/local/apache2/htdocs directory.
To get started, open the index.html file in your preferred code editor and make the desired modifications to the HTML markup. Below, I have changed the welcome message within <h1> tags from It works! to It works great!. You can make any other changes you prefer.
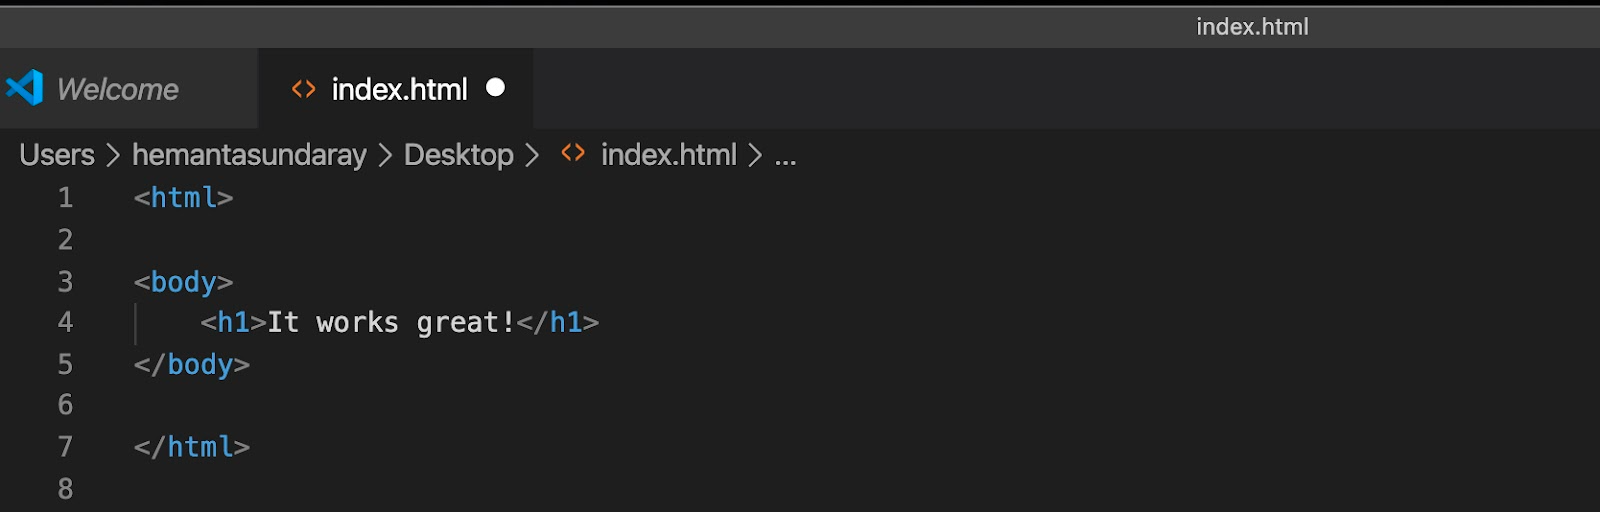
After making the changes to the index.html file, save it. Then, run the following command to copy the modified file from the desktop to the location we copied it from.
docker cp ~/desktop/index.html myapache:/usr/local/apache2/htdocsNotice that we have changed the order of the source and destination paths in this command.
To verify whether the copy was successful or not, we can check the contents of the index.html file inside the myapache container. Let's follow the steps below.
First, run the following command to get a shell to the myapache container:
docker exec -it myapache /bin/bashThis command will open a bash shell prompt, as shown below:

Note: To get an in-depth understanding of the docker exec command, check out our blog post: Docker Exec: How to Enter Into a Docker Container's Shell
From the shell prompt, run the following command to print the contents of the index.html file.
cat /usr/local/apache2/htdocs/index.htmlThis will print the contents of the file in the shell. You should see the modified welcome message, as shown below:

This means that we have successfully copied the modified index.html file from our local system to the container.
Copy Directory From Host to Container
In this section, we’ll copy a directory from the host to the container. To demonstrate this, I have created a blank directory on my desktop named demo, as shown below. Feel free to choose any name for your directory.

To copy the demo directory from the desktop to the apache2 directory within the Apache server’s root directory, run the following command:
docker cp ~/desktop/demo myapache:/usr/local/apache2To verify that the directory has been copied successfully, let’s first get a shell to the container by running the following command.
docker exec -it d71b85f33430 /bin/bashRunning the command above will start an interactive bash shell session, as shown below:

Next, let’s list the content inside the apache2 directory by running the following command on the bash shell:
ls /usr/local/apache2We see the demo directory listed in the output, as shown below:

We have successfully copied a directory from the host to the container.
Want to learn more about containerization? Check out our Docker Learning Path:

Conclusion
In this post, you learned how to use the docker cp command to copy files and directories from a container to the local system and from the local system to a container. You can use this command to perform tasks such as debugging, data backup, and more.
More on Docker:
- How to Fix Docker Build Requires Exactly 1 Argument
- How to Clear Docker Logs for a Container
- How to Keep Docker Container Running
- How to Build a Docker Image With Dockerfile From Scratch
- How to Pass Environment Variables to Docker Containers
- How to Tag a Docker Image
- How to Get Docker Container IP Address From the Host
- How to Create Docker Image From a Container
FAQs
Q1: Does the container need to be running to use the docker cp command?
No. One of the best features of this command is that it works on both running and stopped containers. You can easily extract logs or Copy files from Docker container instances that have unexpectedly crashed.
Q2: Can I use docker cp to copy files between two different containers directly?
No, you cannot copy files directly from one container to another. You must first use the Docker copy file command to bring the file from Container A to your host, and then run it again to Transfer files to container B.
Q3: Does docker cp behave like the standard Linux cp command?
Yes, it is very similar. It recursively copies directories by default and assumes paths relative to the container's root (/) directory if you don't specify an absolute path.
Q4: How does this compare to other Docker CLI commands like Volumes?
Volumes are intended for persistent, long-term data sharing between the host and the container. The docker cp command is meant for temporary, ad-hoc Docker file management (like pulling out a single log file or injecting a quick script).
Q5: Are file permissions preserved when I copy files?
When copying from a container to the host, the files are created with the UID and GID of the user running the command. When copying from the host to the container, the file retains its original UID/GID, which might not map exactly to the users inside the container.


Discussion