


Highlights
- Complete Replacement (PUT): The PUT method replaces the entire resource with the payload you provide. If you omit a field, it is set to null or its default value.
- Partial Update (PATCH): The PATCH method applies partial modifications to a resource. You only need to send the fields you want to change.
- Bandwidth Efficiency: PATCH is generally more bandwidth-efficient than PUT because you send smaller payloads containing only the changes.
- Idempotency: PUT is idempotent (retrying the request yields the same result), whereas PATCH is not necessarily idempotent, though it can be designed to be.
- Resource Creation: PUT can create a resource if the ID is specified and it doesn't exist (depending on API design), while PATCH typically only updates existing resources.
In this blog post, we’ll learn about the differences between PUT & PATCH and when to use each method. But before we do so, let’s take a step back and understand some important concepts such as HTTP, HTTP methods, and RESTful APIs.
Understanding the nuances of put vs patch is essential for designing robust APIs that handle resource updates efficiently.
What is HTTP?
HTTP stands for Hypertext Transfer Protocol. It is a set of rules for encoding and transporting information between a client and a server over the Internet.
When you open a website on your browser, it sends an HTTP request to the server where the website is hosted. The server then sends back an HTTP response with the website content, such as text, images, and videos. HTTP is responsible for structuring these requests and responses in a way that both the client (your browser) and the server can understand.
HTTP Methods
HTTP defines a number of different methods that can be used to request or send information to a server. These methods are often referred to as HTTP verbs or HTTP methods. The five primary methods are GET, POST, PUT, PATCH, and DELETE.
What is REST API?
In the context of web development, HTTP is important because it is the foundation of RESTful APIs. RESTful APIs are a way for different software systems to communicate with each other.
RESTful APIs use HTTP methods, such as GET, POST, PUT, PATCH, and DELETE, to specify what action should be taken on a resource.
Difference Between PUT & PATCH
PUT and PATCH are two methods that are often used for updating resources on the server. However, they differ in their approach.
PUT
PUT is used to replace an existing resource with a completely new one. In other words, if you send a PUT request to update a resource, the server will completely replace the existing resource with the new one.
For example, let's say you have a user profile with fields for name, email, and password. If you use PUT to update the profile, you’ll have to send the updated values for all three fields: name, email, and password.
PATCH
On the other hand, PATCH is used to make a partial update to an existing resource. In other words, if you send a PATCH request to update a resource, the server will only update the specified fields in the existing resource.
So, if you only want to update the email field only, you would send just that field with the new value. The server then applies the changes you specified and leaves the rest of the resource unchanged.
The following table captures the main differences between PUT vs PATCH:
When to Use Put and When to Use Patch
In general, if you want to update a resource completely, you should use PUT. If you want to update only a part of a resource, you should use PATCH. This distinction is crucial in put vs patch rest api design.
To make this concept clearer, let’s dive into a practical example. For our example, we’ll use the following:
- JSONPlaceholder: It’s a fake REST API. Fake REST APIs are used for testing and prototyping purposes without messing with real production APIs and databases.
- Postman: It’s an API platform for working with APIs. We’ll use Postman to create and send API requests to JSONPlaceholder, the fake REST API.
To follow along with this example, you must have Postman installed. If not, you can download Postman from the link Download Postman.
The JSONPlaceholder fake API comes with many resources. We’ll work with the todos resource. To see what a "todo" resource looks like, go to https://jsonplaceholder.typicode.com/todos/1 in your browser and you’ll see the following output:
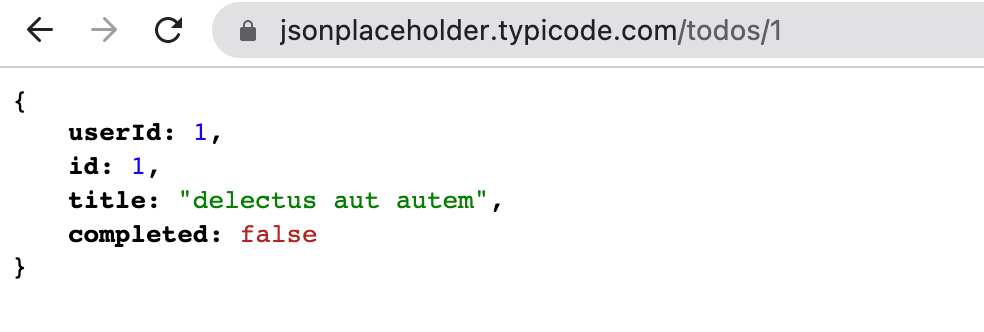
As you can see in the screenshot above, a todo resource has four fields: userId, id, title, and completed.
Note: In the URL https://jsonplaceholder.typicode.com/todos/1, /1 refers to the id field of the "todo" resource.
Using PATCH
Let’s say we want to update the completed field from false to true for the "todo" resource with an id of 1. As we want to update only one field out of four fields (in other words, we want to update only a part of a complete resource), we’ll send a PATCH request. Let’s do that now using Postman.
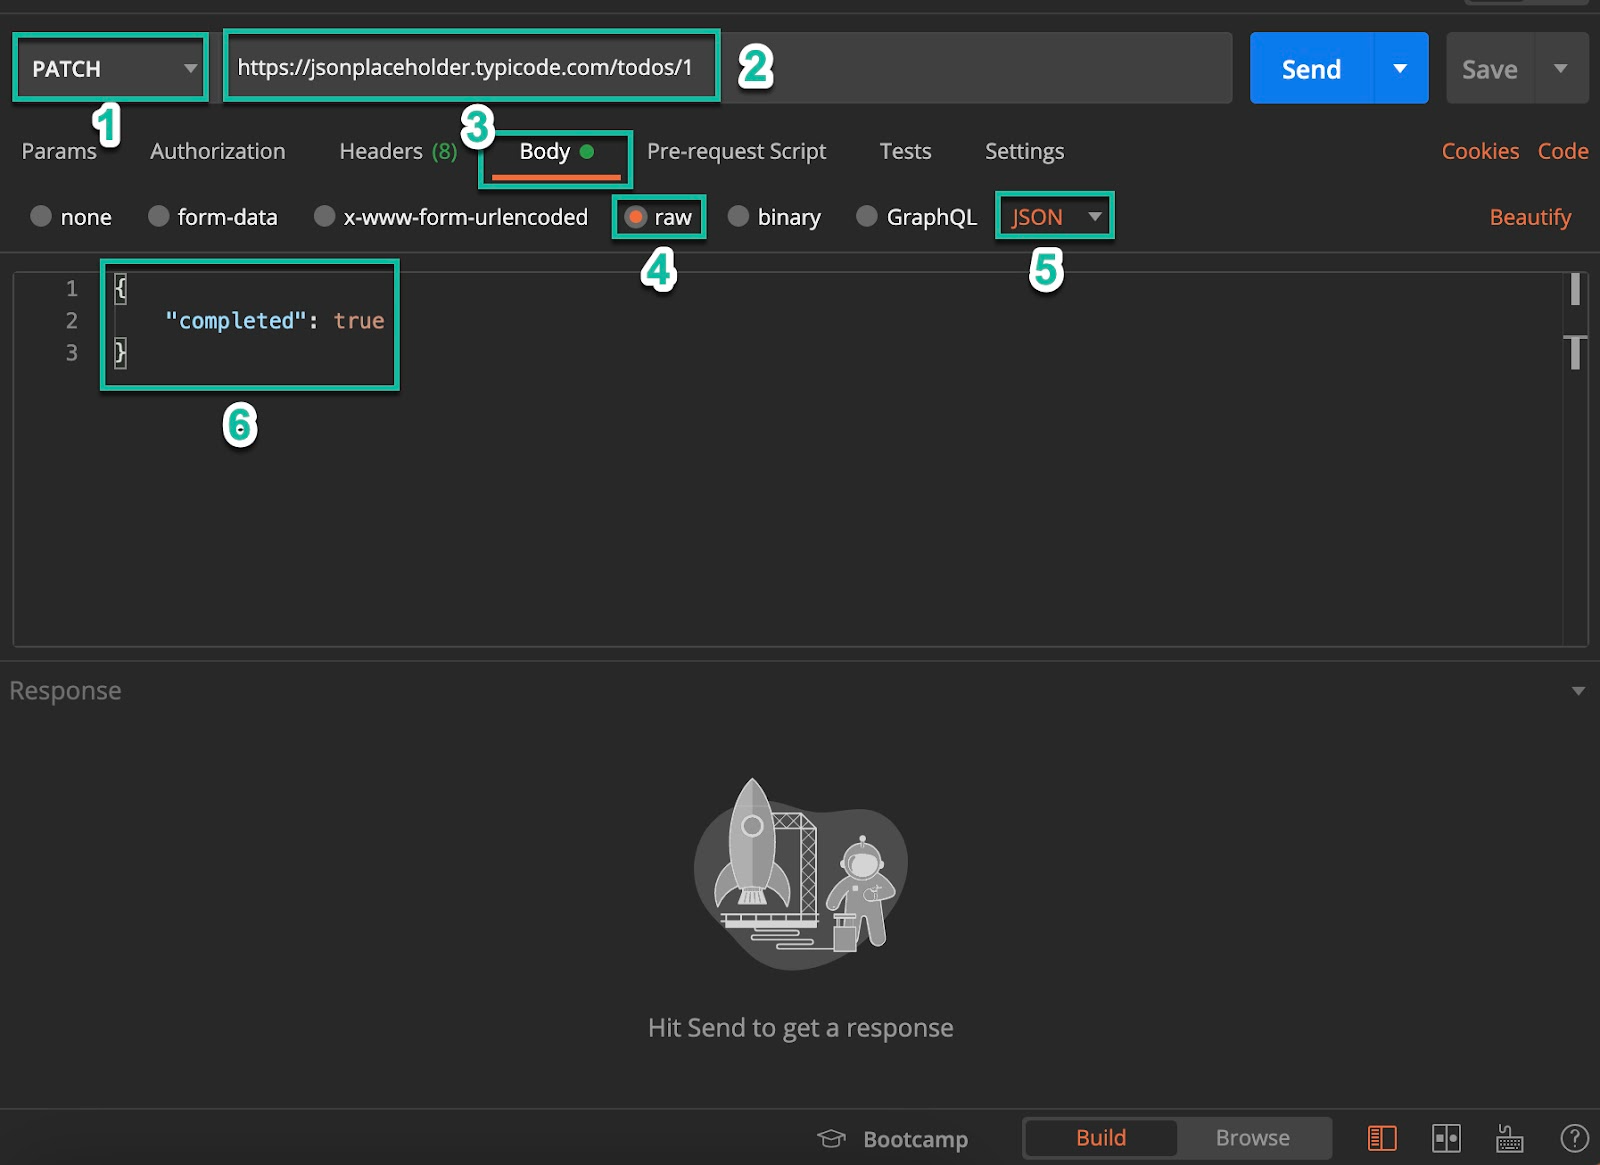
In Postman, complete the following steps, as highlighted in the screenshot below:
- Select
PATCH - Mention the API endpoint,
https://jsonplaceholder.typicode.com/todos/1. - Select
Body - Select
raw - Select
JSONfrom the dropdown. We’ll be sending the data to the API endpoint in JSON format. - Write the JSON object:
{"completed" : true}in the section as highlighted below. This is the data we’ll send to the JSONPlaceholder API.
Finally, click on SEND. Upon sending the request, you’ll get a response as shown below:
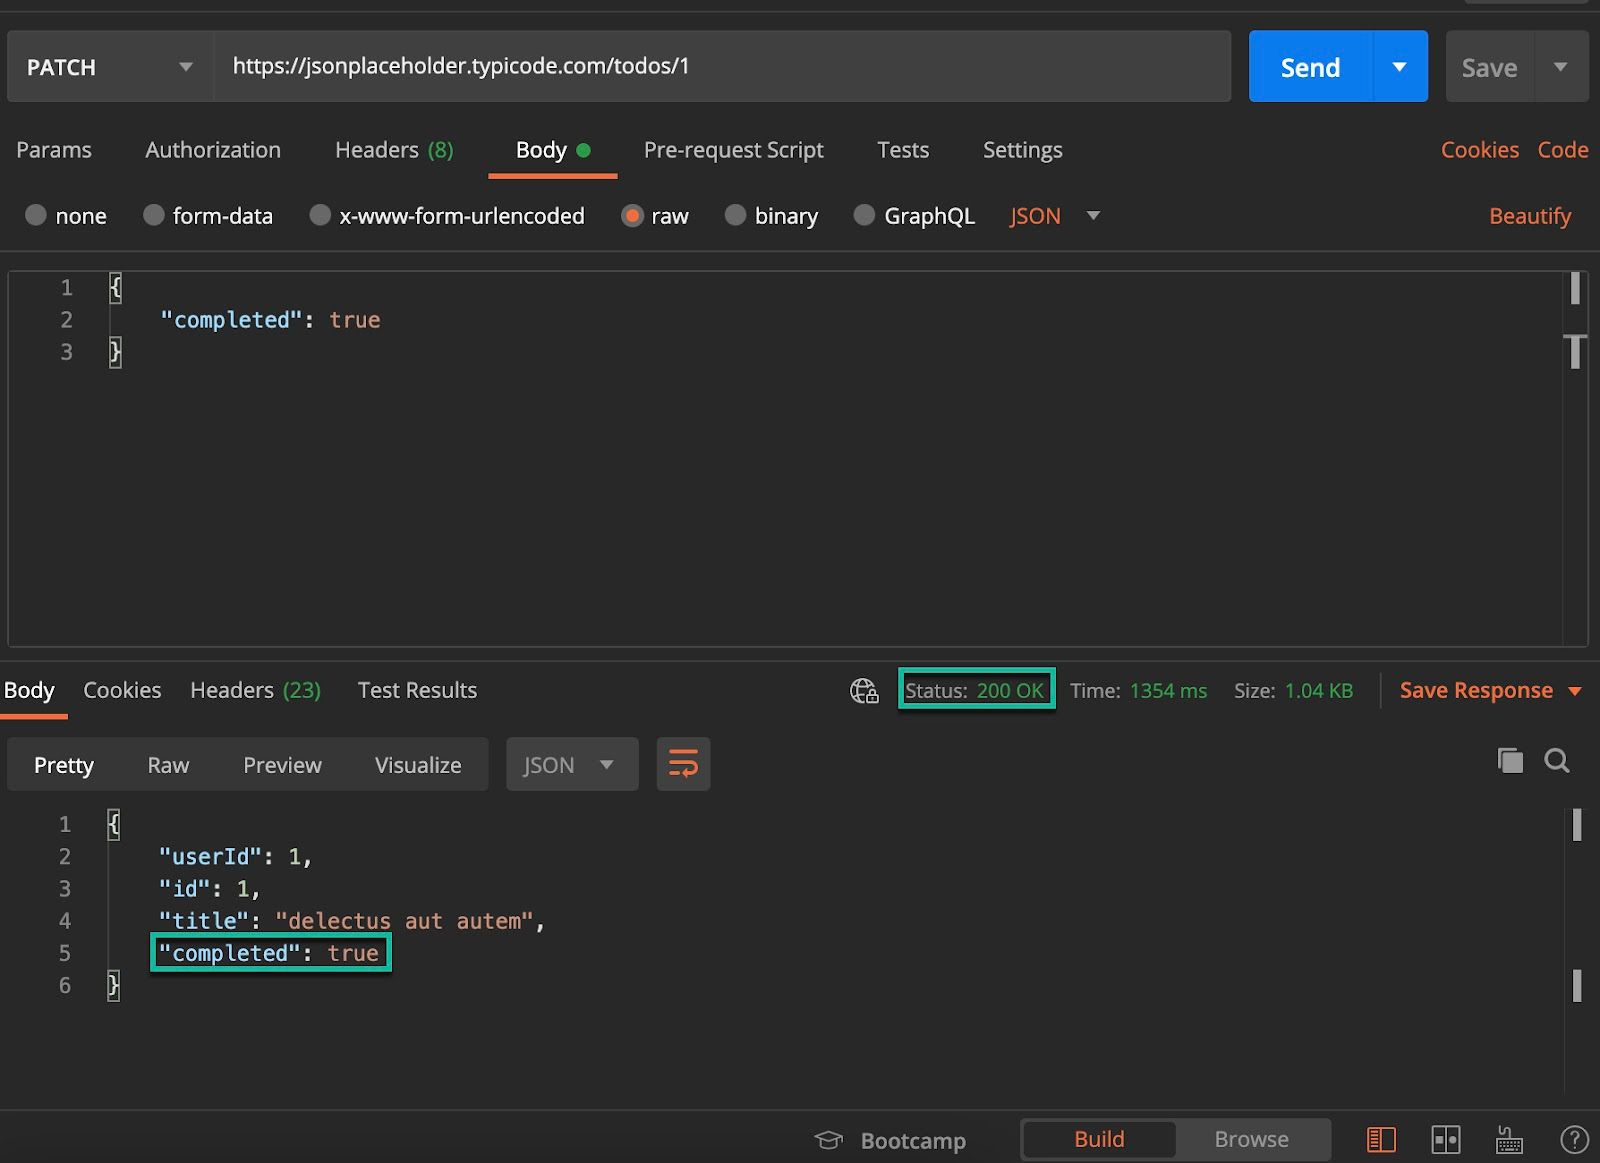
As you can see, the server has returned the complete resource, where the value of the completed field has been updated from false to true, as requested. Also, we have an HTTP status response code of 200, indicating that the update was successful. This serves as a clear patch vs put example where only the delta is sent.
Next, let’s explore the PUT method.
Using PUT
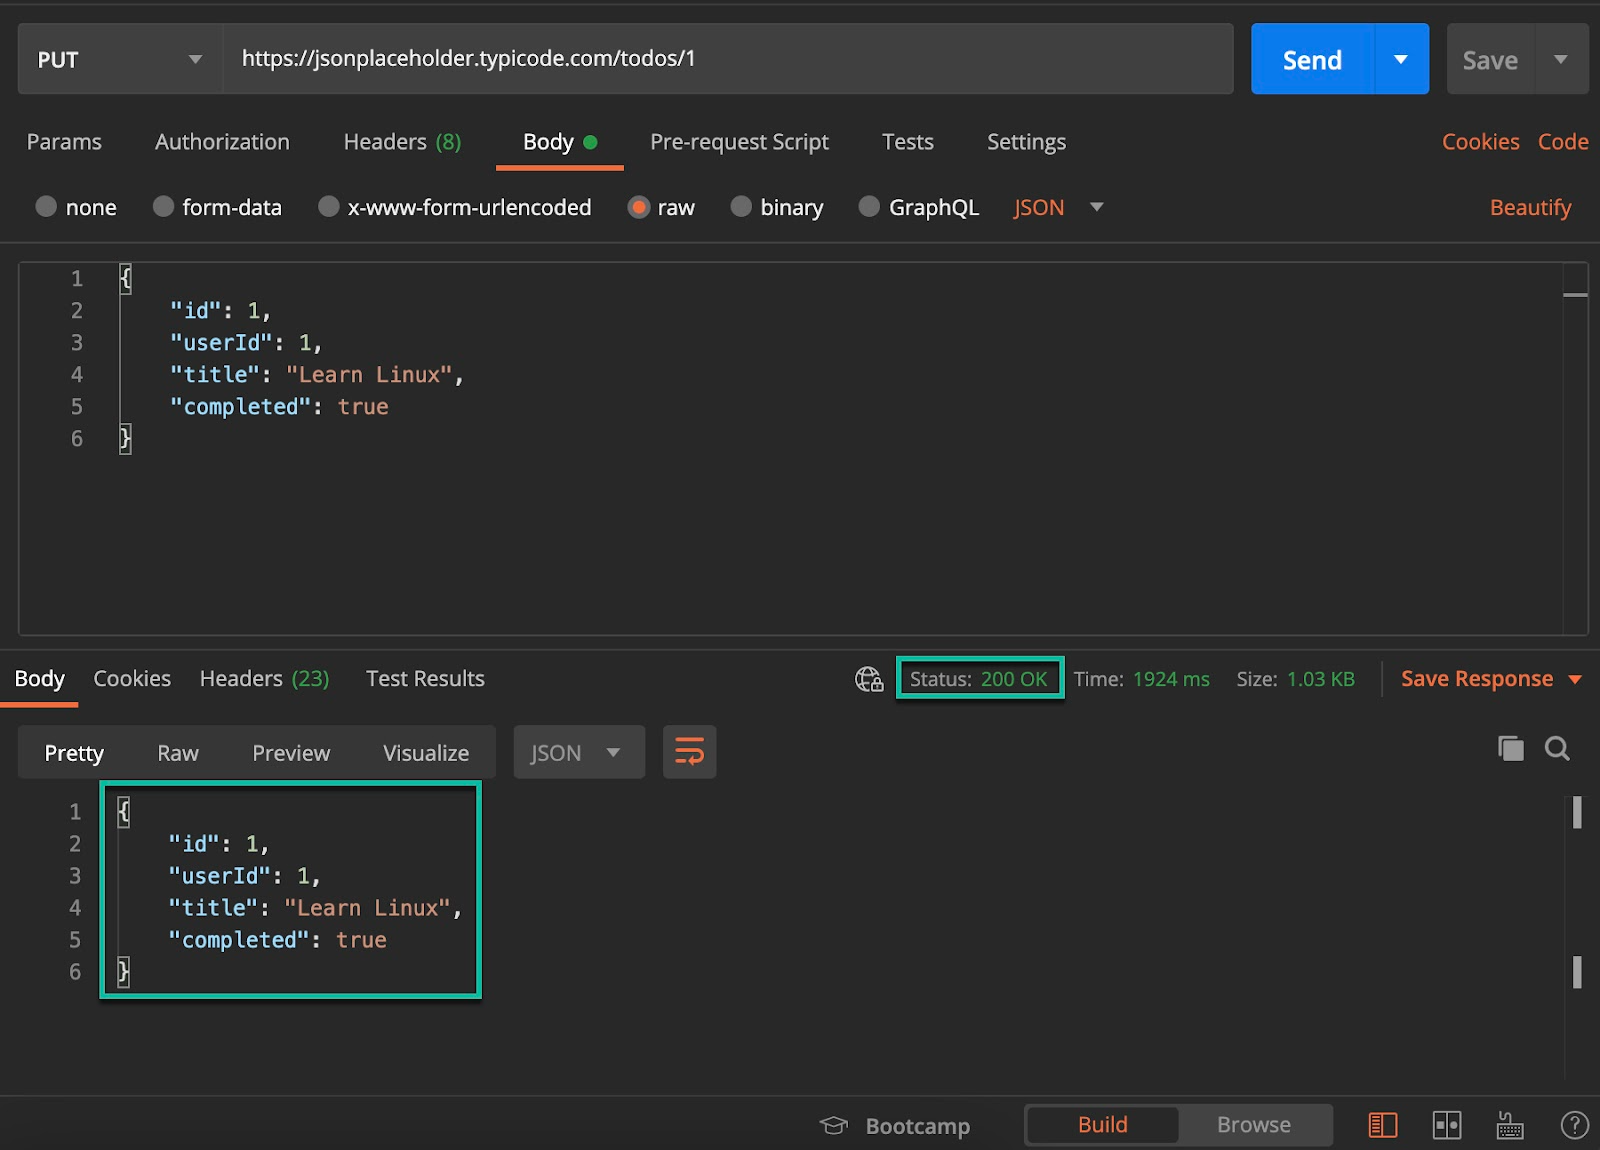
As discussed earlier, PUT requires sending the complete resource we want to update, including all the updated fields. Let's say we want to update all the fields of the "todo" resource with an id of 1. This highlights the heavyweight nature of http put vs patch operations.
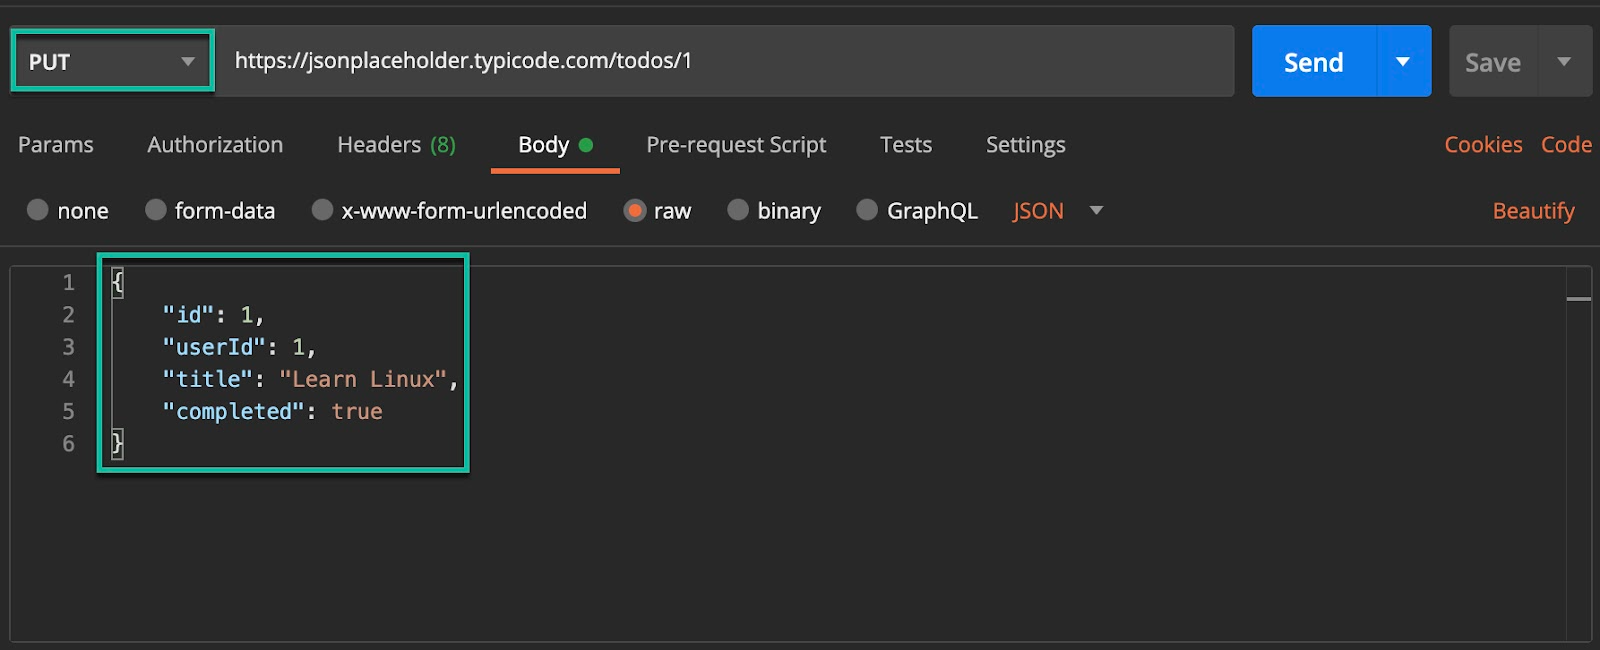
On the same Postman request we have used with PATCH, make the following changes:
- Choose the PUT method from the dropdown.
- In the "Body" section, write the following JSON object:
{
"id":1,
"userId": 1,
"title": "Learn Linux",
"completed": true
}
Note that you can change the values of these fields - id, userId, title, and completed - to anything you like.
Now, click on SEND.
As you can see below, the server has responded with the updated output and a status code of 200, indicating a successful update.
Note: Keep in mind that the updates we made to the "todo" resource are not persisted in "JSONPlaceholder" as it's a FAKE REST API. It only behaves as if the resource has been updated. With this understanding, you now have the knowledge to effectively work with PUT and PATCH requests in your API development workflow.
Embark on a DevOps journey with our DevOps Learning Path:

.webp)
Conclusion
I hope that this blog post has clarified the differences between PUT and PATCH and has provided you with a better understanding of when to use each method. Mastering these rest api methods is key to building standard, predictable web services.
Interested in learning more about programming? Check out the programming learning path from KodeKloud.
Other interesting reads:
- 10 Essential DevOps Tools You Should Learn in 2024
- 17 DevOps Monitoring Tools to Learn in 2024
- Understanding DevOps for Absolute Beginners
- Cloud Computing And DevOps: What You Need to Know
- How To Learn Cloud Computing
- Should I Learn Python Or Javascript
- How to Learn Kubernetes and Docker
- How CI/CD Pipeline Works
FAQs
Q1: Is PUT idempotent?
Yes, PUT is idempotent. This means that if you send the exact same PUT request multiple times, the state of the resource on the server will be the same as if you sent it only once. It replaces the resource every time.
Q2: Is PATCH idempotent?
Technically, PATCH is not required to be idempotent, although it often is in practice. Since PATCH applies instructions (like "append this item to a list"), applying the same patch multiple times could result in different states (e.g., the item being appended multiple times), unlike the standard put vs patch behavior where PUT always results in the same state.
Q3: What happens if I use PUT but only send one field?
If you use PUT and only send a single field (e.g., {"email": "new@example.com"}), most APIs will treat the missing fields as null or deleted. The entire resource is replaced by the new representation you provided, which can lead to accidental data loss if you meant to do a partial update.
Q4: Can I use POST instead of PUT or PATCH?
While you can use POST for updates, it breaks RESTful conventions. POST is generally used to create new resources or trigger processes. Using the correct HTTP verbs makes your API intuitive and allows it to leverage standard web infrastructure features like caching and safe retries.
Q5: Which is faster, PUT or PATCH?
PATCH is generally faster and consumes less bandwidth because the payload is smaller. You only send the data that has changed, rather than the entire resource representation required by PUT.


Discussion