


As applications grow, undertaking tasks such as version management, resource allocation, updating, and rollbacks in Kubernetes can become more difficult and error-prone. To get the best out of applications in containers managed by Kubernetes, you need a tool that can ease these tasks. This is where Helm comes in.
This blog covers basic tasks that every beginner should be proficient at.
What is a Helm Chart?
Helm Chart is a package manager for Kubernetes that allows you to define, install, and upgrade your Kubernetes applications. They provide an easy and reproducible way to package and distribute applications, making it easier to manage application deployments on Kubernetes.
A Helm Chart is a collection of YAML files that define a set of Kubernetes resources, along with some metadata that describes how to install and configure those resources. With Helm Charts, you can easily deploy and scale your applications, manage configuration files, and roll out updates with ease.
Launching a WordPress Website in Kubernetes With a Helm Chart
In this section, we'll guide you on how to install a WordPress website with a Helm Chart.
Prerequisites
You'll need access to a running Kubernetes cluster to follow along with the examples in this post. If you don’t have access to one, you can use a tool such as minikube to set up a Kubernetes cluster. Also, you’ll need to have kubectl and Helm installed on your local machine.
The commands in this blog are executed on KodeKloud's Helm Playground. With this playground, you won't need to go through the hassle of installing any additional software— everything you need is already set up and ready to use.
Using Helm’s Built-In Help
First, we need to know what we can do with the Helm command. We'll use the built-in help command to see this.
Run the command below to see Helm's subcommand:
helm --helpYou'll get an output similar to this:
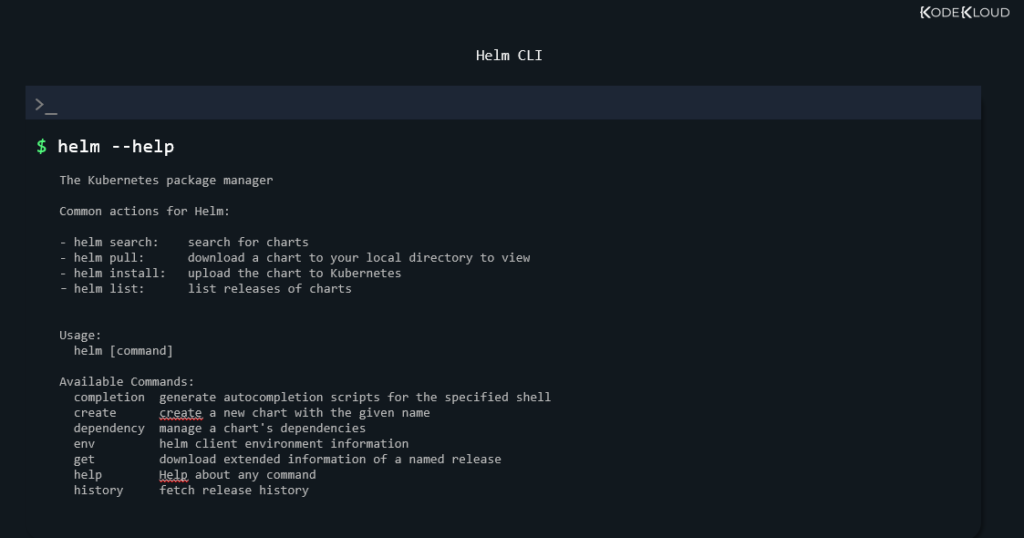
This can serve as a quick way to remember what the right command is when performing an action with Helm.
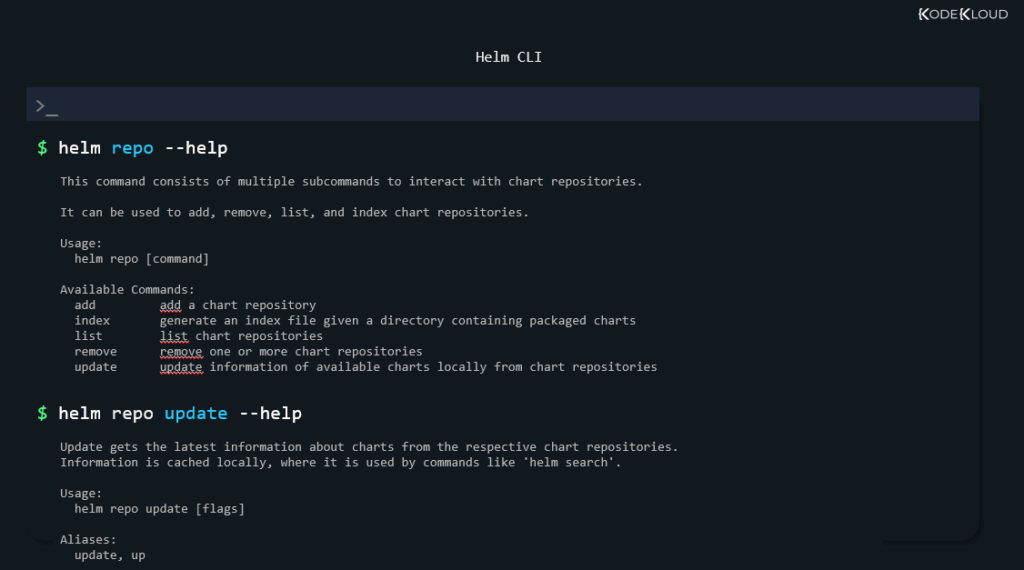
We can also use this help feature for subcommands. For example, if we want to see what repository-related actions we can take
helm repo --helpAnd we can even dig deeper and learn about what a sub-sub-command does and what parameters it supports:
helm repo update --helpYou'll get an output similar to this:
After using Helm’s built-in help a couple of times, it will become easy to memorize the correct commands for all the important actions.
Why We Need Helm
To see why we need a Helm Chart? We'll look at how to launch a WordPress website in Kubernetes with and without Helm.
Launching a Website in Kubernetes Without Helm
So, let’s assume we are in a scenario where we need to launch a WordPress website in Kubernetes. Doing it without Helm, while not really hard, still involves several steps. You can check out an example here.
From the example above, we can see it’s quite a long list of actions we need to take. We need to create each Kubernetes object one by one until we get all components ready. We’ll need persistent volumes to store the database. We’ll need to define a service to expose the website to the outside world and deployment objects to launch the pods that'll run the MySQL database and Apache web server applications.
Now, let’s see how much easier it is to do this with Helm.
Launching a Website in Kubernetes With a Helm Chart
We’ll first need to find a chart for the WordPress structure we want. We can use the helm command itself to search for this:
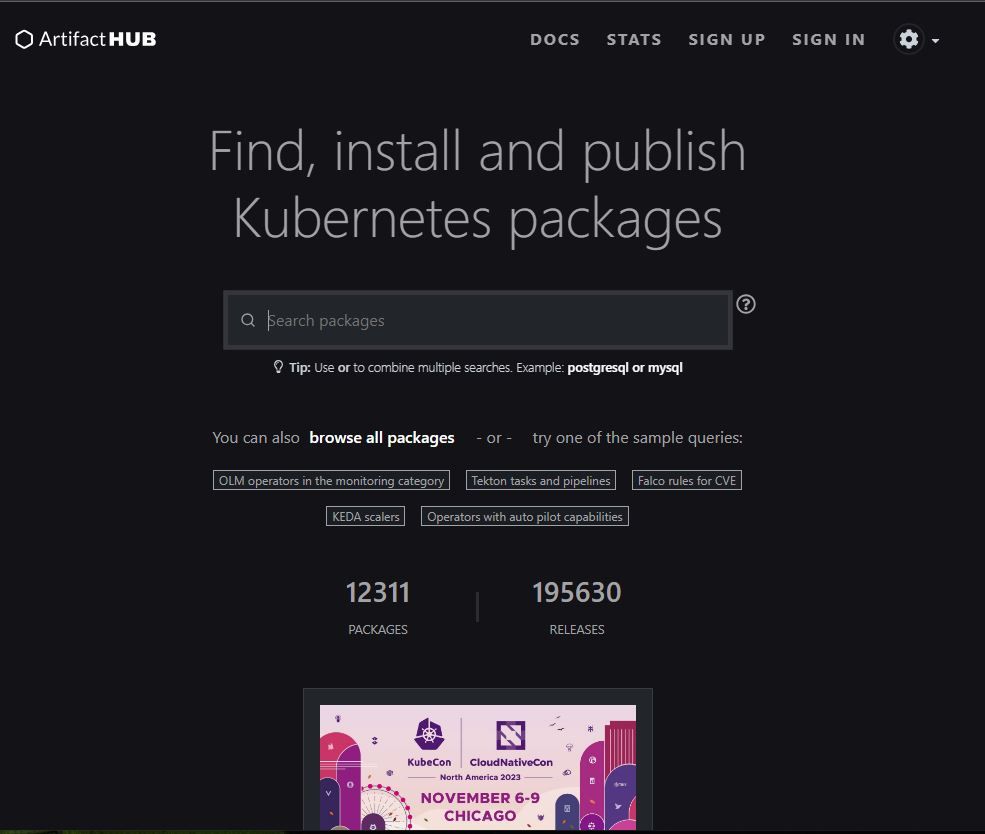
helm search hub wordpressBut this is a bit limited. We can’t really see a lot about how these are built and what exactly they contain. We can instead visit the ArtifactHub website.
To see a list of the Kubernetes resources required to launch a WordPress website with Helm, see this page.
With software, in general, especially what we use in a commercial/corporate environment, there’s always the issue of Can we trust this code? Is it non-malicious? Is it of good quality? To ensure we get a high-quality chart, we can try to find one with the Official or Verified Publisher badge.
If we click on this result, we’ll see a detailed page with all the information we may want about this chart. It starts out with the exact commands we need to use to install the chart into our Kubernetes cluster, continues with what software components this uses, and further down the page, we can even see some of the most important configurable settings we can tweak. It’s up to chart developers to mention what they think is important on the description page.
Deploying a Helm Chart
There will be cases where the packages we install with Helm require no tweaks, and we can get them up and running with two simple commands: helm repo add and helm install. Let’s assume our WordPress app fits this scenario and installs it into our Kubernetes cluster.
First, we tell Helm about this new repository of charts that we want to use:
helm repo add bitnami https://charts.bitnami.com/bitnamiThis way, it knows the address from where it can pull in the charts we’ll need.
We’ve named this repository bitnami. We can choose any name we want after the add command, but we’ll need to use this same name when installing our chart.
It’s worth mentioning here that, from time to time, we’ll also want to use this command:
helm repo updateThis is somewhat equivalent to what the command sudo apt-get update does on some Linux-based operating systems. In a nutshell, the info that Helm has about that repository is stored locally.
With time, repository maintainers make changes, update stuff, and so on, so our local copy of this info gets stale and outdated. The command above refreshes Helm's info by pulling it from the online repository and moving it to our local computer. This way, we get the latest data available.
Finally, we can install our WordPress chart. Notice how we use the same name we chose for the repository we added earlier. bitnami/wordpress in the next command is basically a way of saying, install the WordPress chart from the repository we named bitnami.
helm install my-release bitnami/wordpressAnd boom! With one single command, Helm does all the heavy lifting and gets everything ready behind the scenes. In the end, we even get some useful information about how we can use this WordPress install.
$ helm install my-release bitnami/wordpress
NAME: my-release
LAST DEPLOYED: Wed Jun 30 17:26:36 2021
NAMESPACE: default
STATUS: deployed
REVISION: 1
NOTES:
** Please be patient while the chart is being deployed **

Your WordPress site can be accessed through the following DNS name from within your cluster:

    my-release-wordpress.default.svc.cluster.local (port 80)

To access your WordPress site from outside the cluster follow the steps below:

1. Get the WordPress URL by running these commands:

  NOTE: It may take a few minutes for the LoadBalancer IP to be available.
        Watch the status with: 'kubectl get svc --namespace default -w my-release-wordpress'

   export SERVICE_IP=$(kubectl get svc --namespace default my-release-wordpress --template "{{ range (index .status.loadBalancer.ingress 0) }}{{.}}{{ end }}")
   echo "WordPress URL: http://$SERVICE_IP/"
   echo "WordPress Admin URL: http://$SERVICE_IP/admin"

2. Open a browser and access WordPress using the obtained URL.

3. Login with the following credentials below to see your blog:

  echo Username: user
  echo Password: $(kubectl get secret --namespace default my-release-wordpress -o jsonpath="{.data.wordpress-password}" | base64 --decode)
This text is generated by instructions included in the chart. This way, users get an idea about how they can continue with their newly installed Kubernetes package. We’ll learn how to do the same (generate output at the end of the installation) with the charts we build.
Now, if you want to actually see that the WordPress website is actually running, it depends on where your Kubernetes cluster is hosted. Normally, you can just follow the instructions in your terminal and access WordPress through the external IP displayed in this command:
kubectl get svc --namespace default my-release-wordpressBut if after you gave Helm a few minutes to install everything, you still get the output showing the EXTERNAL-IP in a pending state, you might not have this option available out-of-the-box. For example, this can happen if you’re running your cluster locally with Minikube. In Minikube, a quick workaround is to open up another terminal window and use this command:
minikube tunnelYou will need to provide a sudo user password in a few seconds. Leave the terminal window open, as this needs to keep running in the background.
Return to your old terminal window, then enter the command below:
kubectl get svc --namespace default my-release-wordpressAgain until you see an EXTERNAL-IP listed as shown below (only if you are using minikube):

Enter the address https://127.0.0.1:443/ on your browser, and voila, we can see that Helm really did all of its magic and installed a complex app for us into our cluster without much effort on our part.
Pretty easy, right? We basically used just two commands to install a complex WordPress website that needs a lot of Kubernetes objects to get up and running.
If you used the minikube tunnel command, go back to that terminal window, press CTRL+C, and then close the window.
Deleting Release
Now we want to remove all traces of this app. Imagine doing that by hand. We would have to delete many objects from our cluster, one by one, to eliminate all WordPress-related components. But with Helm, this is again easily done with a single command.
To see all releases installed:
helm listThis gives the following output:

This is useful for tracking what has been installed and seeing what hasn’t been updated in a long time.
Since we now have the release's name, we can remove all Kubernetes objects added by this WordPress website with one simple command.
helm uninstall my-releaseThis gives the following output:

This confirms that all the WordPress components have been removed. Again, very easy. We have now seen Helm's power as a package manager for Kubernetes.
Want a short intro to Helm’s basic concepts? Check out this video.
Customising Chart Parameters at Install Time
For the sake of simplicity, we went through an example of how to install a Helm chart with its default settings. Normally, charts give users multiple ways to specify their desired settings by editing a values.yaml file or by providing their desired preferences on the command line. If the user does not specify any preferences, default values are used.
With some simpler apps, we’ll sometimes use the defaults, as there aren’t many interesting things we may want to tweak, and the general defaults are good enough. However, for something like WordPress, choosing some custom settings may be useful before everything gets installed. WordPress is a very complex app with hundreds of customizable settings, from simple things, such as website titles, to security-related things like administrator passwords or TLS certificates that would be used to provide HTTPS connections to website visitors.
Of course, there’s also the option to adjust these settings later from within WordPress’s admin interface or with kubectl commands to edit Kubernetes objects. Nonetheless, knowing how to customize our Helm releases at install time is very useful. There are generally three ways to do this:
1. Specifying our custom parameters in the command line directly
If there are just a couple of things we want to customize, we can just specify our desired custom values directly in the command line by adding --set parameters. For example, this chart lets us specify the title of our WordPress site. We could use a command like this to choose a specific title:
helm install --set wordpressBlogName="Helm Tutorials" my-release-2 bitnami/wordpressIf we need to specify multiple custom values for our chart, we just use the --set parameter multiple times, as shown below:
helm install --set wordpressBlogName="Helm Tutorials" --set wordpressEmail="john@example.com" my-release-3 bitnami/wordpress2. Creating a “values.yaml” file where we specify our desired custom values.
When there are just too many values we want to set, using many --set parameters in a single command would make it tedious to write and hard to edit if we need to reinstall our app with different settings. So, the cleaner way is to create a file that lists the values we want to set.
Let’s create this file:
nano values.yamlIn this file, instead of specifying a value in the form of wordpressBlogName="Helm Tutorials" , we will use a different notation. Here is how we represent it in the values.yaml file.
wordpressBlogName: Helm Tutorials
wordpressEmail: john@example.com
We’re basically using “:” instead of “=” and adding a space after those “:” to set the value we desire.
Press CTRL+X, and then ENTER to save this file.
So, how do we tell Helm to use these custom values when installing the chart? By adding the --values command line parameter and specifying the path to our values.yaml file.
helm install --values values.yaml my-release-4 bitnami/wordpress3. Downloading the entire chart locally and then editing the included values.yaml file
This method is usually recommended if we really want to dig deep into customizing the app we install with this chart. And it does have one big advantage. Complex, professionally developed charts have many comments inside the values.yaml file, which helps us understand better what we can change and what the effect would be. Let’s go through an example.
We can download a chart with this command:
helm pull --untar bitnami/wordpressNormally, the chart would be downloaded in an archived form (called TAR archive) and the --untar parameter we added automatically extracts this file’s contents.
Here’s how part of values.yaml file looks like
wordpressUsername: user
## @param wordpressPassword WordPress user password
## Defaults to a random 10-character alphanumeric string if not set
##
wordpressPassword: ""
## @param existingSecret Name of existing secret containing WordPress credentials
## NOTE: Must contain key `wordpress-password`
## NOTE: When it's set, the `wordpressPassword` parameter is ignored
##
existingSecret:
## @param wordpressEmail WordPress user email
##
wordpressEmail: user@example.com
## @param wordpressFirstName WordPress user first name
##
wordpressFirstName: FirstName
## @param wordpressLastName WordPress user last name
##
wordpressLastName: LastName
## @param wordpressBlogName Blog name
##
wordpressBlogName: User's Blog!
We can edit everything we want in here, and when we’re done, save the file and then use this command:
helm install my-release-5 ./wordpress
When running in the directory where the chart is stored, this command will install WordPress with custom settings.
ENROLL in our Helm For Beginner'sCourse to learn other concepts, such as creating Helm Charts, adding dependencies in them, and distributing them.


Conclusion
Helm charts provide a standardized way of packaging and deploying applications, making it easier for teams to collaborate and share their work. It allows for easy versioning and rollback, ensuring you can always return to a previous version if necessary.
Overall, using Helm charts can save you time and effort while also helping you avoid errors and ensure the stability of your applications.
More on Helm:


Discussion