


In this lesson you'll learn how to add a new user to Ubuntu, Debian, RHEL, Rocky Linux, and all of the other popular Linux-based operating systems.
Prerequisites
To be able to create a new user you'll need administrative privileges. So you'll have to log in as the "root" user, or log in as a user that can run sudo commands.
How to Create a New User on Ubuntu, and Debian (And Distros Based on Them)
To create a new user on Ubuntu, or Debian, run this command:
sudo adduser user_nameReplace user_name with the actual username you want to add to your system.
Note that the same command will work on other operating systems based on Ubuntu, or Debian, such as MX Linux, Linux Mint, Pop!_OS, elementary OS, Zorin OS, and so on.
Once you run this command a sort of "install wizard" will start, and you'll be taken through the process step-by-step.
If you see a [sudo] password prompt type in the password of your current user (NOT the password for the new user account). It's a security measure which verifies that you actually own the current user, and you are authorized to use sudo commands.

Once you type in that password, some information will be displayed.
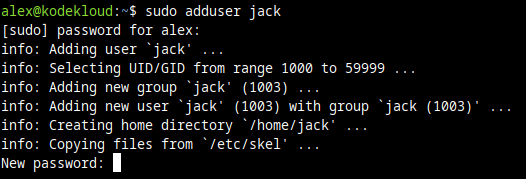
This shows you:
- The user id, a number identifying the new user (1003 in this example).
- A new group with the same name will be created, and the group id will be displayed (also 1003 in this example).
- The home directory that is automatically created for this user (
/home/jackin this example). The home directory is a personal directory where the user's files and settings will be saved.
After this point you get a New password: prompt where you can choose a password for the new user you just created. Note that nothing will be displayed as you type. That's normal. You can still press backspace if you type something wrong though.
Once you've chosen the password, press Enter.
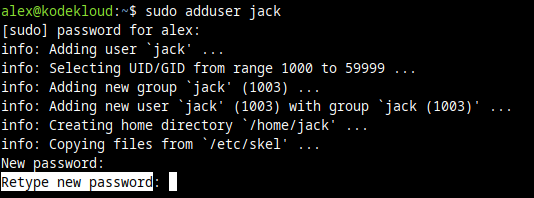
After you press Enter, you'll be prompted to repeat the same password. This helps double-check that you typed it correctly.

Next, you'll be prompted to pick some additional details for the new user, such as the full name, and phone number. Often, these details are omitted. You can just press Enter at each prompt if you don't want to fill in these optional details.
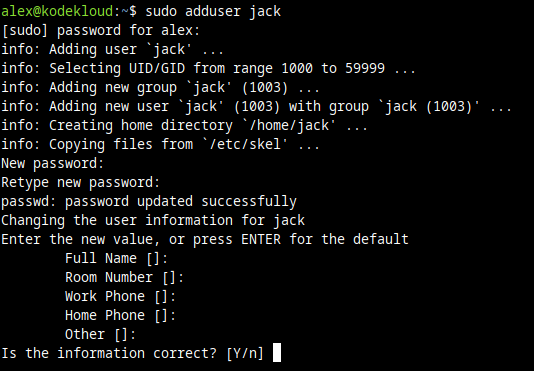
Finally, when you're asked if the information is correct, type y and press Enter, and the new user will be created.
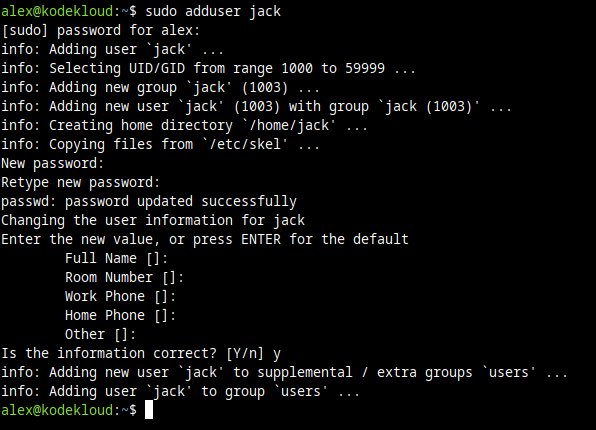
And that's it. Your job is done at this point.
Read this if you also need to add your user to a group.
And this, if you need to add your user to sudoers / grant the user sudo privileges.
How to Delete / Remove a User on Ubuntu, or Debian (And Distros Based on Them)
Of course, sometimes you'll need to do the opposite: Delete a user you no longer need.
Before you do this, though, you need to ask yourself a question:
- Do you want to also remove the user's personal files,
- Or do you want to preserve them?
If you want to remove a user, but preserve their personal files (home directory), then run this command:
sudo deluser user_nameReplace user_name with the actual username you want to delete.
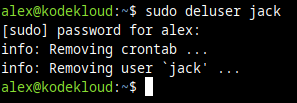
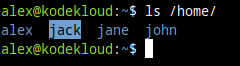
This way, the user gets deleted, but the personal home directory at /home/username remains untouched. In this example, you can see that /home/jack still exists:
If, however, you want to delete the user, and their home directory too, you can run this instead:
sudo deluser --remove-home user_nameReplace user_name with the actual username you want to remove.
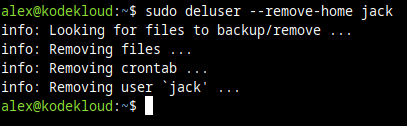
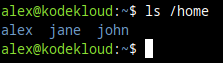
This time, the user's home directory will be deleted. So in our example, /home/jack is now gone:
useradd vs. adduser
Before we jump to commands for Red Hat systems, let's demystify some things. As I often see the adduser and useradd commands explained poorly on the Internet.
- Where
adduseris presented as a command that will work on every Linux system (it does not). - Or it's shown as a way to add a user to a group, with a command like
adduser jack docker. But it doesn't mention that this syntax won't work on RHEL-like systems, becauseadduseris basically a "fake" command on RHEL. More on this later. - Or it's somewhat implied that the other command,
useradd, is a low-level tool, that just adds a user to the system, doing nothing else. Which is partially untrue, becauseuseraddworks a certain way on Debian-like systems, and it works in a slightly different way on RHEL-like systems. (Different default settings on these operating systems for theuseraddtool).
You might notice that Ubuntu, and Debian have two commands for adding new users to the system: useradd, and the adduser command that was explained in the previous chapter.
On Debian, Ubuntu, and other distributions based on them, you should almost always use the adduser command. That's because adduser takes care of all the details. It not only creates the user, but also:
- Lets you pick a user password.
- Choose a full name for the user.
- And creates their home directory.
The useradd command is much more simplistic, and only creates the user on Debian and Ubuntu-like systems. But it doesn't automatically do all of that additional stuff. It does not create a home directory. It does not prompt you to choose a password. It does not prompt you to pick a full name for that user.
Pictures explain this better.
adduser takes you by the hand, and helps you with all of this:
While useradd doesn't do much; it just creates the user, and then exits:

Long story short:
- On Ubuntu, Debian, and operating systems based on them, use
adduser. - On RHEL, Rocky Linux, and operating systems based on them, use
useradd.
By default, adduser isn't really available on RHEL-based systems anyway. I mean, if you use the adduser command on RHEL, it will seem to work. But it's a trick.
On RHEL-based systems, adduser is actually a shortcut to useradd. And when you enter the adduser command, the real program that will start up is useradd.

However, the interesting thing is that useradd on RHEL, Rocky Linux, and similar operating systems, does a bit more than it does on Debian / Ubuntu. Otherwise said:
useraddon Ubuntu / Debian, just adds a new user to the system, nothing else.useraddon RHEL does a few extra things. For example, it also creates a home directory for the new user.
How to Create a New User on RHEL, or Rocky Linux (And Distros Based on Them)
To add a new user to a RHEL-based system, enter this command:
sudo useradd user_name
Replace user_name with the username you require.
If you went through the Debian / Ubuntu section, you might have noticed that the process was more detailed there; with many steps happening automatically. Like being prompted to choose a password.
Well, on RHEL-based systems things are a bit more hands-on. After you create the user, you have to manually choose a password for this new user, with this command:
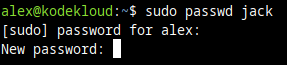
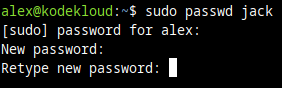
sudo passwd user_nameIf you see this [sudo] password prompt, first type the password for your own user (NOT the new user). That's just sudo trying to confirm that you are authorized to run sudo commands.

But if you don't see this [sudo] password prompt, and instead you see something like this:
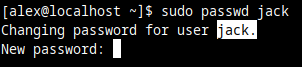
Then you can jump straight to picking the password for your new user. Type it once here, and press Enter. Note that nothing will be displayed on the screen while you type.
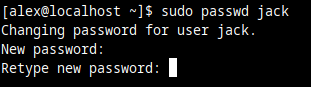
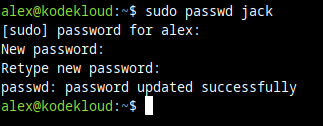
At this prompt, type the password again, and press Enter. This double-checks that you typed the password correctly.
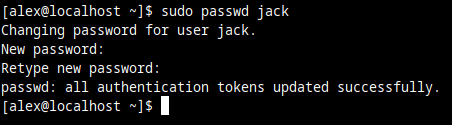
If you see this, it confirms the password was changed successfully:
How to Delete / Remove a User on RHEL, or Rocky Linux (And Distros Based on Them)
If you want to delete the user, but keep the user's home directory, run this command:
sudo userdel user_nameReplace user_name with the actual user you want to remove.
If you want to delete the user, and also delete the user's home directory, run this command instead:
sudo userdel -r user_nameReplace user_name with the actual username you want to remove.
Additional Information
After you add a new user to the system, you might want to follow up with some things. Here are the usual follow-ups:
List Users and Groups
Want to double-check that you created all the right users? You can list all users on the system with this command:
getent passwd | awk -F: '{ print $1 }'To list all groups, run this command:
getent group | awk -F: '{ print $1 }'If you want to learn more about how these commands work, read this blog on how to list all users on Linux.
Add User to Group
After you add a new user to the system, you sometimes want to add it to some groups; like docker to allow it to run docker commands, or sudo, or wheel to grant it sudo privileges.
To add a user to a group, run this command:
sudo gpasswd -a user_name group_nameFor example, to add a user called jack to a group called docker, you would run:
sudo gpasswd -a jack dockerRead this if you want to learn more about how to add, or remove users from groups on Linux.
Add user to Sudoers / Grant a User sudo Privileges
If you want a user to be able to run sudo commands, all you have to do is add them to a special group. Which will work 90% of the times, but if you encounter any issues, then see this detailed blog about how to add a user to sudoers.
To grant a user sudo privileges on Ubuntu / Debian systems, add them to the sudo group with this command:
sudo gpasswd -a user_name sudoReplace user_name with the actual username you want to allow to run sudo commands.
To grant a user sudo privileges on RHEL-based systems, add them to the wheel group instead:
sudo gpasswd -a user_name wheelReplace user_name with the username you want to allow to run sudo commands.
Change User Password
In case a user forgets his /her password, you can change the password with this command:
sudo passwd user_nameReplace user_name with the username you need.
[sudo] password prompt you will first have to type the password for YOUR OWN user, before choosing the password for the other user.So if you see this, type your own password first.

After that, you can choose the password for that different user:
Type the new password you want to choose, then press Enter.
Nothing will be displayed on the screen as you type this; that's normal.
And then type the new password again, to double check you typed it correctly the first time. Once you press Enter at this step, the password should be successfully updated.
Conclusion
This should cover the most common tasks related to adding a new user to a Linux system.
If you're on a journey to learn more about Linux, we have some of the best courses around. Easy to go through. Full of practical exercises to help you memorize what you just learned. And some courses even have a sort of Linux virtual machine running in your browser. So you can practice in a realistic Linux environment, without even having to install anything.
Check them out, see what you think:


Discussion