


Need to create a file on the Linux command line? Here are some easy ways to do that.
The Fastest Way to Create an Empty File on Linux
There's a nice trick to create an empty file on Linux. It's the shortest command you can type, for this purpose. And it requires just one special character, >.
This will work on any Linux distribution that uses the Bash shell. But Bash is the default shell on most distributions, so it will work almost everywhere.
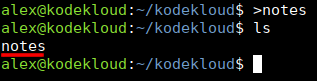
Say you want to create an empty file called notes. All you need to do is run:
>notesAnd that's it, file created!
This works because > is a so-called output redirection operator (in Bash, and similar shells). It tells the shell (command interpreter):
Redirect the output of this command to a file with this name: notes.So you can run something like ls >files.txt and the output of the ls command will be saved into a file called files.txt. But, in this case, the command before the > operator is missing.
In other words, no output is generated. So >notes saves empty output to a file called notes. Hence, it's the quickest way to create an empty file; just one > character needed.
As long as you're in the Bash shell (or others that support it), you can always use this > trick, for speed. But, if for some reason, you use a shell that doesn't support this redirect operator, you can jump to the next, more well-known method.
Generate an Empty File on Linux with the touch Command
To create an empty file called notes, run:
touch notesNormally, touch is a tool designed to modify a file's access, or modification timestamps. But when touch sees that the file does not exist, it automatically creates it. So it's often used for this secondary purpose, to create an empty file.
Now let's jump to non-empty files.
Create a File with One Line of Text Inside, on Linux
Say you want to create a file, and instantly add one line of text to it, at the same time. You can run a command like this:
echo "Don't forget to buy milk" >notesThe result? If you read file with the cat command:
cat notes
You'll see it contains the text line you passed to the echo command.
How does this work?
echo is a command that generates output, based on what text you pass to it.
In this case, the text is Don't forget to buy milk, wrapped between " " double quotes, to make sure the shell doesn't misinterpret special characters like ' ? !, and others.
If you would run the command like this:
echo "Don't forget to buy milk"
It would simply output that back to the screen.
But, as described in the earlier section, the trick is the > redirect operator. So adding that at the end:
echo "Don't forget to buy milk" >notesTells the shell (command interpreter):
Take the output from the previous command (echo), and>redirect it (save it) to a file callednotes.
And that's how the file is created with that text inside.
Create a File with Multiple Lines of Text Inside, on Linux
If you want to create a new file called notes, and then add content inside, line-by-line, run this command:
cat >notesYour command prompt is now waiting for input:
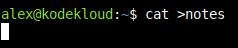
Type what you want, line-by-line (press Enter to jump to the next line):
CTRL+SHIFT+V. Or right click in your terminal window. Just experiment and see what works.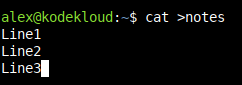
Once you've written your last line, press Enter. And on the empty line your cursor jumped to:
Press CTRL+D (hold down CTRL key and press d).
This tells the cat command you've finished writing your lines. And you'll see the command prompt re-appearing:
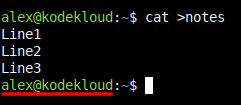
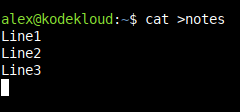
To check if your notes file has the correct content, read it with the cat command:
cat notes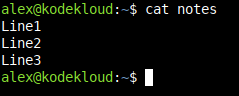
A minor confusion here might be that the commands seem similar, cat notes and cat >notes.
cat notes reads a file called notes.
cat >notes redirects output to a file called notes. And once cat opens up in this mode, it waits for input from you, line-by-line. After it gets all that input, it echoes it back. Normally, it would output it to the screen. But since you redirected with >notes, it will send that output to the file instead.
Create a File and Open It in the Text Editor
What if you need to create a file? And then open it, and add the text you need? It might seem like two steps are required:
- Create file.
- Edit file.
But, as counter-intuitive as it might feel, you can perform both steps in a single operation. You can edit a file that doesn't exist yet. And the text editor will automatically create it once you save the text you added.
The default text editor you will find on RHEL, Rocky Linux, and similar distributions is vi, or vim. The default on Debian, Ubuntu, and similar is nano.
Beginners usually feel that nano is easier to use. Even if not installed by default, you can install nano on RHEL-like distros with this command:
sudo dnf install nanoCreate a File and Edit It with nano
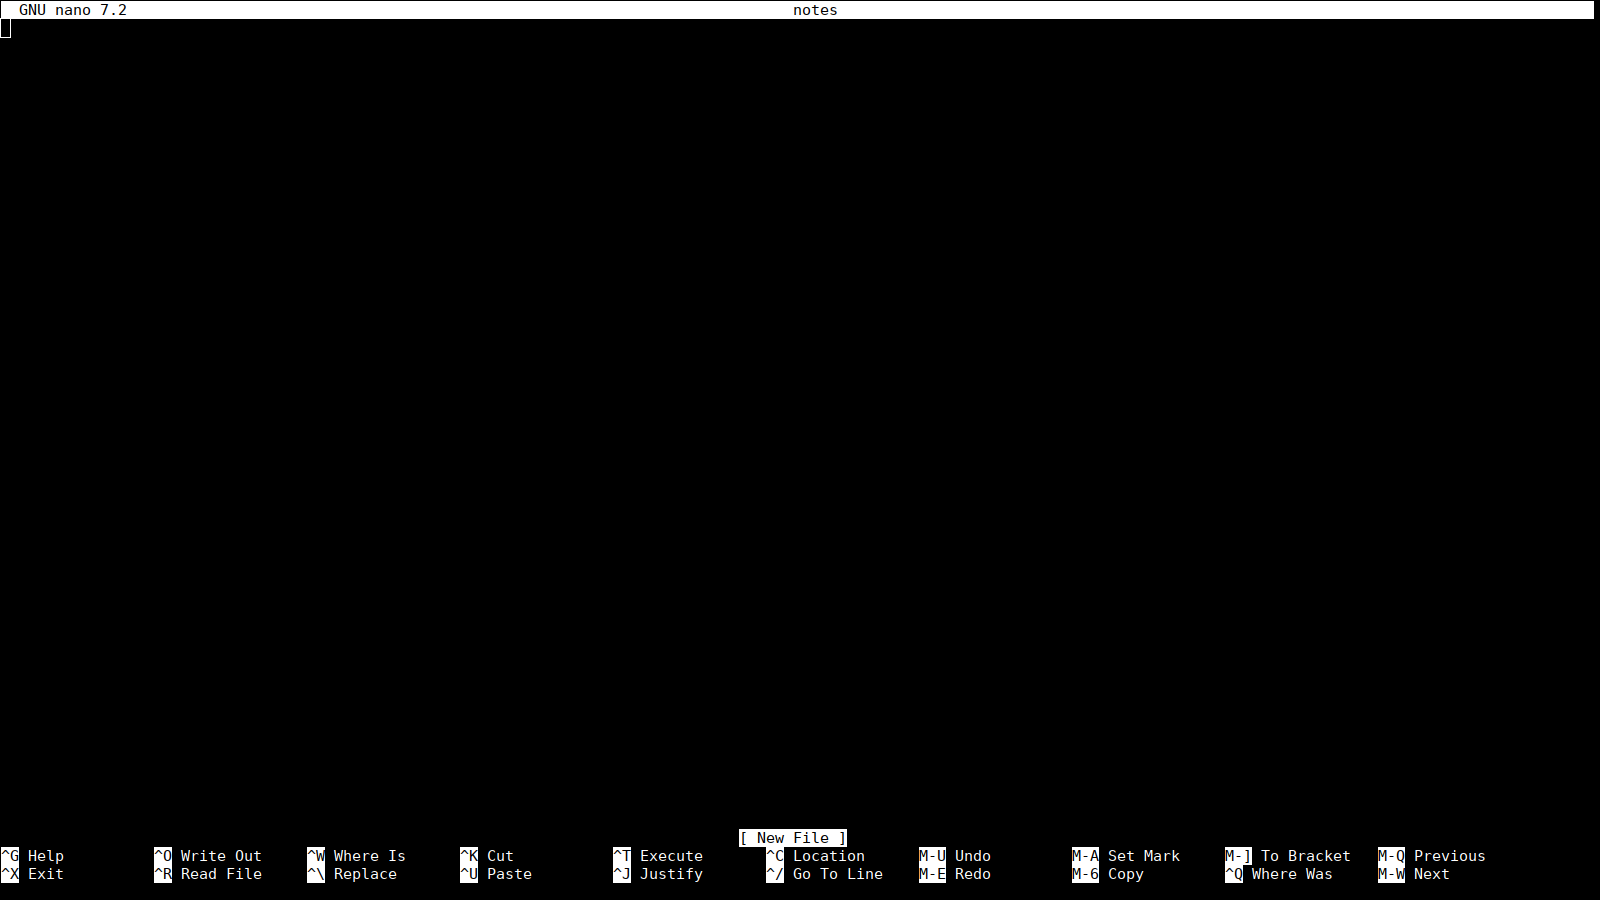
To automatically create a file called notes, and start adding text inside, run a command like this:
nano notesYou will be dropped into a text editor interface like this:
Start typing normally, line by line:
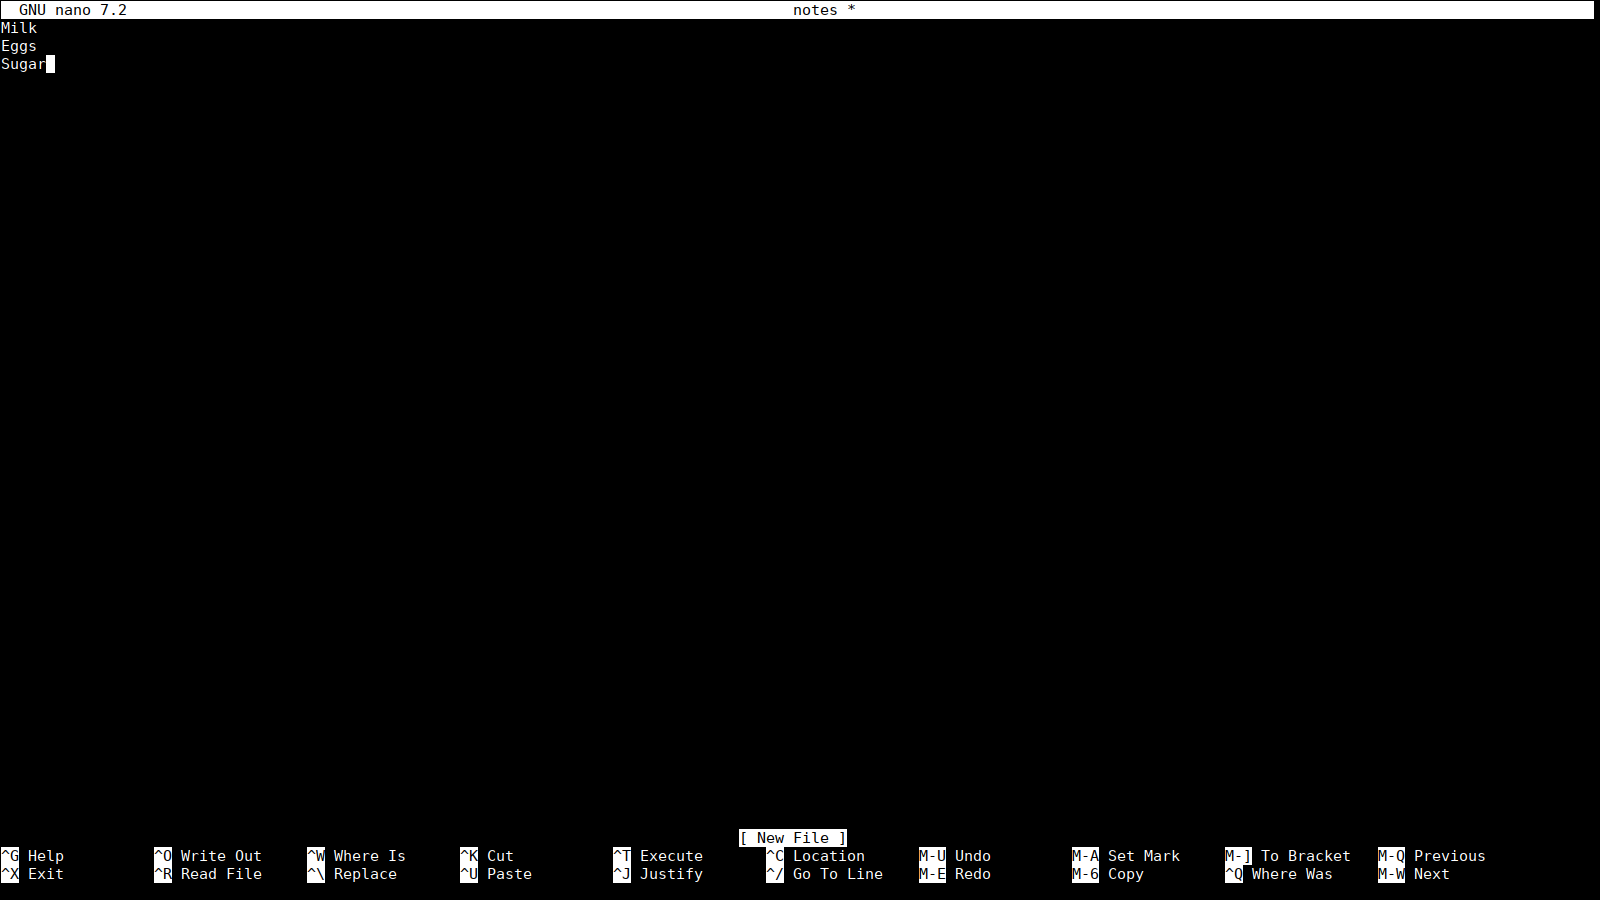
When you're done, press CTRL+X (Hold CTRL key and press x).
You'll see this at the bottom-left:
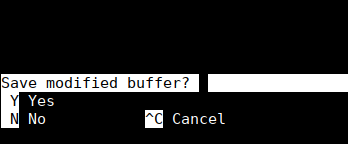
Type y, and then press Enter.
If you want to check the contents of the file, run:
cat notes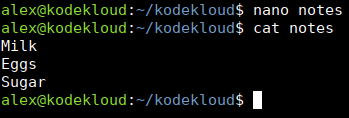
And there it is!
Create a File and Edit It with vim or vi
To automatically create a file called notes, and open it in your editor, run:
vim notesIf you get a "command not found" error, try vi:
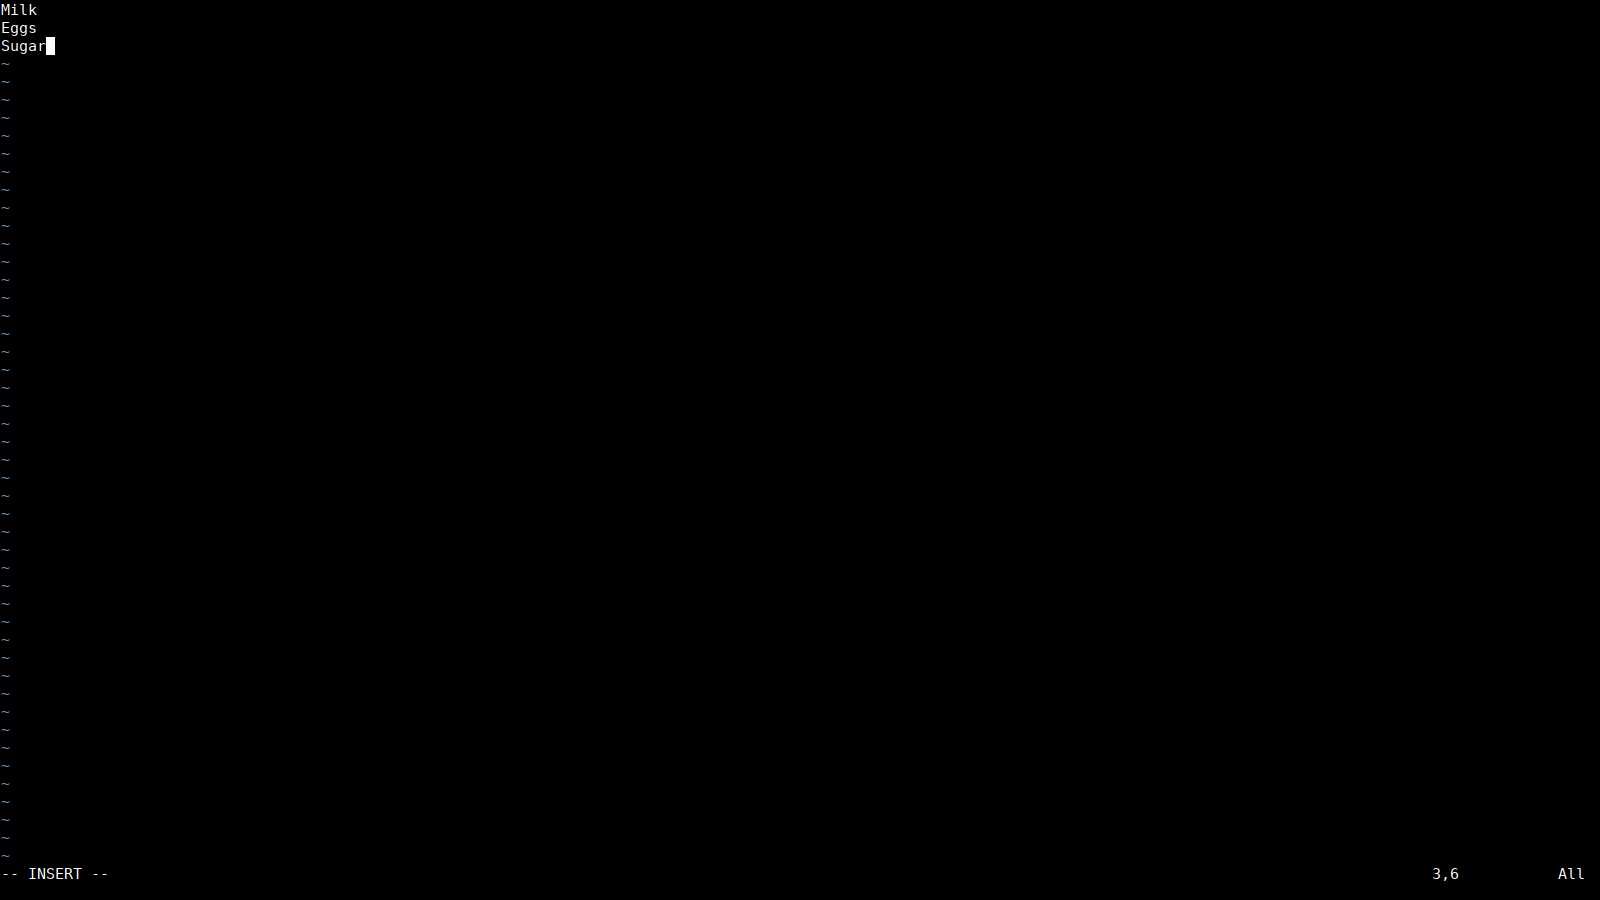
vi notesOnce that opens, don't type anything yet!
You'll see this text editor interface:

At first use vi / vim can seem a bit weird. You cannot immediately start typing text in here. First, you have to enter what is called insert mode in vi / vim.
Do that by pressing i.
Look at the bottom-left corner to confirm:
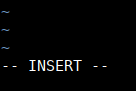
You should see INSERT here.
If that appears, you can now start typing your text.
When you finish editing, do this to save your file:
- Press the
ESCAPEkey (ESC). This exits from insert mode, back to command mode. - Type
:wq. That's colon, w, q. Think of:as listing "These are the actions you will perform." Then specifying write, quit. - Press
Enter.
Now you can check the contents of your notes file with:
cat notes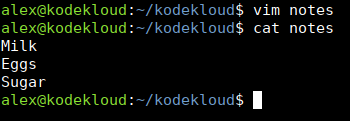
And you should see what you added earlier in the vi / vim editor.
We hope this was a fun read. And will see you in the next blog!


Discussion