


Let's learn about Git branches through the power of example.
How to Use a Git Branch to Add a New Feature to an Application
Imagine our application at version 1.0. It's complete. It has all the features it needs. It works well. And it has these lines of code:
// Main application code:
line1
line2
line3
Git might track this state of our code in what it calls the master branch. Think of it as the "main road" of development. So there will be a commit in master where we will see the code in this state, as shown above.
On a Linux machine (or on Windows' WSL, or Git Bash) here are the commands we could go through to arrive at this exact state in the master branch:
# Switch to our home directory
cd

# Create a new directory called "project"
mkdir project

# Step into the "project" directory
cd project

# Configure the email that will be shown in our Git commits.
git config --global user.email "alex@example.com"

# Initialize this new directory as a local Git repository
git init

# Create a new file called "main.code" and add the fake application code shown in the previous example.
# IMPORTANT: If you want to use this "cat" command,
# you must copy/paste all 6 lines in one shot,
# from "cat >main.code <<ENDL" all the way down to "ENDL" (under line3)

cat >main.code <<ENDL
// Main application code:
line1
line2
line3
ENDL

# Stage the file we want to add in the next Git commit
git add main.code

# Commit the change with the message "Version 1.0 was completed"
git commit -m "Version 1.0 was completed"

# By default, this commit will happen in the "master" branch, as we never explicitly created or switched branches, up to this point.
But, now, imagine we want to add a new feature to our application. And let's assume we need two new lines for this new feature:
line4
line5
We could create a new branch, call it feature/signup, and base it off the master branch:
git switch -c feature/signup master
The git switch command normally just switches to another branch. But with the -c option we told it to also create the branch, and then switch to it.
In this new branch, after a few commits, we would end up with this code:
// Main application code:
line1
line2
line3

// New feature:
line4
line5
To simulate this, we could use these commands:
# Add a few more lines to our main.code file
# IMPORTANT: If you want to use this "cat" command,
# you must copy/paste all 6 lines in one shot,
# from "cat >>main.code <<ENDL" all the way down to "ENDL" (under line5)
cat >>main.code <<ENDL

// New feature:
line4
line5
ENDL

# Stage the file for the next commit
git add main.code

# Commit the change with the message "Added our new feature"
git commit -m "Added our new feature"
Now let's put the master branch and the feature/signup branch side by side. Here's how they would look like, with master on the left, and feature/signup on the right:
// Main application code:                // Main application code:
line1                                    line1
line2                                    line2
line3                                    line3

                                         // New feature:
                                         line4
                                         line5
Or, to be more specific, what the last commit in each branch would look like. Either way, as soon as we switch to one branch, or the other, that's what we would see.
Here's a real example, at the command line. If we switch to the master branch:
git switch master
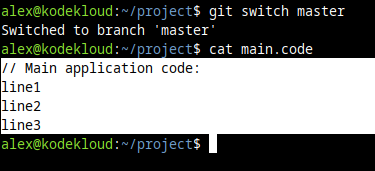
And we take a look at our main.code file:
cat main.codeThis is what we'll see:
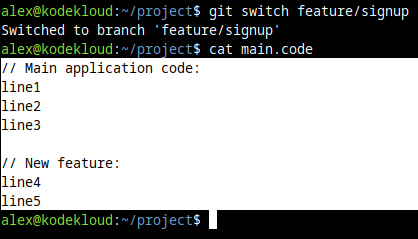
But if we switch to the feature/signup branch, and then check our main.code file:
git switch feature/signup
cat main.code
This is what we see instead:
And it makes sense. Because, remember, we added our latest commit to our feature/signup branch only. So the master branch "does not know" about this latest, new feature commit. It does not "contain" it. It's one step behind.
We can see this clearly with the git log command. On the feature/signup branch, if we look at our commits, we'll see this:
git log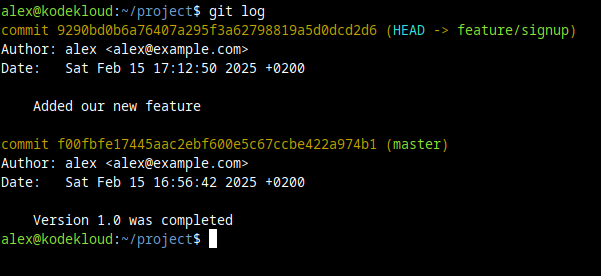
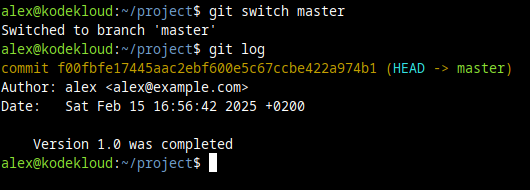
But if we switch to the master branch and check our commits:
git switch master
git log
We notice there's only one commit here. The first (and only one) we made in our master branch specifically.
So this is how branches can have a view of different code stages, different last commit, and different chains of commits.
If anyone wants to see how the code for the main, finished application looks like, they can check out the master branch. If they want to see the new signup feature, they can check out the feature/signup branch.
Same when they want to work on something. They first switch to the branch they want to work in.

Our branch is essentially a "fork in the road." It started out from our main road, called master, and it deviated to a new road called feature/signup, where we started to add code for our new feature.
Once the code for our new feature is well-written, and tested, we can bring it back to our "main road". We'd do that by doing what is called a merge. All the new code added in the feature/signup branch would be brought into the master branch.
In our example, to do this merge, we'd first have to switch to our master branch (since that's where we want to "import" it):
git switch masterAnd then we can merge the changes from our feature/signup branch into our current master branch:
git merge feature/signup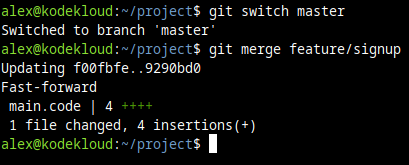
We can already see 4 new lines were inserted. So our main.code file in master should now be up-to-speed with the changes from our feature/signup branch.
And it sure is. If we view our file with the cat command, and check out our commits in the master branch, we'll now see a different story:
cat main.code
git log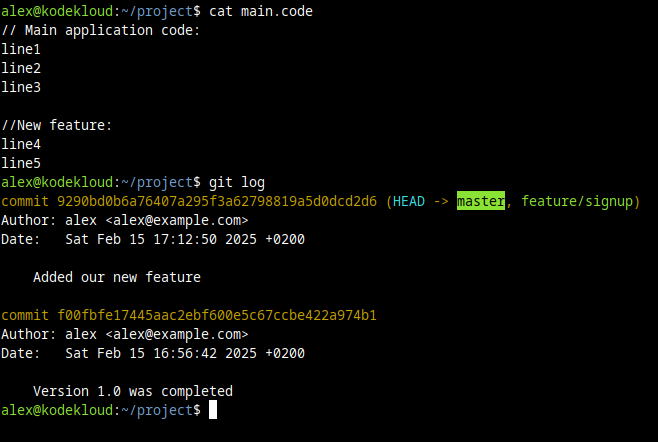
master is now up-to-date with the commits from the feature/signup branch.
And that's how we can work on a separate branch, slowly building up our changes. And when we're happy with the result, we can bring it back to our master branch (or any other branch, if we have a different use case in mind).
Now let's move on to the various ways we can create branches.
How To Create a Local Branch with Git
First thing's first. Remember that a branch is based off something. The branch has to have a starting point.
If we don't specify it, then its starting point will be "wherever we're currently in" (usually, the current branch we're in will be its starting point, by default).
So let's see...
How to Create a New Branch from the Current Branch
To see what branch we are currently in, we can run this command:
git branch --listAnd we'll see an asterisk * next to the branch name we are currently in. Here's how it looks when we are in the master branch:

And here's how it looks when we are in the feature/signup branch:

So if we want to base our new branch off of the master branch, we must first switch to it with this command:
git switch master
If it's another branch we need, we just replace master with the branch name we need.
Now that we're in master we can create a new Git branch in the local repository with this command:
git branch bugfix/bug29-loginformThis would create a new branch called bugfix/bug29-loginform. And it would be based on the current branch we're in.
The name does not have to contain a / character by the way. Instead of bugfix/bug29-loginform, the branch could also be called bug29, if that's what we want to choose. It's just easier to organize things if we use something like category/name.

Remember, this only creates the new branch. But it doesn't switch to it. At this point, we're still in the master branch. If we need to immediately start work on that new branch, we must also switch to the branch after we create it:
git switch bugfix/bug29-loginform
And now we could start to modify our code, and changes (commits) would be tracked under this new branch.
How To Create a Remote Branch with Git
git init in) and associate it with a remote repository with a command like:git remote add origin git@github.com:your_username/repo_name.gitOf course, replace the address after the
origin keyword with whatever the real address to your repository is.Creating a Git branch in a remote repository starts off in a similar way. Meaning that first we create the local branch. And then we simply "push" it (upload it) to the remote repository.
For example, we can create a branch called bugfix/bug30:
git branch bugfix/bug30And then we can push this branch to our remote repository with this command:
git push -u origin bugfix/bug30
In the command above, -u sets the upstream for the local branch. It's a way to tell Git "Hey, this local branch will be synced with this remote branch, at this "origin" location.
And origin is just the usual generic "codename", or "alias" given to a remote Git repository. In the example above my remote Git repository is set to git@github.com:nixtricks/kkproject.git.
So origin = git@github.com:nixtricks/kkproject.git.
Why use a codename / alias? Because it's shorter, less to write. It's easier to say in a command: "Upload to origin" rather than "Upload to git@github.com:nixtricks/kkproject.git".
To see what remote repositories are associated with the local repository (and their aliases), we can run this command:
git remote -v
As we switch to this branch with git switch bugfix/bug30 and then add new changes and commits to it, we can rerun the same git push command to keep pushing our new commits from the local bugfix/bug30 branch to the remote bugfix/bug30 branch.
How to Create a New Branch from Another Branch
When we create a new branch, we can manually specify a starting point for it.
Imagine the old branch we have, feature/signup. We later notice that this new feature has a bug that is not that easy to correct. What we can do is create a new branch called bugfix/bug31, and base it on branch feature/signup. We can do that with the command:
git branch bugfix/bug31 feature/signupSo we can see the general syntax to create a new branch off of an existing old branch is:
git branch new_branch old_branchHow to Create a New Branch from a Commit
In some cases we won't want to base our new branch on another old branch. Instead, we'll want to base it on a specific commit.
For example, imagine that the branch bugfix/bug30 has 10 commits in it. If we base a new branch on this, it will start out exactly "at the end" of bugfix/bug30. The new branch will look just like bugfix/bug30 looked like on its last, 10th commit.
But maybe there's some reason we want to "start in the middle". Maybe it's commit #5 that is interesting in that branch. Simply because "some new problems" might have started at the 5th commit in that branch.
So we can start off a branch based on a certain commit hash with a command like this:
git branch testing/bug30-commit5 7db2dca2This would create a branch named testing/bug30-commit5 based on the commit that starts with the hash 7db2dca2.
For reference, the git log command can show us commit hashes:
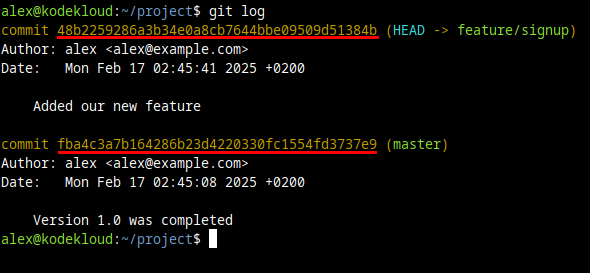
And we can also see these in remote repositories, like GitHub web pages.
We can use the first few characters of these hashes in our commands. It's recommended to use at least 6-8 characters, to make sure the first few characters of this hash don't match the first few characters of another hash.
How to Create a New Branch from a Tag
Imagine that one day all that code looks perfect. The branches have been merged into the master branch. The bugs have been fixed. We make the last commit, proud of our work.
The master branch will go on, tracking other changes in the future. And this last commit that we made today, we'll forget about it in a few weeks, or months. But this is a very important commit. It's the one where we wrapped up all the plans we had for this project, for this quarter of the year. It's the commit that marks the moment when our application is once again complete! We can think of it as version 2.0.0.
Since branches can be deleted, and the commits forgotten, we need to track this point in time, when version 2.0.0 was released. We can do that by using a tag.
With this command, we can tag our current commit, and call the tag v2.0.0:
git tag v2.0.0A tag is essentially an "easy to remember name for a specific commit". Think of it like a bookmark.
A few months later, if we want to create a new branch called version2-test, and base it on that tag called v2.0.0, we can run a command like this:
git branch version2-test v2.0.0How to Create a New Local Branch from a Remote Branch
Let's imagine this. Maybe our co-worker, Jane, just posted some interesting commits. And she uploaded these to the remote repository, in a branch called improvements/signup. How do we get this remote branch on our local computer?
First of all, we need to refresh our data. Our local repository won't know that a new remote branch was recently created. We can refresh this data (get new information about the remote repository) by running this command:
git fetch
Notice how the command informs us about the new repository it found.
It's important to mention that git fetch will pull new data from the remote repositories aliased as origin. Which is the default, on most systems. But if on your system the remote repositories are aliased with another name, like gitserver, then specify that name as well. Example: git fetch gitserver.
As we learned before, a command like git remote -v will show what remote repositories are associated with the local ones, and what aliases/names they have.

Now here's how to create a new branch based on a remote branch. If we want to:
- Create our (local) branch, and call it
janes-branch. - Base it on the remote branch called
improvements/signup, - from the remote repository aliased as
origin.
We'd run a command like this:
git branch janes-branch origin/improvements/signupSo the general syntax is:
git branch new_branch_name alias_of_remote/branch_nameAnd that's about it. Don't forget that after a new branch is created, no matter its source, to start working "inside" it we also have to switch to it with a command like:
git switch janes-branchAlso, it might be useful to know:
How to View Local and Remote Branches
To view all the local branches, we can run this command:
git branch --list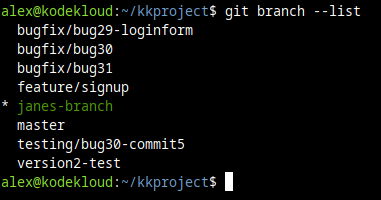
And to view all the remote branches we can run this command:
git branch -r
git fetch beforehand to make sure you are up-to-date with whatever might have changed on the remote repository. Generally, whenever you need data from the remote repositories you'll need to run some kind of command to refresh your local data with new information about the remote location. For example, you might also need some git pull commands if you want to see all the latest commits, code changes, etc.And to view both local and remote branches, at the same time:
git branch -a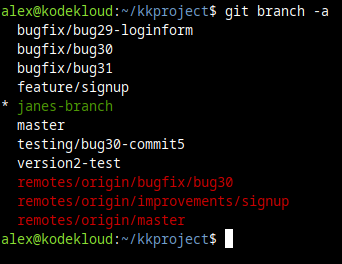
Conclusion
So that's the story about Git branches. If you read this far, thank you! We hope this was easy to understand and pleasant to read.
If you're more of a visual learner, we also have this Git Course for Beginners:


Discussion