Kubernetes is a production-grade, open-source platform that orchestrates the placement (scheduling) and execution of application containers within and across computer clusters.
In this post, I will demonstrate some options that we can use to self-provision a single-node k8s cluster, for exam practice or testing purposes, check it out!

Option 1: minikube
I used Macbook Air M2 (macOS Monterey), and going to use brew to install minikube.
Step 1: Installation
brew install minikube
Step 2: Start
minikube start

It will take a few minutes for package downloading and cluster provisioning. If you see this message
"Done! kubectl is now configured to use "minikube" cluster and "default" namespace by default", you’re good to go!
Step 3: Verification
trungtran@Trungs-MacBook-Air Downloads % kubectl cluster-info
Kubernetes control plane is running at https://127.0.0.1:56904
CoreDNS is running at https://127.0.0.1:56904/api/v1/namespaces/kube-system/services/kube-dns:dns/proxy
trungtran@Trungs-MacBook-Air Downloads % kubectl run nginx --image=nginx:alpine
pod/nginx created
trungtran@Trungs-MacBook-Air Downloads % kubectl get po
NAME    READY   STATUS    RESTARTS   AGE
nginx   1/1     Running   0          13s
You can also SSH to cluster node by using this command
trungtran@Trungs-MacBook-Air Downloads % minikube ssh
docker@minikube:~$ sudo ls /etc/kubernetes/manifests/
etcd.yaml  kube-apiserver.yaml	kube-controller-manager.yaml  kube-scheduler.yaml
Reference: minikube start | minikube
Option 2: Docker for Desktop Kubernetes
With Docker for Desktop, it much more easier to provision a Kubernetes cluster as it part of Docker for Desktop, we just needed to enable it.
Step 1: Installation
Install Docker for Desktop: Install Docker Desktop on Mac | Docker Docs
Step 2: Start
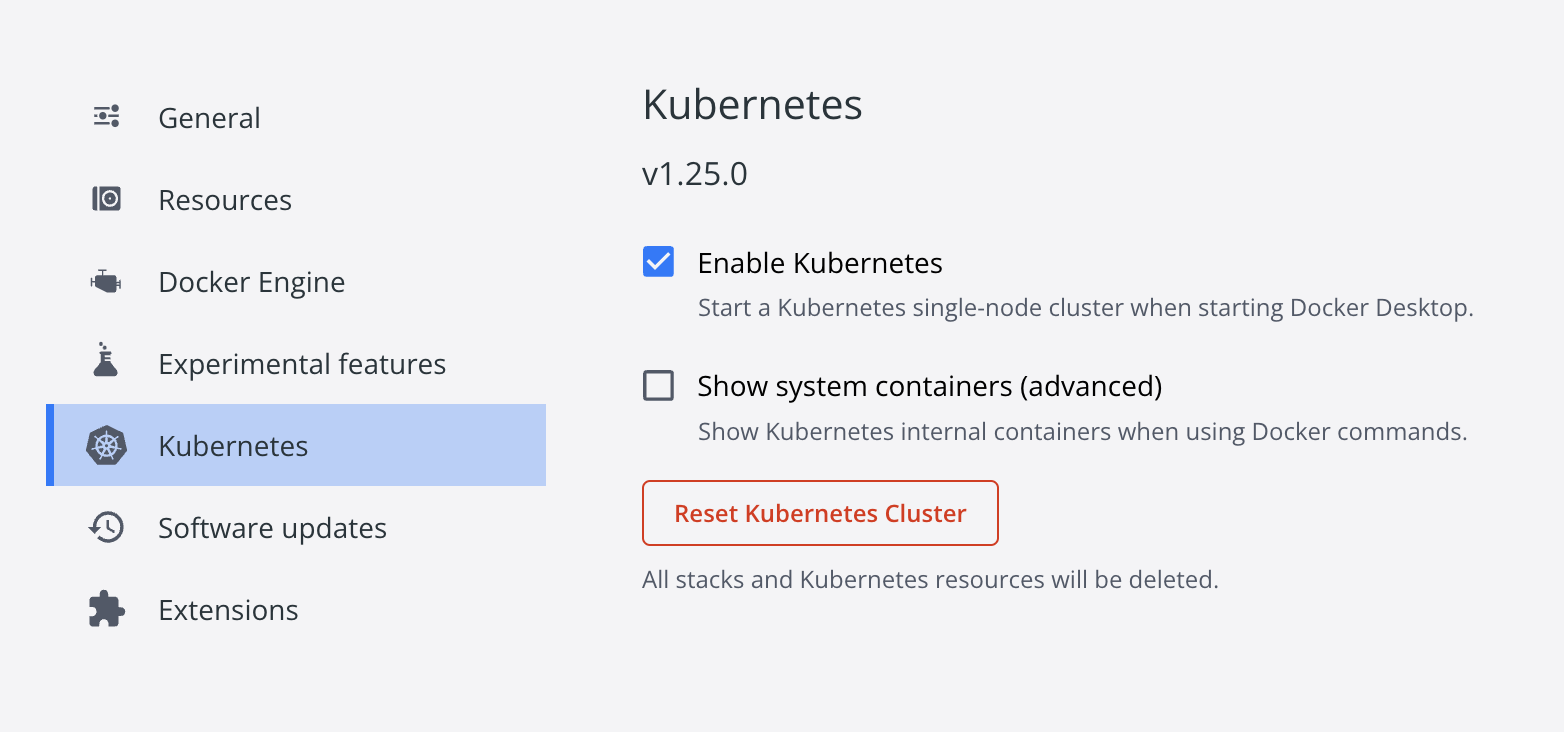
Enable Kubernetes cluster: Deploy on Kubernetes with Docker Desktop | Docker Docs
- From the Docker Dashboard, select the Setting icon, or Preferences icon if you use a macOS.
- Select Kubernetes from the left sidebar.
- Next to Enable Kubernetes , select the checkbox.
- Select Apply & Restart to save the settings and then click Install to confirm.
Step 3: Verification
trungtran@Trungs-MacBook-Air ~ % kubectl cluster-info
Kubernetes control plane is running at https://kubernetes.docker.internal:6443
CoreDNS is running at https://kubernetes.docker.internal:6443/api/v1/namespaces/kube-system/services/kube-dns:dns/proxy
kubectl get po -n kube-system
NAME                                     READY   STATUS    RESTARTS           AGE
coredns-95db45d46-54v7m                  1/1     Running   3 (2d16h ago)      32d
coredns-95db45d46-wjvht                  1/1     Running   3 (2d16h ago)      32d
etcd-docker-desktop                      1/1     Running   3 (2d16h ago)      32d
kube-apiserver-docker-desktop            1/1     Running   3 (2d16h ago)      32d
kube-controller-manager-docker-desktop   1/1     Running   3 (2d16h ago)      32d
kube-proxy-jqp7j                         1/1     Running   3 (2d16h ago)      32d
kube-scheduler-docker-desktop            1/1     Running   3 (2d16h ago)      32d
storage-provisioner                      1/1     Running   3 (2d16h ago)      32d
vpnkit-controller                        1/1     Running   1360 (5m14s ago)   32d
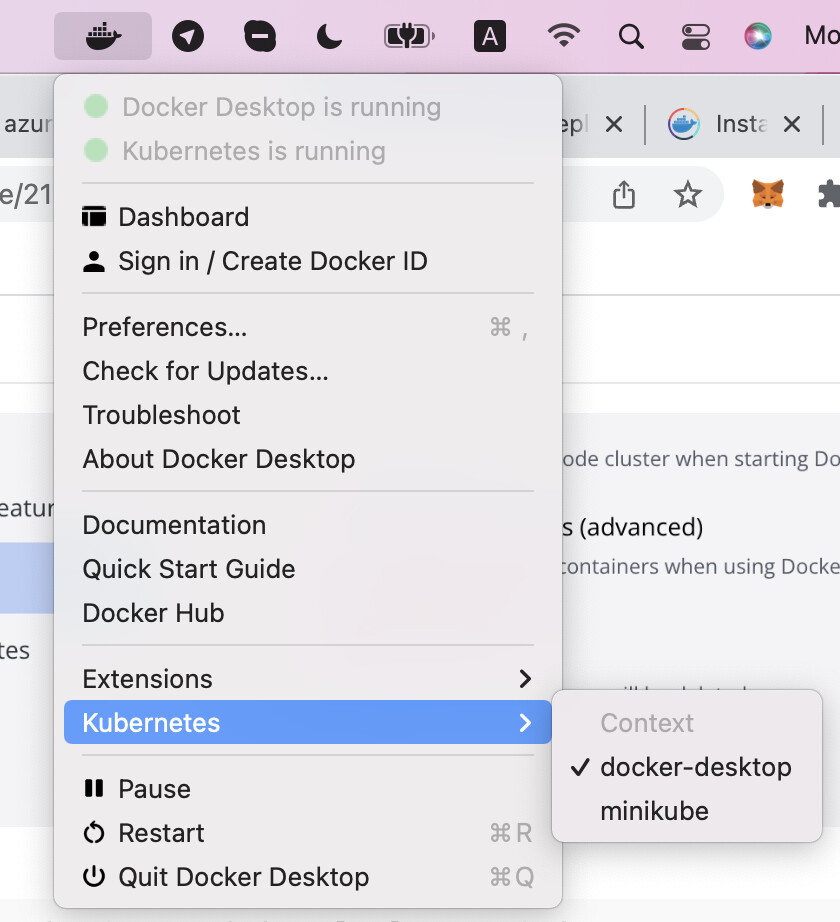
Notes: if you have more than 1 cluster on local env (minikube and Docker for Desktop), you can switch the context by accessing the below menu:
Option 3: Kind
This option is quite complex compared to minikube and Docker for Desktop, please visit the official guidelines from Kind for detailed information!
https://kind.sigs.k8s.io/docs/user/quick-start/#installing-with-a-package-manager
Happy learning,
Trung.