In the previous piece of the 7-article series, we covered Image Creation, Management, and Registry. This piece introduces the Docker Engine, including its architecture, installation, and configuration. We will also go through basic container operations and explore various ways of configuring and troubleshooting the Docker Daemon.
Here are the five other parts:
- Docker Certified Associate Exam Series (Part-1): Container Orchestration
- Docker Certified Associate Exam Series (Part-2): Kubernetes
- Docker Certified Associate Exam Series (Part-5): Networking
- Docker Certified Associate Exam Series (Part-6): Docker Engine Security
- Docker Certified Associate Exam Series (Part-7): Docker Engine Storage & Volumes
Docker Engine Architecture
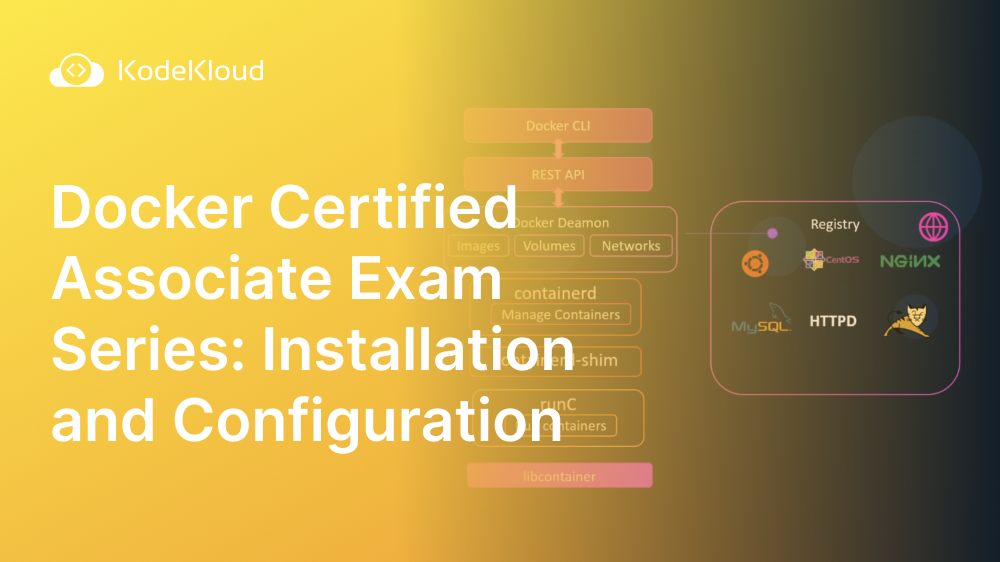
Docker was first released for public use in 2013. It consisted of three elements: the Docker CLI, the Docker Daemon, and the REST API.
- The Docker Command Line Interface (CLI) is the client for composing and running commands to manage Docker objects.
- The Docker Daemon server creates and runs Docker objects, including images, networks, containers, and volumes.
- The REST API is an interface that allows you to manage and interact with Docker Objects.
The first version of Docker relied on Linux Container (LXC) to manage and run Docker objects. This scheme used kernel elements like Namespaces and CGroups to create isolated environments (containers). The next release, Docker v0.9 (2014), introduced a new execution environment known as libcontainer. Libcontainer allowed the Docker Daemon to interact directly with Linux Kernel elements, and it became Docker’s default execution environment.
Once Docker had gained popular use, the Open Container Initiative (OCI) came up with specifications that would ease the running and management of containers. The OCI defined two important specifications: the Runtime Specification (runtime-spec) and Image Specification (image-spec).
- Runtime specification defines how a bundle will be operated from when the disk is unpacked to when the container stops. It describes a container’s lifecycle.
- Image specification defines how you create an open container image and includes image configuration, filesystem serialization, and the image manifest.
The next release, Docker v1.11 (2016), broke down the Docker Daemon into smaller functional components. Containers could now run on an independent component known as runC. The new platform for managing containers would now be containerd. If the Daemon failed or needed a restart, containers could be run and managed by containerd-shim, which runs and manages containers in the background and then reattaches them once the Daemon is back up.
Docker Objects
Docker mainly helps create and manage four types of objects:
- Images - These are read-only templates used to create containers. These could be the base OS image (e.g., CentOS, Ubuntu), applications such as servers and databases, or custom-built images for your application.
- Containers - These are read-write templates representing the running instance of an image.
- Network - A connection that implements communication between containers.
- Volumes - Containers are ephemeral, only staying on when running a task. We use volumes to persist data stored in containers for reference and future use.
Registry
A registry is a repository on which you can publish, store, and share images, either publicly or within your organization. DockerHub is a public registry where users can access and publish base OS images, applications, and privately created images. Each organization can have its own Private Trusted Registry where only organization-specific images can be stored or retrieved. Installing Docker Enterprise gives you and your team access to a shared registry used for development and production.
So, what exactly goes on behind the scenes when you run a Docker command? Consider a user trying to pull the Ubuntu OS from the registry by running the command:
docker run ubuntuLet us learn this in a few steps:
- Once you type this command onto the CLI, the client will convert this command into a RESTful API call. This is then passed onto the Docker Daemon as a request.
- The Daemon will first check whether the specified image exists within the local file system. If it doesn’t exist, Docker will download the image from DockerHub.
- This downloaded image will make a call to containerd, asking it to initiate a container.
Containerdwill first convert this image into an OCI-compliant bundle, which is passed tocontainerd-shim.Containerd-shimwill then pass a call torunC, which creates and runs the specified container.
Demo- Docker Engine Setup: Ubuntu
You should meet the prerequisites before installing Docker on your Ubuntu machine.
First, begin by uninstalling old versions of Docker on your machine:
for pkg in docker.io docker-doc docker-compose docker-compose-v2 podman-docker containerd runc; do sudo apt-get remove $pkg; doneThis command removes installed Docker packages (if any) but preserves images, volumes, containers, and networks.
To set up the repository, first, update the apt package index, then install these packages to allow apt to access a repository over HTTPS:
sudo apt-get updatesudo apt-get install \
apt-transport-https \
ca-certificates \
curl \
gnupg-agent \
software-properties-commonThen add an official GPG key for docker:
curl -fsSL https://download.docker.com/linux/ubuntu/gpg | sudo apt-key add -You will then be given a key fingerprint. To verify that this key has a valid fingerprint, search the last characters of this fingerprint:
sudo apt-key fingerprint 0EBFCD88

pub   rsa4096 2017-02-22 [SCEA]
      9DC8 5822 9FC7 DD38 854A  E2D8 8D81 803C 0EBF CD88
uid           [ unknown] Docker Release (CE deb) <[email protected]>
sub   rsa4096 2017-02-22 [S]
You can now create a stable repository by running the command:
sudo add-apt-repository \
   "deb [arch=amd64] https://download.docker.com/linux/ubuntu \
   $(lsb_release -cs) \
   stable"
To install the Docker Engine, update the apt package index then installs the latest version of Docker:
sudo apt-get updatesudo apt-get install docker-ce docker-ce-cli containerd.ioTo find a specific version, you will first list the available versions by using the command:
apt-cache madison docker-ceYou can now install a specific version using the version string:
sudo apt-get install docker-ce=<VERSION_STRING> docker-ce-cli=<VERSION_STRING> containerd.ioLastly, verify that this Docker Engine has been installed by running the hello-world image:
sudo docker run hello-worldDemo – Docker Engine Setup: CentOS
In this demo class, you will learn to install Docker’s CentOS distribution on your Linux machine. You will first set up a repository and then use it to install and update Docker.
To set up the repository, we'll install the yum-utils package, then configure a stable repository by typing the following command into your terminal:
sudo yum install -y yum-utilssudo yum-config-manager \
--add-repo \
https://download.docker.com/linux/centos/docker-ce.repoYou can now install the latest version of the Docker Engine and containerd by running the command:
sudo yum install docker-ce docker-ce-cli containerd.io docker-buildx-plugin docker-compose-pluginIf you are looking to install a specific version of Docker, you could list the available versions:
yum list docker-ce --showduplicates | sort -rThis code will show your results from highest to lowest. You can now install Docker using the package name docker-ce plus the version string:
sudo yum install docker-ce-<VERSION_STRING> docker-ce-cli-<VERSION_STRING> containerd.io docker-buildx-plugin docker-compose-pluginYou can now initiate Docker by running the command:
sudo systemctl start dockerTo verify that the Docker Engine has been correctly installed, you can test the hello-world image.
sudo docker run hello-worldThe container is running properly if it prints an informational message and then exits. This implies that the image has been downloaded and run in a container as intended.
Docker Service Configuration
Here, we’ll see how to configure the Docker Daemon service. We have already explored how to run services using the systemctl utility. Configuring Docker as a service will let the Daemon run in the background, which automatically starts when the system boots up.
You can start the Daemon manually and run it as a foreground process by running the command:
dockerdTo provide additional information for your Daemon, you will use the debug command:
dockerd --debugUnix Socket
When the docker daemon initiates, it listens for HTTP through an internal Unix Socket via the path /var/run/docker.sock. This is a mechanism used for communication between different processes in the same host. The Docker CLI communicates with the Docker Daemon using this socket.
If you want to target the Docker CLI of a different host and run containers on that host, we’ll configure our Daemon to listen to a tcp interface on that host by adding the tcp host option to the Docker Daemon command:
dockerd --debug \
   --host=tcp://192.168.1.10:2375
TCP Socket
The remote host can also target your daemon using docker commands. To enable this, set up an environment variable called DOCKER_HOST to point to the host’s TCP interface.
export DOCKER_HOST= "tcp://192.168.1.10:2375"Here, 192.168.1.10 is the host’s TCP address, while 2375 is the default Docker port.
TLS Encryption
You can add transport-level security by adding certificates and validating the TCP path. You can do this by adding the elements:
dockerd --debug \
   --host=tcp://192.168.1.10:2376
   --tls=true
   --tlscert=/var/data/server.pem
   --tlskey=/var/data/serverkey.pem
Docker Daemon Configuration File
Alternatively, you can configure all your daemon specifications in a JSON format and save it to the address /etc/docker/daemon.json.
The arguments and expressions for this file are:
{
"debug": true,
"hosts": ["tcp://192.168.1.10:2376"]
"tls": true,
"tlscert": "/var/docker/server.pem"
"tlskey": "/var/docker/serverkey.pem"
}
You can then run the Docker Daemon command to initiate the Daemon with this configuration information.
Basic Container Operations
The Docker CLI lets you manage objects using docker commands. The typical format for a Docker command is:
docker <docker object> <sub-commance> [options] <argument/command>For instance, to list properties of images, you will run the command:
docker image lsThis is the new command format that groups commands under objects. The earlier command style involved grouping commands under specific tasks, such as:
docker run -it ubuntudocker builddocker attach ubuntudocker kill ubuntuTo create a new container, run the docker container create command:
docker container create httpdThis command creates a container based on an http image that exists on the host. If this image does not exist, it is first downloaded from the public repository. Deploying Docker automatically creates a default path library: /var/lib/docker/.
- You can access a list of all objects in this path by running the command:
ls /var/lib/docker/- To list the containers present in this library, use the command:
ls /var/lib/docker/containers/- To check the files present within a specific container in this library, add the container’s ID to the string above:
ls /var/lib/docker/containers/container-ID- To list all the running containers in a Docker environment:
docker container ls- To list all containers present:
docker container ls -a- To view details on the last created container:
docker container ls -l- To display running containers with their shortened container ID:
docker container ls -q- To display all containers with the shortened container ID:
docker container ls -aq- To initiate a container, use the start command:
docker container start <container-name>- To create a container and start it immediately after downloading, use the run command:
docker container run <container-name>- You can add several options to the run command to dictate the behavior of your container. To run the Ubuntu OS base image with an interactive terminal listening for commands, type the command:
docker container run -it ubuntuAlways specify the option before the image name when writing the command. Any specification placed after the image is passed into the container as a default configuration command. When you exit a process in a container with just a single process, the container also exits from Docker.
Typically, when you use the run command, Docker automatically gives your image an arbitrary name. To specify a name for your container, type it into the command as follows:
docker container run -itd --name=webapp ubuntuThis command now creates an Ubuntu OS image and names the container webapp.
To rename this container to custom-web app, run the command:
docker container rename webapp custom-webappTo run a container in the background, run it in detached mode using the command:
docker container run -d httpdTo reattach this container, use the attach command:
docker container attach httpdInteracting with a Running Container
When a process terminates in a container, the container exits. When you detach a container, it continues running in the background. To detach from a container while it is active, press CTRL+p+q. You can now run commands on the container using the exec command. For instance, to display the hostname of a known container, run the command:
docker container exec <container-ID> hostnameInspecting a Container
You can use several operations to check the status of your containers.
- To return all container details in JSON format, use the command:
docker container inspect app-name- To inspect the utility statistics of all running containers, use the command:
docker container stats- To list the processes running inside a container:
docker container top app-name- To check all the contents written by a process/container:
docker container logs app-name- To live-stream process logs:
docker container logs -f app-name- To display all changes and configurations set to the docker environment within a set time frame:
docker system events --since 60mStopping and Removing a Container
We'll recap Linux signals to understand how processes are paused and stopped inside containers. These are commands that directly control processes at runtime.
- To pause a process, we use the signal:
kill-SIGSTOP Process-ID- This command preserves a process state so it can be resumed later. To resume a paused process:
kill-SIGCONT Process-ID- To completely terminate a process, we use the signal:
kill-SIGTERM Process-ID- If this signal takes too long or is ignored by the process, you can force a stop by running the command:
kill-SIGKILL Process-IDWhen you run the docker stop command, it passes the SIGKILL signal to processes running inside the container. Docker cannot use Linux signals to pause and unpause containers since processes could be coded to handle these commands differently. It instead uses the freezer cgroup.
- You can also send Linux signals to a containerized process using the kill command:
docker container kill --signal=9 app-name- To remove a container, you must first stop the processes running inside it using the command:
docker container stop app-name- Then remove it using the command:
docker container rm app-nameWhen we pause/stop a container, it stops running but is still preserved in the default directory so we can restart it. When we remove a container, it is erased from the library to preserve space.
- To remove all containers, we’ll first list their IDs using the command:
docker container ls -q- We then append this command to the stop command to terminate all running containers:
docker container stop $(docker container ls -q)- To remove all running containers, we append this command to the remove command but include stopped containers:
docker container stop $(docker container ls -aq)Setting Container Hostnames
We saw that you can easily assign a name to your container in the Docker CLI. For instance, an Ubuntu container can be named webapp using the command:
docker container run -itd --name=webapp ubuntuDocker usually assigns a hostname, which allows the creation of URL addresses and writing into log files. The hostname is typically a shortened version of the container’s unique ID. You can also manually set this hostname using an attribute with the run command:
docker container run -itd --name=webapp --hostname=webapp ubuntuCopying Contents into Containers
You may want to transfer files between containers and hosts. For this, use the docker container cp command, followed by the source path and then the destination path. For instance, to copy files from /tmp/web.conf on the host to the container, we run the command:
docker container cp /tmp/web.conf webapp:/etc/web.confTo transfer from the docker container to a local host:
docker container cp webapp:/root/dockerhost /tmpYou can only copy files onto a directory that exists; otherwise, you will get a destination/source path error. To copy an entire directory, specify its path as the source followed by the destination path, i.e.:
docker container cp /tmp/app webapp:/opt/appPublishing Ports
Every container has an internal address that users can connect to when trying to access the container. You can also get a response from the server by running the curl command. This only works if the user is trying to access the container from a local host.
A user looking to access a container from a different host can use the host’s IP address. The container’s ports should be mapped onto the free port within the Docker host. For instance, to map our application’s port 5000 to the host’s port 80, we’ll run the command:
docker run -p 80:5000 KodeKloud/simple-webappIf the host IP address is 192.168.1.5, users can now access the container using the URL: http://192.168.1.5:80
This means you can run multiple instances of your application on the same host or access different applications like databases and web servers on the same host.
If a host is part of three networks, they are assigned 3 separate IP addresses. You can access your containers from each of these networks using the IP addresses. We can limit this to a specific IP address by specifying it as an attribute on the command line:
docker run -p 192.168.1.5 80:5000 KodeKloud/simple-webappIf you omit the host port in this command, Docker will publish the container to a random host port within the random range: 32768-60999. This port range is saved onto the file path: cat /proc/sys/net/ipv4/ip_local_port_range.
Demo: Container Operations
This demo covers advanced and useful commands used in container creation and management. You will practice how to:
- run,
- remove,
- stop,
- list,
- name containers,
- set up hostnames,
- execute commands on remote hosts,
- restart containers on failure,
- exit processes,
- test containers,
- copy files, and,
- access containers from remote hosts.
Troubleshooting the Docker Daemon
When you want an overview of all running containers, run the command:
docker psIf you get an error saying docker could not connect, this could mean that the Daemon service is down.
For a remote connection, you can check on the Docker host through the TCP interface:
export DOCKER_HOST="tcp://192.168.1.10:2375"You can now check the processes running on this host using the ps command. Furthermore, to check the status of all running Docker containers, use the command:
systemctl status docker web-appLogs are a great resource that helps you monitor container activity. To display all system logs:
journalctl -u docker.serviceYou can also check on the Docker Daemon configuration file for any errors in specification. You should set the “debug” option to “true” for proper troubleshooting. Another way to troubleshoot is to check for disk space on the host and free space wherever you can.
To check the disk status, run the command:
df -hTo remove all images and non-running containers, run the prune command:
docker image prunedocker container pruneYou could display system information and events as you try to pinpoint the source of disturbance. You can access events and system information by running these commands:
docker system infodocker system eventsDocker Debug Mode
In this demo class, you will cover the concepts explored in the previous section practically. You will run the docker system info command to make sure that the debug mode is set to true. You will then restart docker services by running the command:
systemctl reload dockerAnother way of reloading the service is to use Linux Signals.
Logging Driver
Docker uses logging drivers to implement mechanisms that access event data on all the running processes and containers. The drivers also define how and where log files are stored. Log files are stored in a JSON format, named like their container ID, and are saved to the default library /var/lib/docker/containers. To display container logs for nginx, we use the command:
docker logs nginxIf you want to display the logging drivers supported by a container, check the plugins column of the output of the docker system info command. You can specify your desired logging driver in the JSON file for the docker daemon:
{
"debug": true,
"hosts": ["tcp://192.168.1.10:2376"]
"tls": true,
"tlscert": "/var/docker/server.pem"
"tlskey": "/var/docker/serverkey.pem"
"log-driver": "awslogs"
}
You can override a container’s existing logging driver by specifying on the command line:
docker run -d --log-driver json.file nginxYou can also use a JSON expression to find the logging drivers directly from the output of the Docker inspect command:
docker container inspect -f '{{.HostConfig.LogConfig.Type}}' nginxOur DCA Exam Preparation course explains all the Docker concepts in the certification curriculum. After each topic, you get interactive quizzes to help you internalize the concepts learned.
At the end of the course, we have mock exams that will help familiarize you with the exam format, time management, and question types.
This concludes the Installation and Configuration chapter of the DCA certification exam. To test your knowledge, it is strongly recommended that you access research questions on all core concepts covered in the coursework.
Research Questions
Here is a quick quiz to help you assess the concepts covered in this article. Leave your answers in the comments below and tag us back.
Quick Tip – Questions below may include a mix of DOMC and MCQ types.
1. Run a webapp container, and make sure that No logs are configured for this container.
[A] docker run -it --logging-driver none webapp
[B] docker run -it webapp
[C] docker run -it --log-driver none webapp
[D] docker run -it --log none webapp
2. Where is the log of the webapp container, with id `78373635`, stored on the Docker Host?
[A] /var/lib/docker/containers/78373635/78373635.json
[B] /var/log/docker/78373635.json
[C] /etc/docker/78373635.json
[D] /var/lib/docker/tmp/78373635/78373635.json
3. What Linux feature isolates containers from the Docker host?
[A] Control Groups (CGroups)
[B] Namespaces
[C] Kernel Capabilities
[D] LXC
4. Which of the following commands is used to start the docker daemon on Linux?
[A] service docker start
[B] systemctl status docker
[C] systemctl start docker
[D] systemctl docker start
5. What Linux feature allows for the restriction of CPU and memory resources on docker containers?
[A] Control Groups (CGroups)
[B] Namespaces
[C] Kernel Capabilities
[D] LXC
6. Which command is used to check the default logging driver?
[A] docker system df
[B] docker system events
[C] docker system prune
[D] docker system info
7. Which of the following commands may be used to list all images matching the com.example.version label?
[A] docker images --label="com.example.version"
[B] docker images --filter "com.example.version"
[C] docker images --filter "label=com.example.version"
[D] docker images --format "label=com.example.version"
8. Which command is used to delete the stopped containers?
[A] docker container remove $(docker container ls -aq)
[B] docker container prune
[C] docker container rm $(docker container ls -aq)
9. What is the command to stop all running containers on the host?
[A] docker container stop $(docker container ls)
[B] docker container rm $(docker container ls -q)
[C] docker container stop $(docker container ls -q)
[D] docker container stop --all
10. While building a docker image from code stored in a remote URL, which command will be used to build from a directory called 'docker' in the branch 'dev'?
[A] docker build https://github.com/kk/dca.git#dev:docker
[B] docker build https://github.com/kk/dca.git#docker:dev
[C] docker build https://github.com/kk/dca.git:dev
[D] docker build https://github.com/kk/dca.gitdev:#docker
11. What is the command to remove all unused images on the Docker host?
[A] docker image prune -a
[B] docker image rm -a
[C] docker image delete -a
[D] docker rm image -a
12. Run a container named webapp with nginx image in detached mode. Select the right answer.
[A] docker container run --detach --name=webapp nginx
[B] docker container run --detach --name=nginx webapp
[C] docker container create -d --name=nginx webapp
[D] docker container create -d nginx
13. Which of the below commands may be used to build an image with the filename – Dockerfile ?
[A] docker build .
[B] docker build -f Dockerfile .
[C] docker build -t Dockerfile .
[D] docker build -t .
14. Map TCP port 80 in the container to port 8080 on the Docker host for connections to host IP 192.168.1.10. Select all the right answers.
[A] -p 192.168.1.10:8080:80
[B] -p 192.168.1.10:80:8080
[C] -p 192.168.1.10:8080:80/tcp
[D] -p 192.168.1.10:8080:8080
15. Which environment variable will be used to connect a remote docker server?
[A] DOCKER_REMOTE
[B] DOCKER_HOST
[C] DOCKER_CONFIG
[D] DOCKER_SERVICE
16. What flags are used to configure encryption on the docker daemon without any authentication?
[A] tlsverify, tlscert, tlskey
[B] key, cert, tls
[C] tls, tlscert, tlskey
[D] host, key, cert, tls
17. Which command is used to get the stream logs of the webapp container so that you can view the logs live?
[A] docker container log webapp
[B] docker container log -f webapp
[C] docker container logs webapp
[D] docker container logs -f webapp
18. Which of the following is the correct docker image address to be used to access an image named payapp hosted under the organization payroll at a private registry registry.company.io?
[A] registry.company.io/payapp/payroll
[B] payroll/registry.company.io/payapp
[C] payapp/registry.company.io/payroll
[D] registry.company.io/payroll/payapp
Conclusion
This guide has prepared you to handle all Docker Image Creation, Management, and Registry tasks in the DCA exam. You are a step closer to passing the DCA certification exam.
On KodeKloud, you also get a learning path with recommendations, sample questions, and tips for clearing the DCA exam.
You can now proceed to the next part of this series: Docker Certified Associate Exam Series (Part-5): Networking.










Discussion