[Playground series] How to create a managed Kubernetes cluster on Google Cloud Playground?
Update - June 2024
The latest version of this guide can now be found here, and is where any future updates will be applied.
In this post, let’s go through steps to create a managed Kubernetes cluster on Google Cloud using GKE, check it out!
1. Provision your Google Cloud Playground lab.
Prerequisite: Premium KodeKloud subscription.
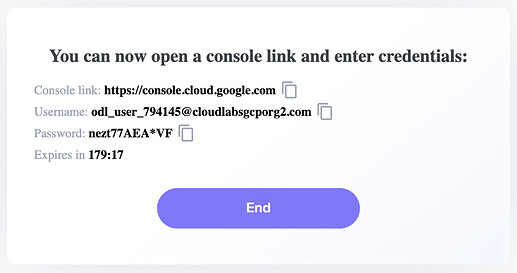
Access this link: Pricing Pro - KodeKloud and click START LAB to request a new Google Cloud Playground instance, after a few seconds, you will receive your credential to access Google Cloud console.
Access https://console.cloud.google.com using provided credentials.
2. Configure the project
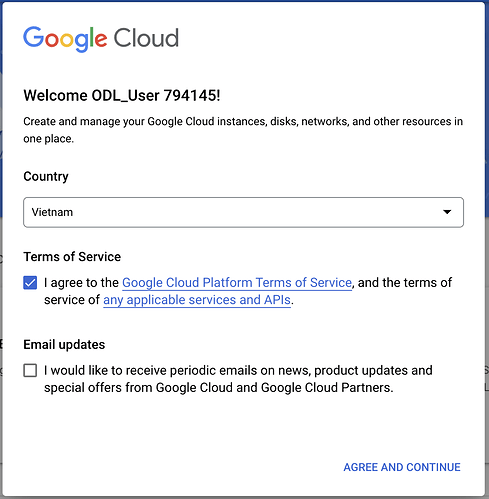
After logging in successfully, select your country, and accept the terms & conditions to continue.
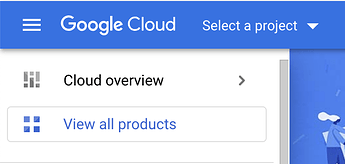
Click select project.
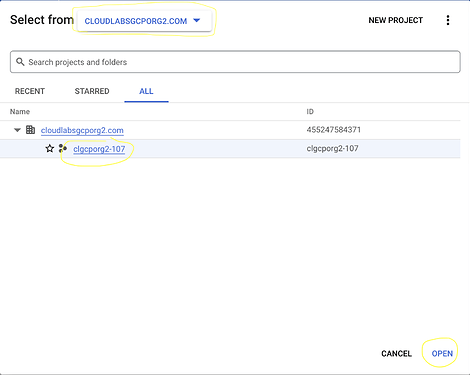
Select Organization and Project (all are already created, you don’t need to create a new one), then click OPEN.
3. Configure the VPC & Firewall Rules
Notes: Due to the limitation of the cloud playground environment, we need these additional steps to make sure the GKE cluster can be created successfully.
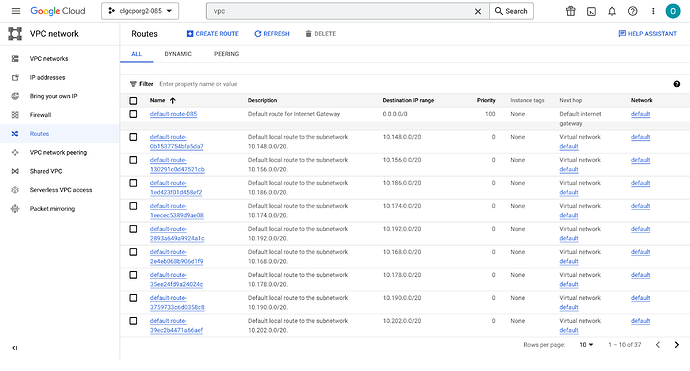
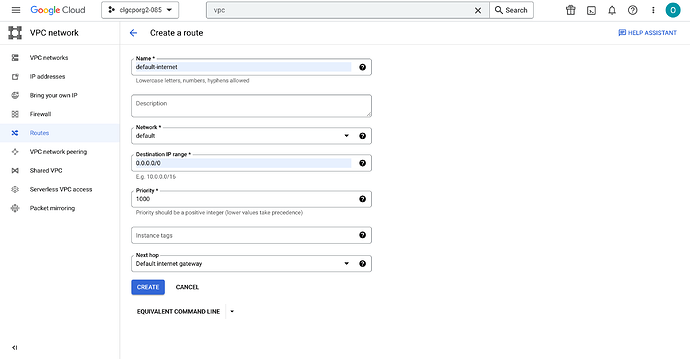
Go to the VPC dashboard and select Routes, then click CREATE ROUTE
Fill in the form as below the image
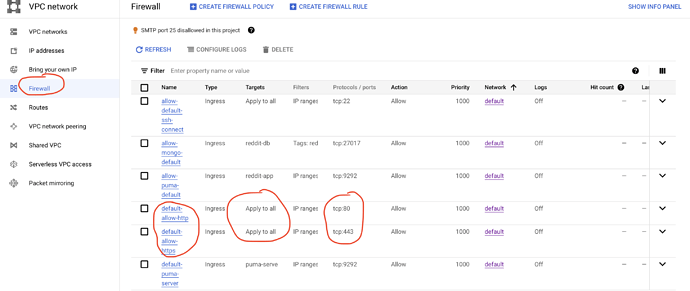
Check the Firewall Rules and confirm allow http & allow https are created (if not yet available, please create it by yourself).
4. Create the Google Kubernetes Engine instance.
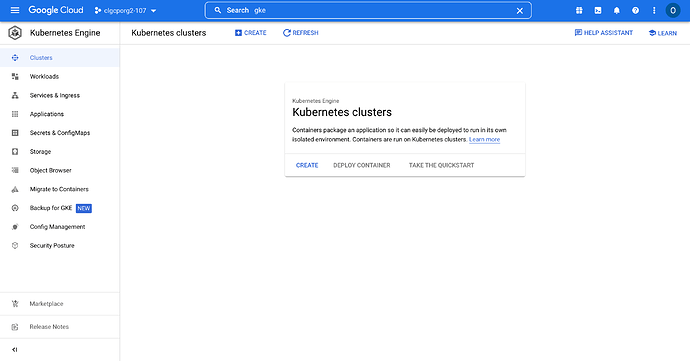
Search for Google Kubernetes Engine.
From the Kubernetes Engine dashboard, click CREATE to create a new managed Kubernetes cluster.
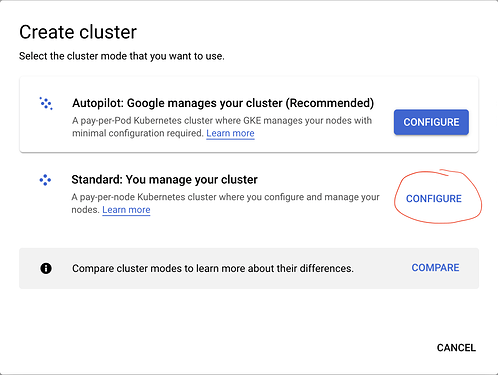
Select the Standard mode (we will manage our own cluster).
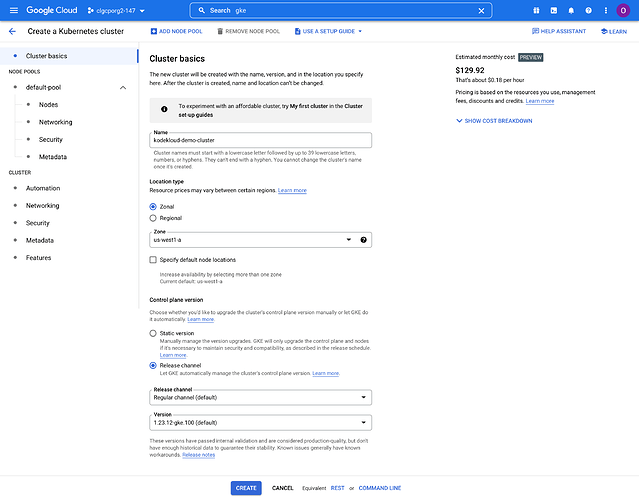
Fill in the “Cluster Basics” form.
-
Name: kodekloud-demo-cluster
-
Location type: Zonal
-
Zone: us-west1-a
-
Control plane version: Release channel
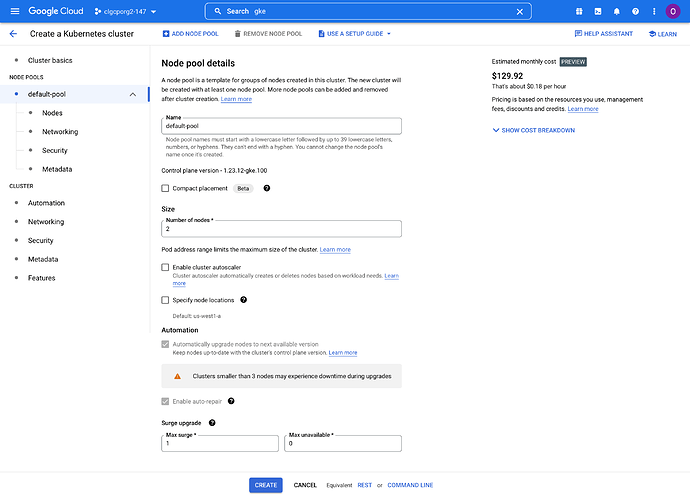
In the default-pool, configure as below image.
- Number of nodes: 2
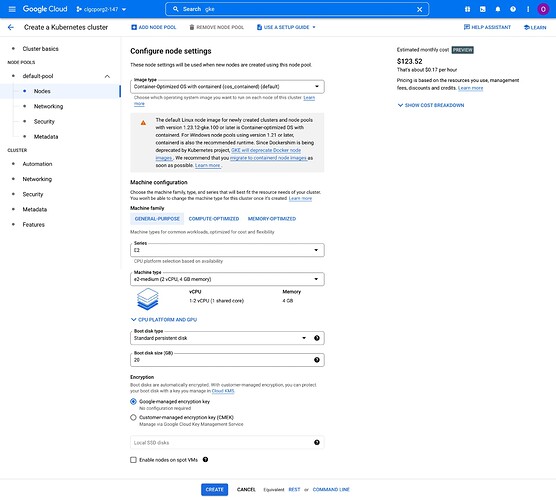
In the default-pool/Nodes, configure as below image.
-
Machine type: e2-medium
-
Boot disk size: 20GB
-
Boot disk type: Standard persistent disk.
Then click CREATE button and wait for our Kubernetes cluster created (Cluster creation can take 5 minutes or more).
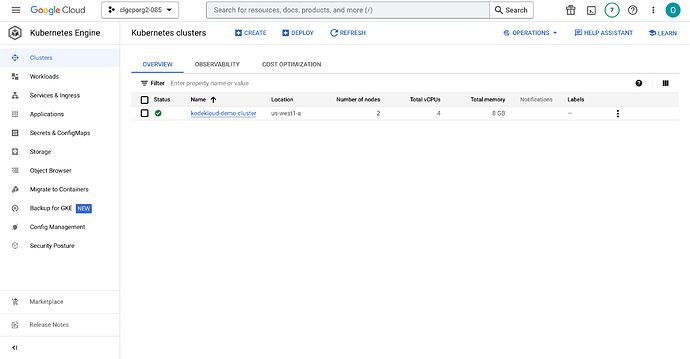
Kubernetes Cluster was created successfully as below image:
5. Verify the create Kubernetes cluster
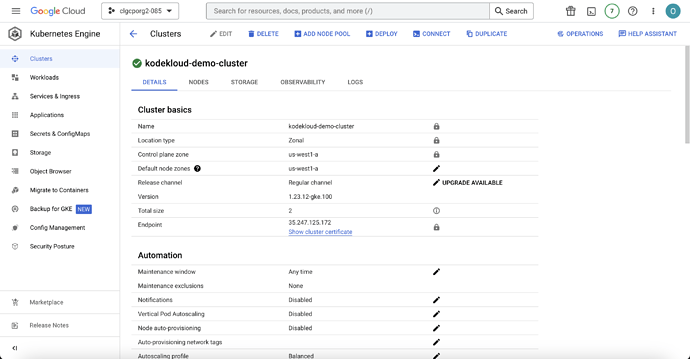
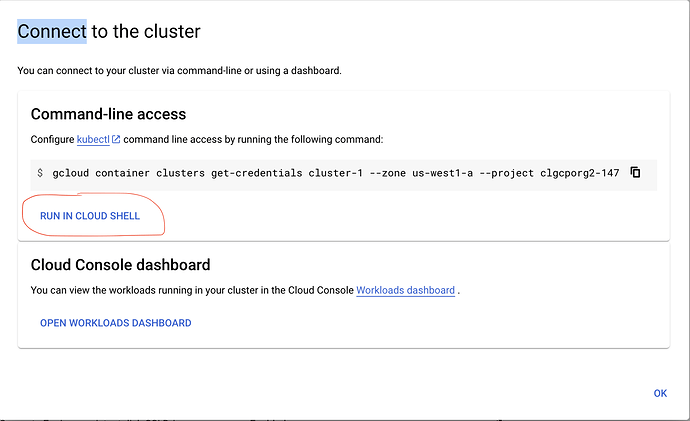
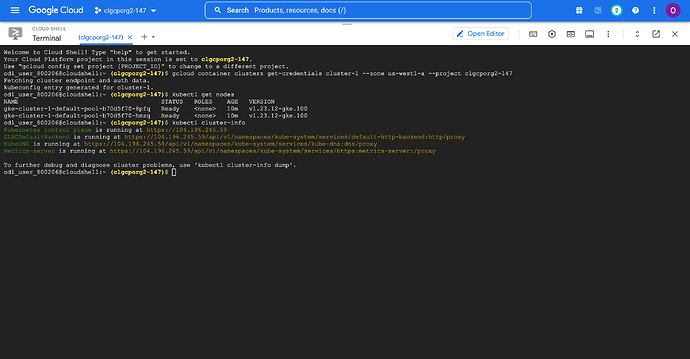
Access the cluster detail and click Connect, and then select Run In Cloud Shell
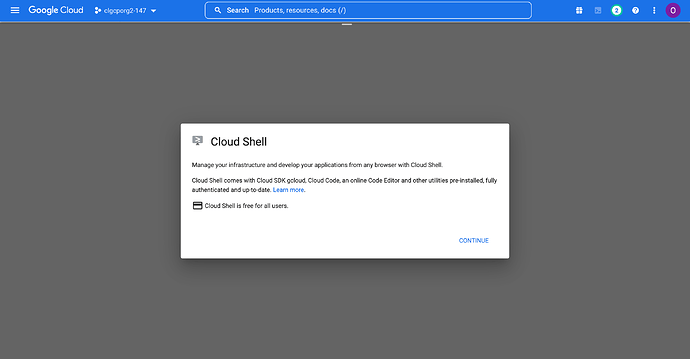
Click Continue and wait while Google Cloud provisions the Cloud Shell. When Cloud Shell is provisioned, try some kubectl commands to verify the cluster.
odl_user_800206@cloudshell:~ (clgcporg2-147)$ kubectl get nodes
NAME                                       STATUS   ROLES    AGE   VERSION
gke-cluster-1-default-pool-b70d5f70-8pfq   Ready    <none>   10m   v1.23.12-gke.100
gke-cluster-1-default-pool-b70d5f70-hmzq   Ready    <none>   10m   v1.23.12-gke.100
odl_user_800206@cloudshell:~ (clgcporg2-147)$ kubectl cluster-info
Kubernetes control plane is running at https://104.196.245.59
GLBCDefaultBackend is running at https://104.196.245.59/api/v1/namespaces/kube-system/services/default-http-backend:http/proxy
KubeDNS is running at https://104.196.245.59/api/v1/namespaces/kube-system/services/kube-dns:dns/proxy
Metrics-server is running at https://104.196.245.59/api/v1/namespaces/kube-system/services/https:metrics-server:/proxy
APRIL 2023 UPDATES (20/04/2023)
Kubernetes Engine (GKE - Google Kubernetes Engine)
If you already have virtual machines running, first delete those. Otherwise you might not be able to launch this cluster. It would exceed the maximum number of 5 CPU cores you can use per project.
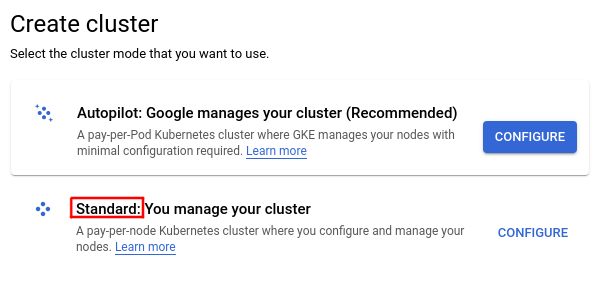
In the first step pick Standard, not Autopilot.
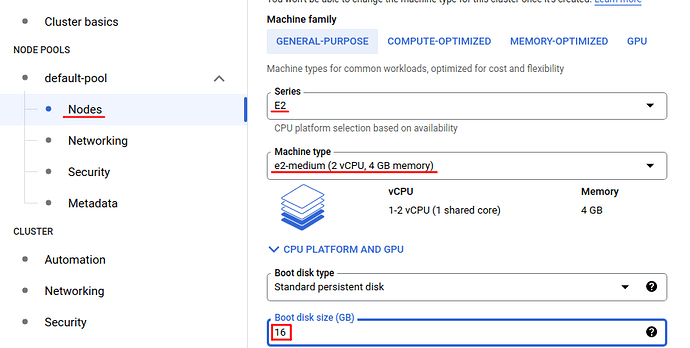
Next, in the left panel, click on default-pool and then click on Nodes.
The Machine type should be e2-medium and Region should be us-west1.
The maximum Boot disk size should be 16 or less. You have 50GB total of disk space you can use. And the cluster has 3 nodes (the maximum available in the playground), by default. 3*16=48GB.
You might get this error:
Network “default” has no route to the default internet gateway. To fix this, add a route with destRange ‘0.0.0.0/0’ and nextHopGateway ‘default-internet-gateway’.
To fix it, open up another tab in your web browser. Open GCP again. Use the top search bar. Type VPC, go to VPC networks. Click on Routes in the left panel. Add a route and type 0.0.0.0/0 in the Destination IP range field.
Other GCP services you can use in our playground:
- Cloud Storage
- Container Registry
- VPC Network
- Load Balancing
- Cloud DNS
Thanks,
Trung.
