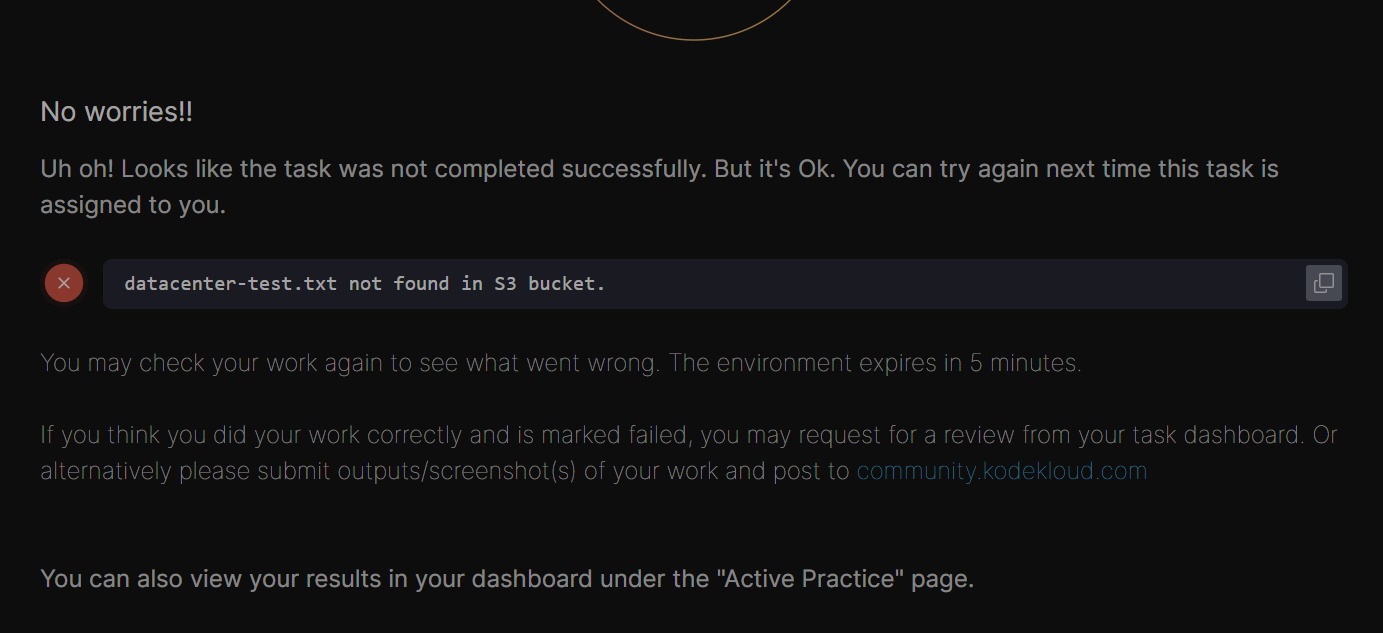
I followed below steps from command line, but file devops-test.txt not found in S3 bucket. please suggest me.
1) Create Public Subnet
aws ec2 create-subnet
–vpc-id
–cidr-block 10.1.2.0/24
–tag-specifications “ResourceType=subnet,Tags=[{Key=Name,Value=devops-pub-subnet}]”
2) Create and Attach Internet Gateway
aws ec2 create-internet-gateway
Copy the InternetGatewayId, then:
aws ec2 attach-internet-gateway
–internet-gateway-id
–vpc-id
3) Create Public Route Table
aws ec2 create-route-table
–vpc-id
Copy RouteTableId, then:
aws ec2 create-route
–route-table-id
–destination-cidr-block 0.0.0.0/0
–gateway-id
4) Associate Public Subnet
aws ec2 associate-route-table
–subnet-id
–route-table-id
5) Create NAT Security Group
aws ec2 create-security-group
–group-name devops-nat-sg
–description “NAT SG”
–vpc-id
Copy GroupId, then:
Allow private subnet traffic
aws ec2 authorize-security-group-ingress
–group-id
–protocol -1
–cidr 10.1.1.0/24
SSH access
aws ec2 authorize-security-group-ingress
–group-id
–protocol tcp --port 22 --cidr 0.0.0.0/0
Allow all outbound
aws ec2 authorize-security-group-egress
–group-id
–protocol -1
–cidr 0.0.0.0/0
6) Launch NAT Instance (Amazon Linux 2023)
First, get an AMI manually:
aws ec2 describe-images
–owners amazon
–filters “Name=name,Values=al2023-ami-*”
–query “Images[0].ImageId”
Then launch:
aws ec2 run-instances
–image-id
–instance-type t2.micro
–subnet-id
–associate-public-ip-address
–security-group-ids
–tag-specifications “ResourceType=instance,Tags=[{Key=Name,Value=devops-nat-instance}]”
Copy InstanceId.
7) Disable Source/Destination Check
aws ec2 modify-instance-attribute
–instance-id
–no-source-dest-check
8) Configure NAT (SSH into instance)
ssh -i <key.pem> ec2-user@
Install iptables (required for Amazon Linux 2023)
sudo dnf install -y iptables-services
Enable IP forwarding
echo “net.ipv4.ip_forward = 1” | sudo tee -a /etc/sysctl.conf
sudo sysctl -p
Configure NAT
sudo iptables -t nat -A POSTROUTING -o eth0 -j MASQUERADE
Persist rules
sudo service iptables save
sudo systemctl enable iptables
sudo systemctl start iptables
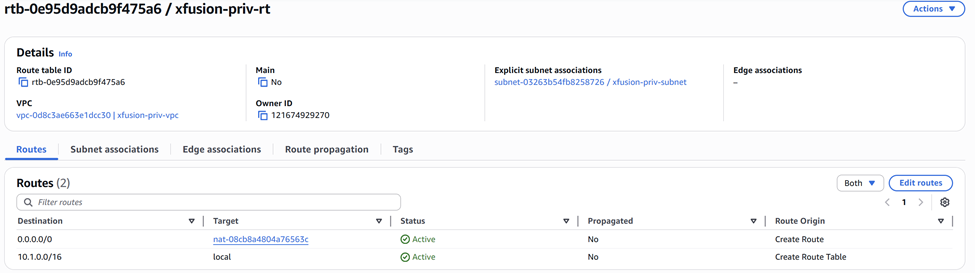
9) Update Private Route Table
Find route table attached to devops-priv-subnet, then:
aws ec2 create-route
–route-table-id
–destination-cidr-block 0.0.0.0/0
–instance-id
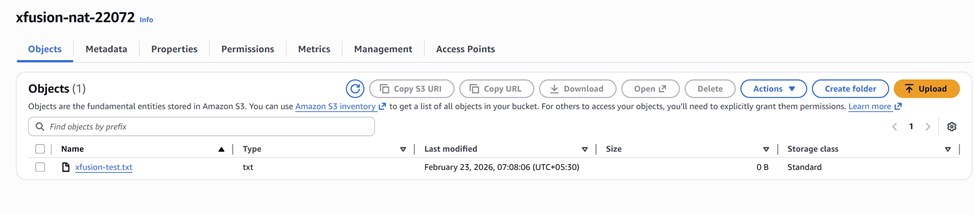
10) Verification
After ~1–2 minutes:
aws s3 ls s3://devops-nat-27807/