Facing issue while transferring keys while setting up Kubernetes-the-hard-way

As a part of the learning Kuberbetes-the-hard-way, I am at lesson:: docs/03-client-tools.md.
In the step Access all VMs have-

  • Generated SSH key pair on master-1 node:
  • Added this key to the local authorized_keys (master-1 )
  • When copying the key to the other hosts, using the command
    ssh-copy-id -o StrictHostKeyChecking=no vagrant@master-2
    I get the following output -

/usr/bin/ssh-copy-id: INFO: Source of key(s) to be installed: “/home/vagrant/.ssh/id_rsa.pub”
/usr/bin/ssh-copy-id: INFO: attempting to log in with the new key(s), to filter out any that are already installed
/usr/bin/ssh-copy-id: INFO: 1 key(s) remain to be installed – if you are prompted now it is to install the new keys
vagrant@master-2: Permission denied (publickey).

As a result the progress is stalled.
Have tried various options and there is no headway.
Do let me know how to resolve this puzzle?

It would appear vagrant up did not complete as expected as there is a shell script which permits ssh login via password.

I’ve tested this out and the newer version on Ubuntu now creates a config file in sshd_config.d that disables password login.

I have raised a PR for this to fix the repo but you might want to incorporate these changes into your local copy:
Pull Request #337 · mmumshad/kubernetes-the-hard-way (github.com)

Thanks a ton for the effort. Will have this tried out and provide a feedback on how it goes.

So as suggested located the vagrant/ubuntu/ssh.sh file. Made the following changes

Removed the line

sed -i ‘s/PasswordAuthentication no/PasswordAuthentication yes/’ /etc/ssh/sshd_config

Added the below 2 lines

sed -i --regexp-extended ‘s/#?PasswordAuthentication (yes|no)/PasswordAuthentication yes/’ /etc/ssh/sshd_config
sed -i --regexp-extended ‘s/#?Include /etc/ssh/sshd_config.d/*.conf/#Include /etc/ssh/sshd_config.d/*.conf/’ /etc/ssh/sshd_config

Brought the Vagrant up using

vagrant up

Next
Generated SSH key pair on master-1 node
Add this key to the local authorized_keys (master-1 )
when copying using the command as below:

ssh-copy-id -o StrictHostKeyChecking=no vagrant@master-2

Again getting the same error

/usr/bin/ssh-copy-id: INFO: Source of key(s) to be installed: “/home/vagrant/.ssh/id_rsa.pub”
/usr/bin/ssh-copy-id: INFO: attempting to log in with the new key(s), to filter out any that are already installed
/usr/bin/ssh-copy-id: INFO: 1 key(s) remain to be installed – if you are prompted now it is to install the new keys
vagrant@master-2: Permission denied (publickey).

Am I missing something in the steps. Do guide.

Did you do a vagrant destroy before running vagrant up?

@haare1.ram

Please wait a few days. This repo is in the process of being updated and will include the fix by @al1

Post destruction it worked. Thanks.

@al1 Hi, When I am executing step 04-certificate-authority lesson I am able to replicate all steps to The Scheduler Client Certificate without any issue.
However when in the The Kubernetes API Server Certificate there is a requirement of a configuration file openssl.cnf.
I create this using vi editor, successfully save it and when executing then it throws out the following error-

openssl req -new -key kube-apiserver.key
-subj “/CN=kube-apiserver/O=Kubernetes” -out kube-apiserver.csr -config openssl.cnf
req: Error on line 16 of config file “openssl.cnf”
40470A9AD27F0000:error:07000068:configuration file routines:str_copy:variable has no value:…/crypto/conf/conf_def.c:751:line 16

For the above step I have copied the openssl.cnf code as mentioned in the script which is reproduced below-

[req]
req_extensions = v3_req
distinguished_name = req_distinguished_name
[req_distinguished_name]
[v3_req]
basicConstraints = critical, CA:FALSE
keyUsage = critical, nonRepudiation, digitalSignature, keyEncipherment
extendedKeyUsage = serverAuth
subjectAltName = @alt_names
[alt_names]
DNS.1 = kubernetes
DNS.2 = kubernetes.default
DNS.3 = kubernetes.default.svc
DNS.4 = kubernetes.default.svc.cluster
DNS.5 = kubernetes.default.svc.cluster.local
IP.1 = ${API_SERVICE}
IP.2 = ${MASTER_1}
IP.3 = ${MASTER_2}
IP.4 = ${LOADBALANCER}
IP.5 = 127.0.0.1
EOF

Do guide.

@haare1.ram Please reset all your VMs and start over. I have just published an update to this course.

Please also let us know what your laptop is (Windows, Intel Mac, Apple Silicon Mac) and how much memory it has.

I have just noticed what is wrong with what you have pasted above.
The EOF should not be part of the content if you created it with vi

The text as per the document on github says

cat > openssl.cnf <<EOF
[req]
req_extensions = v3_req
distinguished_name = req_distinguished_name
[req_distinguished_name]
[v3_req]
basicConstraints = critical, CA:FALSE
keyUsage = critical, nonRepudiation, digitalSignature, keyEncipherment
extendedKeyUsage = serverAuth
subjectAltName = @alt_names
[alt_names]
DNS.1 = kubernetes
DNS.2 = kubernetes.default
DNS.3 = kubernetes.default.svc
DNS.4 = kubernetes.default.svc.cluster
DNS.5 = kubernetes.default.svc.cluster.local
IP.1 = ${API_SERVICE}
IP.2 = ${CONTROL01}
IP.3 = ${CONTROL02}
IP.4 = ${LOADBALANCER}
IP.5 = 127.0.0.1
EOF

This if pasted entirely to the terminal will create the file without having to use vi.

If you want to do it in vi, you must omit the first and last lines of the above.

Hi, The issue was not solved as suggested.

However alternatively Could solve that by replacing the IP1, IP2, IP3, IP4 with actual IP values.

Additionally when I reach the 05 lesson-

Generating Kubernetes Configuration Files for Authentication

and execute steps till i reach

Distribute the Kubernetes Configuration Files

At this point when I run the following command-

for instance in node01 node02; do
scp kube-proxy.kubeconfig ${instance}:~/
done

I get the error as

ssh: Could not resolve hostname node01: Temporary failure in name resolution
lost connection
ssh: Could not resolve hostname node02: Temporary failure in name resolution
lost connection

to overcome this I replace the instance with worker-1 and worker-2 and then it works. Hope I did that correctly. :question:

Again while running

for instance in controlplane01 controlplane02; do
  scp admin.kubeconfig kube-controller-manager.kubeconfig kube-scheduler.kubeconfig ${instance}:~/
done

I get the error as-

ssh: Could not resolve hostname controlplane01: Temporary failure in name resolution
lost connection
ssh: Could not resolve hostname controlplane02: Temporary failure in name resolution
lost connection

What should I replace in controlplane1 and controlplane2?

Also although not specified in the lesson, have done all these commands from master-1. Can i presume that is correct?

System Configuration is

Host Name: ACER
OS Name: Microsoft Windows 11 Home Single Language
OS Version: 10.0.22631 N/A Build 22631
OS Manufacturer: Microsoft Corporation
OS Configuration: Standalone Workstation
OS Build Type: Multiprocessor Free

Registered Organization: N/A
Original Install Date: 25-10-2023, 01:03:57
System Boot Time: 07-03-2024, 20:33:07
System Manufacturer: Acer
System Model: Nitro AN515-43
System Type: x64-based PC
Processor(s): 1 Processor(s) Installed.
[01]: AMD64 Family 23 Model 24 Stepping 1 AuthenticAMD ~2100 Mhz
BIOS Version: Insyde Corp. V1.12, 05-11-2020
Windows Directory: C:\WINDOWS
System Directory: C:\WINDOWS\system32
Boot Device: \Device\HarddiskVolume1
System Locale: en-us;English (United States)
Input Locale: en-us;English (United States)
Time Zone: (UTC+05:30) Chennai, Kolkata, Mumbai, New Delhi
Total Physical Memory: 30,659 MB
Available Physical Memory: 14,713 MB
Virtual Memory: Max Size: 35,267 MB
Virtual Memory: Available: 13,360 MB
Virtual Memory: In Use: 21,907 MB

                             I

There are no nodes called master or worker - that was the old version. Please ensure you are using the latest version of the documentation, and re-clone the repo to ensure your local copy is up to date, since the repo was updated last week.

For the name resolution to work correctly, you must create the virtual machines using vagrant up as described, and you must use the latest version of Vagrantfile. The vagrant script ensures proper configuration of all hosts such that the name resolution will work correctly.

You begin the lab from controlplane01 and ssh from there to other nodes as instructed.

I know this lab works due to the number of times I have tested it, and the fact that I have automation to validate the commands in the documentation, thus any failure for the cluster to come up on sufficient hardware (which you do have), is user error.

I have just built it again:

image

When I took over the maintenance of this project from Mumshad, it was horribly out of date and it took me about a week to get the cluster up for the first time, and I’m a very experienced DevOps person :wink:

1 Like

After the latest solution shared, I was able to proceed quite a way and there were no significant errors noticed, till about point
07-bootstrapping-etcd.md
when I do verification step

Verification

Then get the following error-

{“level”:“warn”,“ts”:“2024-03-24T10:20:57.82112Z”,“logger”:“etcd-client”,“caller”:“[email protected]/retry_interceptor.go:62”,“msg”:“retrying of unary invoker failed”,“target”:“etcd-endpoints://0xc0003b8c40/127.0.0.1:2379”,“attempt”:0,“error”:“rpc error: code = DeadlineExceeded desc = context deadline exceeded”}
Error: context deadline exceeded

Do let me know how this can be be debugged?

You have probably installed it twice on controlplane01.

Ensure you follow all the steps carefully on controlplane01, then

ssh controlplane02

and repeat all the steps there. Then return to controlplane01

exit

Note that when you do make a mistake, you generally have to zap all the VMs and start over. This is why it took me a week the first time!

I retried multiple times. And everytime failed at the very same step.
Then tried to debug the etcd.service . To do that I started etcd and got the error printed on screen when running the etcd service. It keeps on saying bind address already in use.
How do I solve that??
Also let me know what is the importance of this step and possibly why this binding is not getting completed.

{"level":"warn","ts":"2024-03-25T12:42:43.961996Z","caller":"embed/config.go:673","msg":"Running http and grpc server on single port. This is not recommended for production."}
{"level":"info","ts":"2024-03-25T12:42:43.965189Z","caller":"etcdmain/etcd.go:73","msg":"Running: ","args":["etcd"]}
{"level":"warn","ts":"2024-03-25T12:42:43.967418Z","caller":"etcdmain/etcd.go:105","msg":"'data-dir' was empty; using default","data-dir":"default.etcd"}
{"level":"warn","ts":"2024-03-25T12:42:43.967547Z","caller":"embed/config.go:673","msg":"Running http and grpc server on single port. This is not recommended for production."}
{"level":"info","ts":"2024-03-25T12:42:43.967568Z","caller":"embed/etcd.go:127","msg":"configuring peer listeners","listen-peer-urls":["http://localhost:2380"]}
{"level":"info","ts":"2024-03-25T12:42:43.967985Z","caller":"embed/etcd.go:135","msg":"configuring client listeners","listen-client-urls":["http://localhost:2379"]}
{"level":"info","ts":"2024-03-25T12:42:43.968126Z","caller":"embed/etcd.go:376","msg":"closing etcd server","name":"default","data-dir":"default.etcd","advertise-peer-urls":["http://localhost:2380"],"advertise-client-urls":["http://localhost:2379"]}
{"level":"info","ts":"2024-03-25T12:42:43.968158Z","caller":"embed/etcd.go:378","msg":"closed etcd server","name":"default","data-dir":"default.etcd","advertise-peer-urls":["http://localhost:2380"],"advertise-client-urls":["http://localhost:2379"]}
{"level":"warn","ts":"2024-03-25T12:42:43.968182Z","caller":"etcdmain/etcd.go:146","msg":"failed to start etcd","error":"listen tcp 127.0.0.1:2379: bind: address already in use"}
{"level":"fatal","ts":"2024-03-25T12:42:43.968219Z","caller":"etcdmain/etcd.go:204","msg":"discovery failed","error":"listen tcp 127.0.0.1:2379: bind: address already in use","stacktrace":"go.etcd.io/etcd/server/v3/etcdmain.startEtcdOrProxyV2\n\tgo.etcd.io/etcd/server/v3/etcdmain/etcd.go:204\ngo.etcd.io/etcd/server/v3/etcdmain.Main\n\tgo.etcd.io/etcd/server/v3/etcdmain/main.go:40\nmain.main\n\tgo.etcd.io/etcd/server/v3/main.go:31\nruntime.main\n\truntime/proc.go:250"}

Also there is unrelated piece when I inspect the Virtual Box VMs another error whether genuine or not is noticed-

image

All steps are important. The cluster will not run if anything at all is missing.

I cannot stress any harder that this lab does work - I have done it more times than I can count!

bind address already in use means that something else is already using the port that etcd wants. Are you absolutely certain that you have not installed it twice on the same node?

As for the graphics controller message, you can ignore that. We are not running a GUI version of Linux, and it reports the same for me. Thus it is not affecting the running of the cluster.

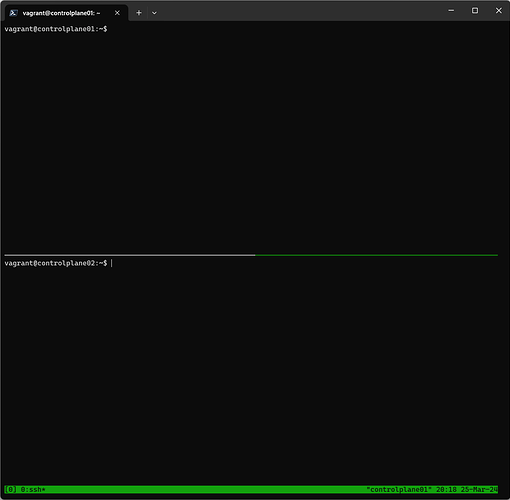
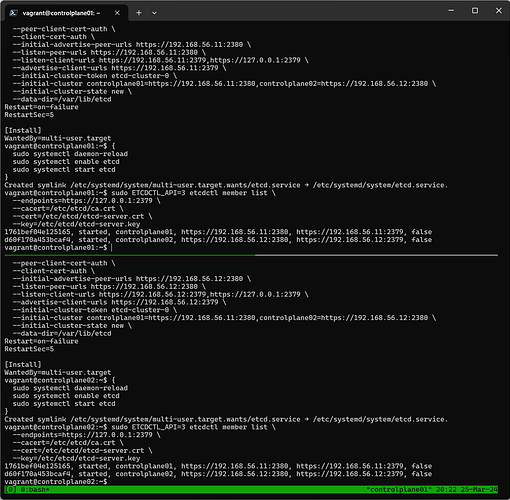
Have a terminal open on both controlplanes. I have used tmux here, but you can use two separate terminal windows. It is key that one of them is logged into controlplane01 and the other is logged into controlplane02.
Enter each set of commands into both terminals. Be extra careful that you have copied all the commands in the right order and missed nothing.

It will work