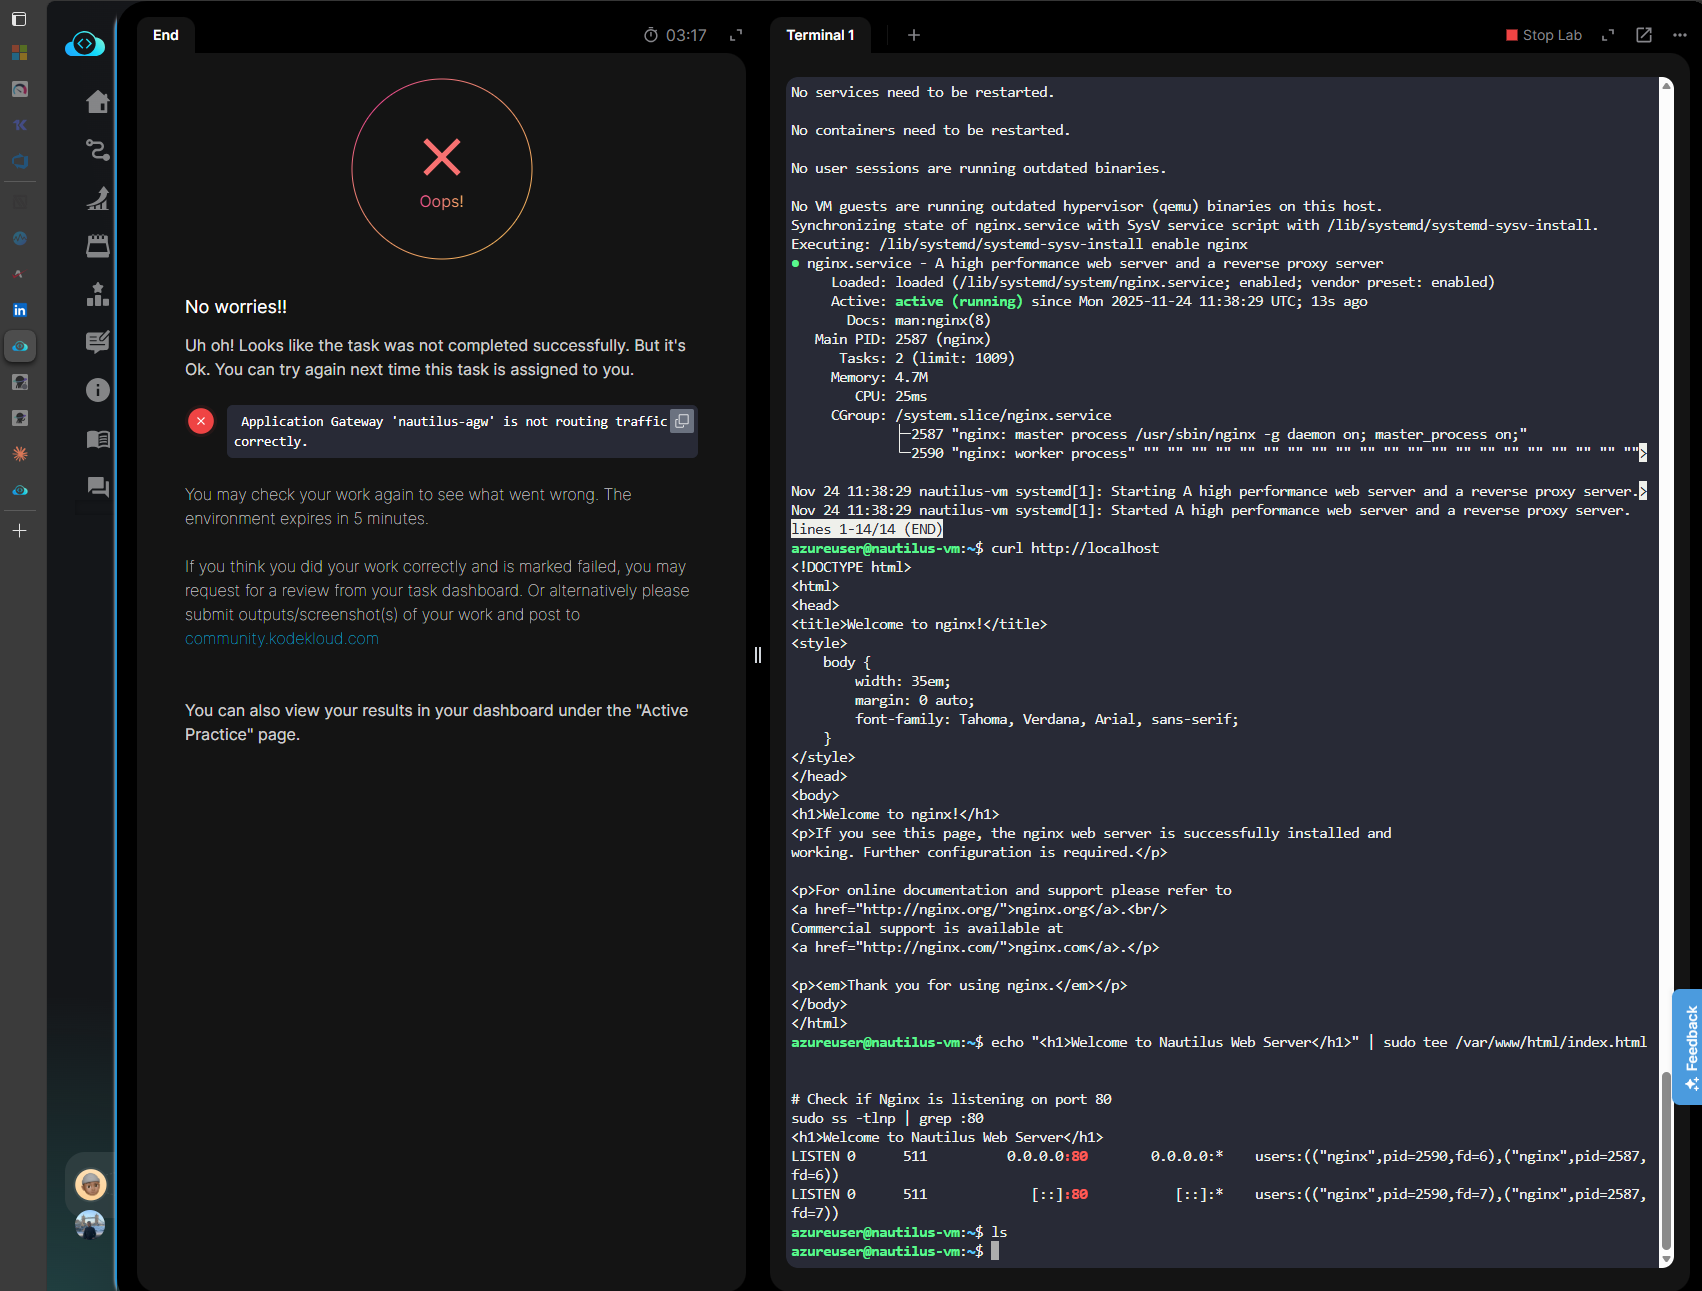
hello i have the same issue, im traing to solved with different ways its not working.
Name Access
Allow-HTTP Allow
{
“BackendPool”: “/subscriptions/f0c3bcdd-5ce2-4fa0-8cf3-41559747512b/resourceGroups/kml_rg_main-5b92cd08a449438a/providers/Microsoft.Network/applicationGateways/xfusion-agw/backendAddressPools/xfusion-backendpool”,
“HttpSettings”: “/subscriptions/f0c3bcdd-5ce2-4fa0-8cf3-41559747512b/resourceGroups/kml_rg_main-5b92cd08a449438a/providers/Microsoft.Network/applicationGateways/xfusion-agw/backendHttpSettingsCollection/xfusion-http-settings”,
“Listener”: “/subscriptions/f0c3bcdd-5ce2-4fa0-8cf3-41559747512b/resourceGroups/kml_rg_main-5b92cd08a449438a/providers/Microsoft.Network/applicationGateways/xfusion-agw/httpListeners/xfusion-listener”,
“Name”: “xfusion-routing-rule”,
“Priority”: 100
}
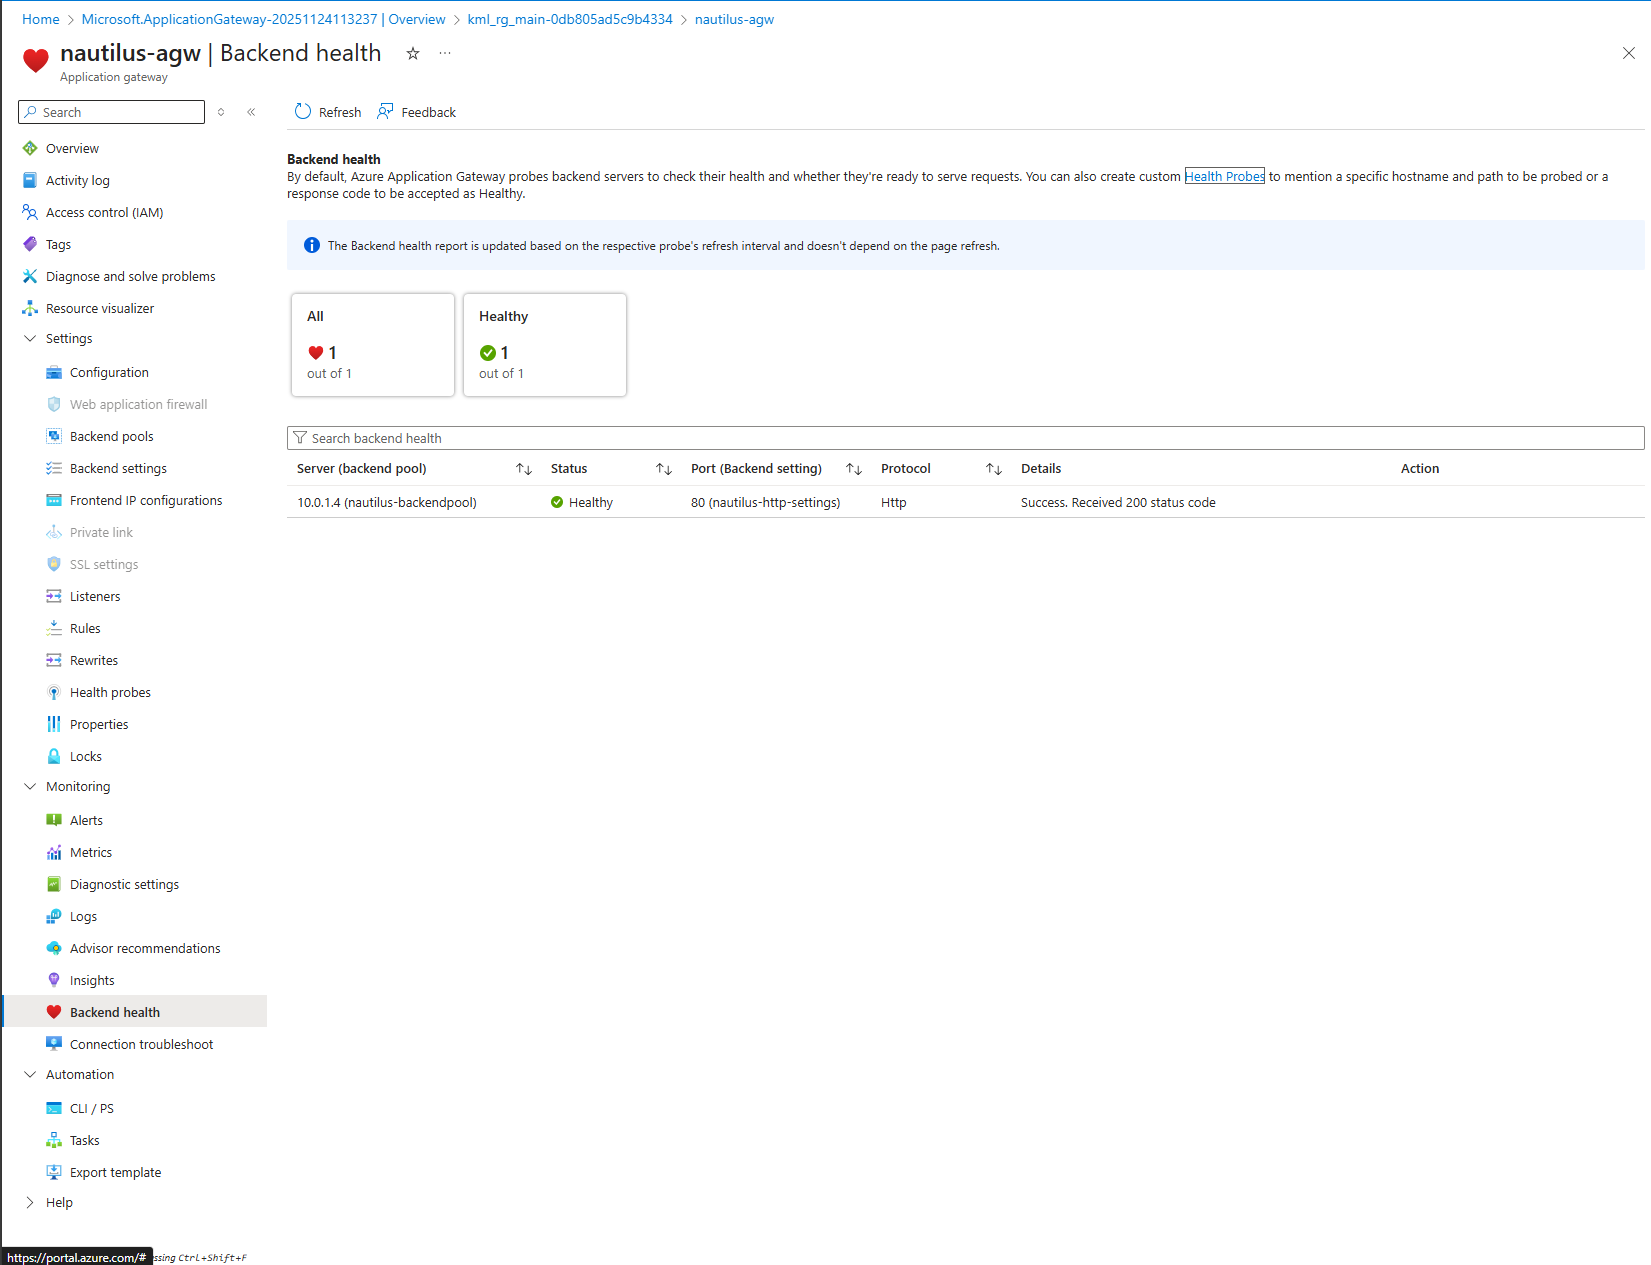
Address Health
10.0.1.4 Healthy
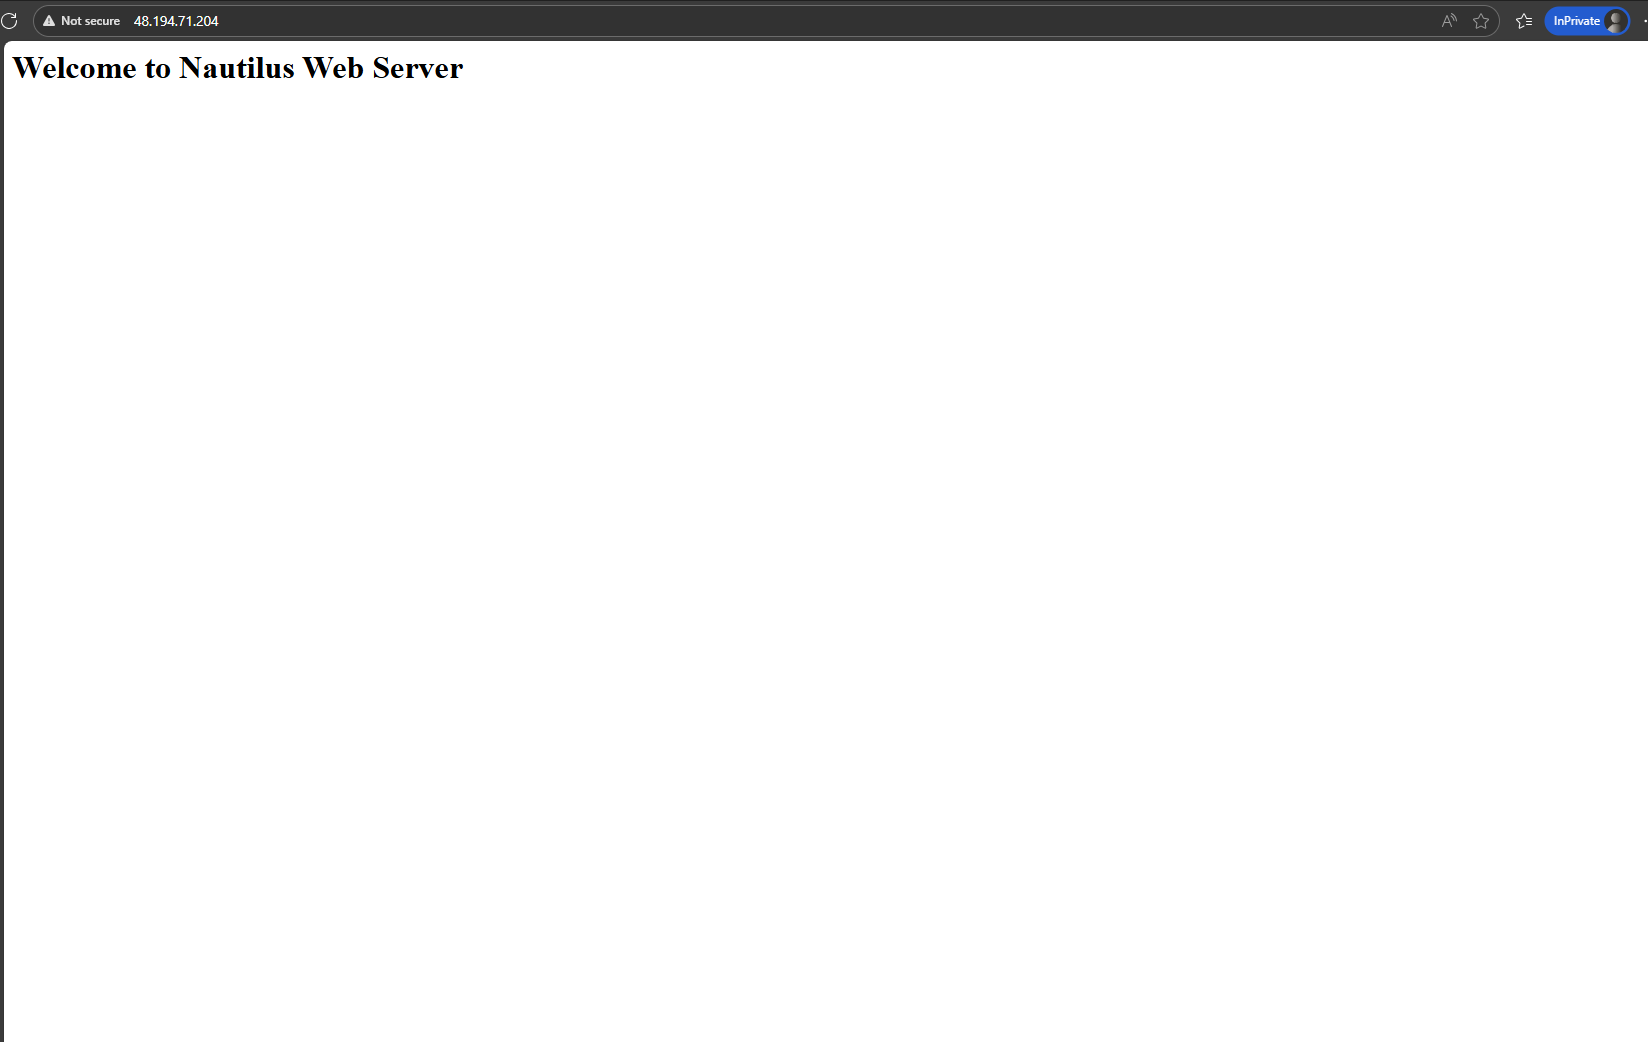
Testing: http://104.42.182.124
XFusion VM
=== Component Names ===
xfusion-backendpool
xfusion-http-settings
xfusion-listener
xfusion-routing-rule
i use this repo for guide and frame ## Task: Configuring Azure VM with Application Gateway
The Nautilus Development Team needs to set up a new Azure Virtual Machine (VM) and configure it to run a web server. This VM should be part of an Azure Application Gateway (AGW) setup to ensure high availability and better traffic management. The task involves creating a VM, setting up an AGW, configuring a backend pool, and ensuring the web server is accessible via the AGW public IP.
Create a Network Security Group (NSG): Create an NSG named nautilus-nsg and add an inbound security rule Allow-HTTP to allow TCP traffic on port 80.
Create a Virtual Machine: Create a VM named nautilus-vm using any available Ubuntu image. Configure the instance with the following settings:
- Size: Choose a lightweight VM size (e.g.,
Standard_B1s)
- Authentication: Use
SSH public key authentication (Please select use existing public key option, create public-key locally and paste contents of ~/.ssh/id_rsa.pub)
- OS Disk: Use a
Standard HDD
- Networking: Under the Advanced section, attach an existing NSG (e.g.,
nautilus-nsg)
Additionally, configure the instance to run a user data script during launch that:
- Install the Nginx package
- Start the Nginx service
Set up an Application Gateway: Set up an Azure Application Gateway named nautilus-agw with the following:
- Associate it with a public IP address named
nautilus-agw-ip
- Attach the backend pool:
nautilus-backendpool to the VM nautilus-vm
- Select a subnet for the Application Gateway (you can create a new one if needed)
Configure HTTP Settings: Create an HTTP setting named nautilus-http-settings on port 80
Route Traffic: Add a listener named nautilus-listener and a routing rule named nautilus-routing-rule to route traffic from the AGW frontend to the backend pool:
- Listener: Frontend IP = public IP, Frontend port = 80, Protocol = HTTP
- Routing rule: Connects
nautilus-listener to nautilus-backendpool using nautilus-http-settings
NSG Adjustments: Make sure the NSG attached to the VM allows inbound TCP traffic on port 80, so the Nginx server running on nautilus-vm is accessible via the Application Gateway public IP.
Note: Wait for the Application Gateway resource to be fully deployed before proceeding with the next steps. Deployment may take several minutes to complete.
Solution
Step 1: Log in to Azure Portal
Go to the Azure Portal:
https://portal.azure.com
Sign in with the credentials provided.
Step 2: Create Network Security Group
- In the Azure Portal, search for Network security groups in the top search bar
- Click + Create to create a new NSG
- Fill in the required details:
-
Resource group: Select an existing resource group
-
Name:
nautilus-nsg
-
Region: Select
East US
- Click Review + create, then click Create
Step 3: Add Inbound Security Rule to NSG
Once the NSG is created:
- Navigate to the
nautilus-nsg resource
- In the left menu under Settings, click Inbound security rules
- Click + Add to create a new inbound rule
- Configure the rule:
-
Source:
Any
-
Source port ranges:
*
-
Destination:
Any
-
Service:
HTTP
-
Destination port ranges:
80
-
Protocol:
TCP
-
Action:
Allow
-
Priority:
100
-
Name:
Allow-HTTP
-
Description:
Allow HTTP traffic on port 80
- Click Add
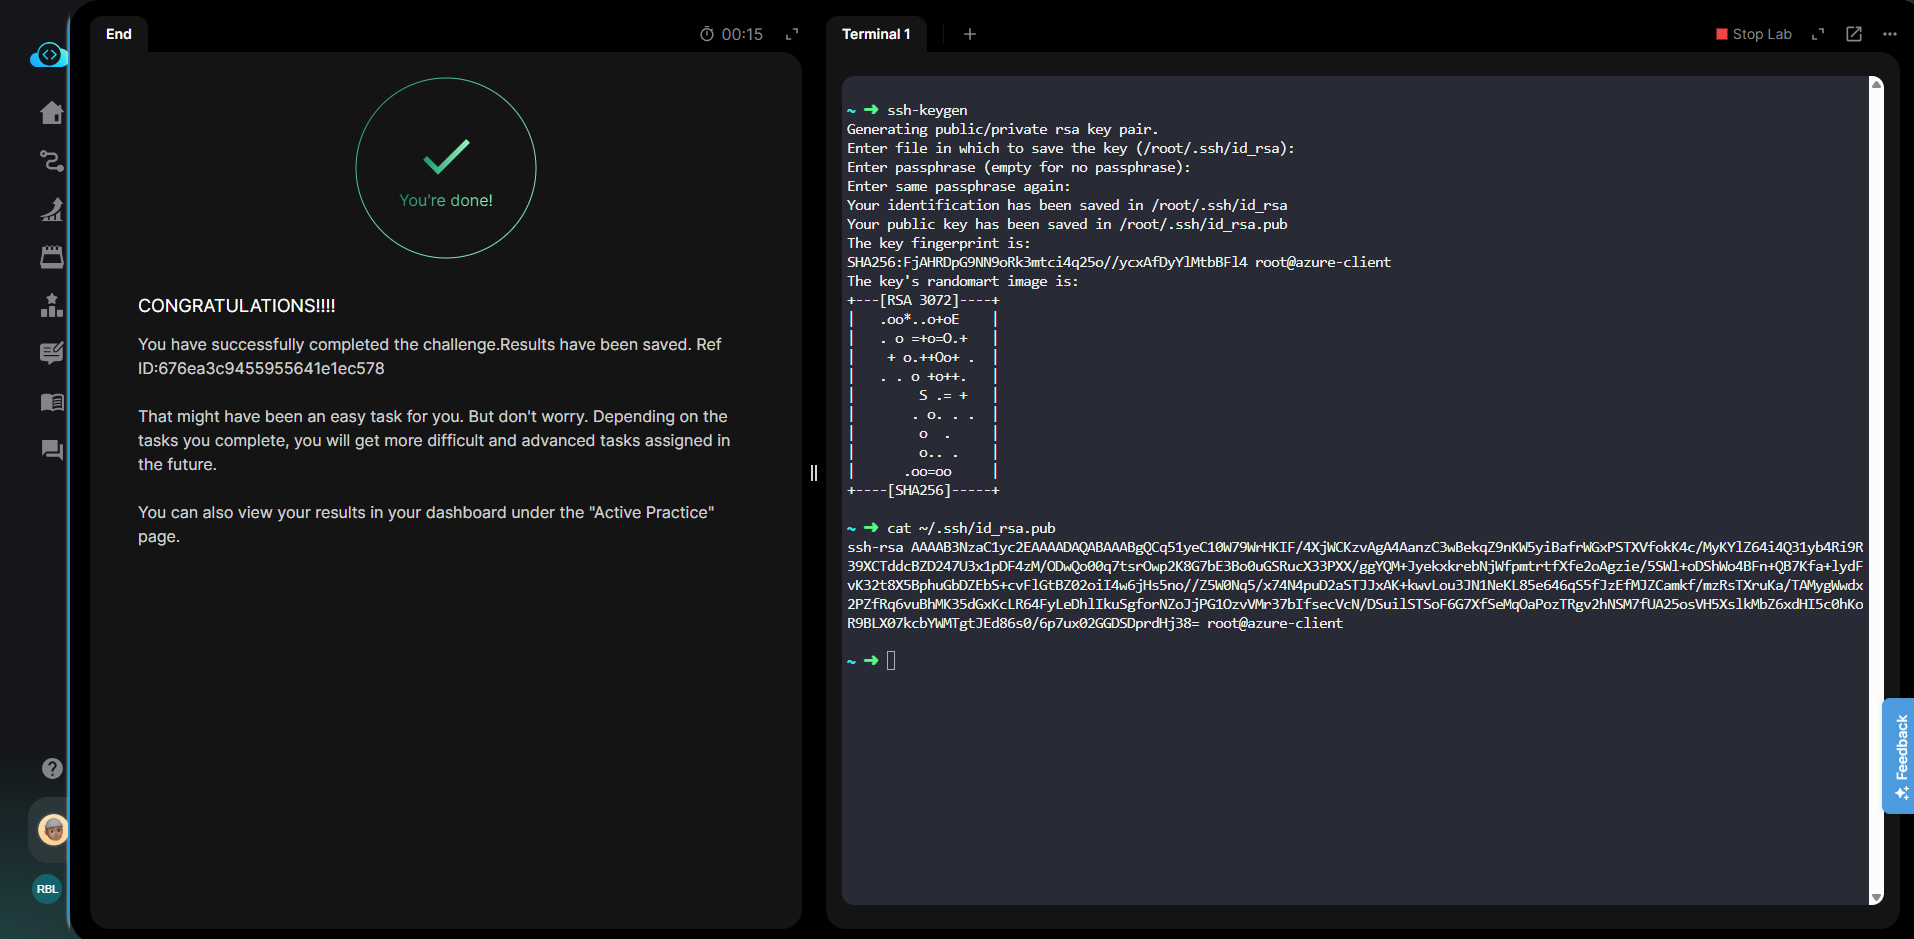
Step 4: Generate SSH Key Pair (if not already exists)
From the azure-client host or your local machine, generate an SSH key pair:
# Check if SSH key already exists
ls -la ~/.ssh/id_rsa.pub

# If it doesn't exist, generate a new SSH key pair
ssh-keygen

# Display the public key
cat ~/.ssh/id_rsa.pub
Copy the entire SSH public key output - we’ll need this in the next step.
Step 5: Create Virtual Machine
- In the Azure Portal, search for Virtual machines in the top search bar
- Click + Create > Azure virtual machine
- Fill in the required details:
Basics Tab:
-
Resource group: Select the same resource group used for NSG
-
Virtual machine name:
nautilus-vm
-
Image: Ubuntu Server 22.04 LTS - x64 Gen2 (or any available Ubuntu image)
-
Size:
Standard_B1s
Administrator Account:
-
Authentication type: SSH public key
-
Username:
azureuser
-
SSH public key source: Use existing public key
-
SSH public key: Paste the contents of
~/.ssh/id_rsa.pub that you copied in Step 4
- Click Next: Disks >
Disks Tab:
-
OS disk type: Standard HDD (locally-redundant storage)
- Click Next: Networking >
Networking Tab:
-
NIC network security group: Advanced
-
Configure network security group: Select
nautilus-nsg
Advanced Tab:
-
User data: Enable and add the following script:
#!/bin/bash
# Update package list
apt-get update -y

# Install Nginx
apt-get install nginx -y

# Start and enable Nginx service
systemctl start nginx
systemctl enable nginx
- Click Review + create, then click Create
Step 6: Create Application Gateway Subnet
Application Gateway requires its own dedicated subnet. If you created a new VNet in Step 5, you need to add a subnet for the Application Gateway.
- Search for Virtual networks in the Azure Portal
- Click on the VNet you created/selected for
nautilus-vm
- In the left menu under Settings, click Subnets
- Click + Subnet
- Configure the subnet:
-
Name:
agw-subnet
-
Subnet address range: Choose an available range (e.g.,
[10.0.1.0/24](http://10.0.1.0/24))
- Leave other settings as default
- Click Save
Step 7: Create Application Gateway
- In the Azure Portal, search for Application gateways in the top search bar
- Click + Create
- Fill in the required details:
Basics Tab:
-
Resource group: Select the same resource group
-
Application gateway name:
nautilus-agw
-
Region: Select the same region
-
Tier: Basic
-
Enable autoscaling: No
-
Instance count: 1
-
Availability zone: None
-
HTTP2: Disabled
-
Virtual network: Select the VNet containing your VM (e.g.,
nautilus-vnet)
-
Subnet: Select the Application Gateway subnet created in Step 7 (e.g.,
agw-subnet)
Frontends Tab:
-
Frontend IP address type: Public
-
Public IP address: Click Add new
-
Name:
nautilus-agw-ip
-
SKU: Standard
-
Assignment: Static
- Click OK
Backends Tab:
- Click Add a backend pool
-
Name:
nautilus-backendpool
-
Add backend pool without targets: No
-
Target type: Virtual machine
-
Target: Select
nautilus-vm
- Click Add
Configuration Tab:
Routing Rule Configuration:
-
Rule name:
nautilus-routing-rule
-
Priority: 100
Listener Tab (within the routing rule):
-
Listener name:
nautilus-listener
-
Frontend IP: Public IPv4
-
Protocol: HTTP
-
Port: 80
-
Listener type: Basic
Backend targets Tab (within the routing rule):
-
Target type: Backend pool
-
Backend target: nautilus-backendpool
-
Backend settings: Click Add new
-
Backend settings name: nautilus-http-settings
-
Backend protocol: HTTP
-
Backend port: 80
-
Click Add
-
Click Add to complete the routing rule
-
Review all settings and click Create
Important: Application Gateway deployment takes approximately 10-15 minutes. Wait for the deployment to complete before proceeding.
Step 8: Get Application Gateway Public IP
Once the Application Gateway is deployed:
- Navigate to the
nautilus-agw resource
- In the left menu, click Frontend IP configurations under Settings
- Note the Public IP address (or click on
nautilus-agw-ip to see details)
Step 9: Test Web Server Access via Application Gateway
Test the web server using the Application Gateway public IP:
Using Web Browser:
- Open a web browser
- Navigate to:
http://<AGW-PUBLIC-IP>
- You should see the Nginx welcome page or the custom page created by the user data script
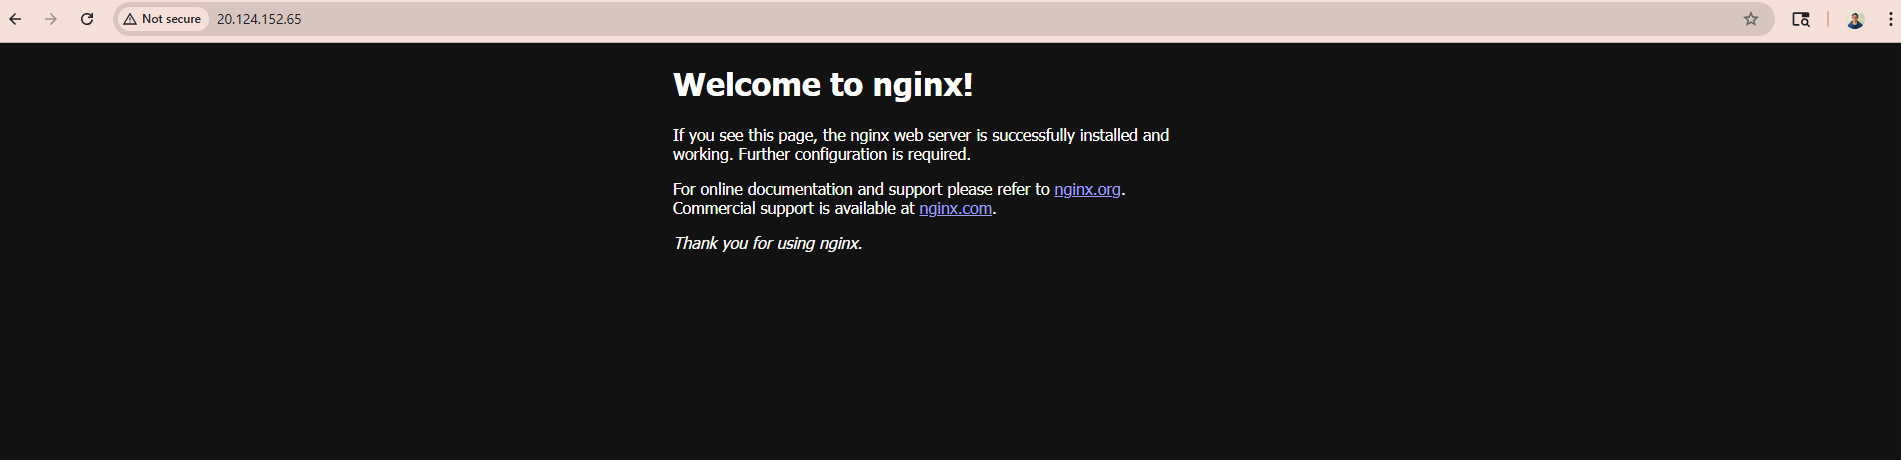
the error is the application gateway dont route the traffic correctly